

I first spotted the OneUp 3D Printer at the 2014 Bay Area Maker Faire (San Mateo, CA) this last May. What caught my eye was not just the simplicity of the printer but also the colors… a variety of colors of laser-cut acrylic made the little 3DP really stand out. Both kids and adults were gawking and squeezing in for a closer look. I made a note to myself to keep an eye on this company…
Turns out, the OneUp had its start with a very successful Kickstarter campaign in late 2013 that raised $413,530. Part of that success could have been that the company had decided to make the little printer Open Source, but I think the real reason was the price… $199.00 for any backer that chose the single Extruder option. (The TwoUp almost doubles the print area for $279.00.)
Since that time, the company (QU-BD – short for Quintessential Universal Building Device) has continued to make improvements on the OneUp as well as add additional 3D printer models.
I reached out to the team at QU-BD and requested a OneUp for testing, and not only did they deliver a working OneUp to my doorstep, but they responded quickly to phone calls and emails when I had some questions. It turns out that many of my questions could have been answered if I’d checked out their well-done forums, but I still appreciate the fast responses — I can place a check in the “Good Customer Service” check box!
Part of keeping the price low on the OneUp is that the kit ships unassembled. Yes, this is a DIY kit… you will need to put it together yourself. I’ve looked at the assembly instructions and they are amazingly detailed and in full-color. I say I looked at them because the box that arrived (along with some test filament) on my door contained a fully-assembled OneUp. The team had put it together for me. For this reason, I cannot verify the actual time needed to assemble but the estimate is between two and eight hours depending on your comfort level and who you ask. Still, the first 3DP I put together took me dozens of hours due to trial-and-error and just not having actual instructions — I was actually WRITING the instructions for assembling the thing with its creator.)
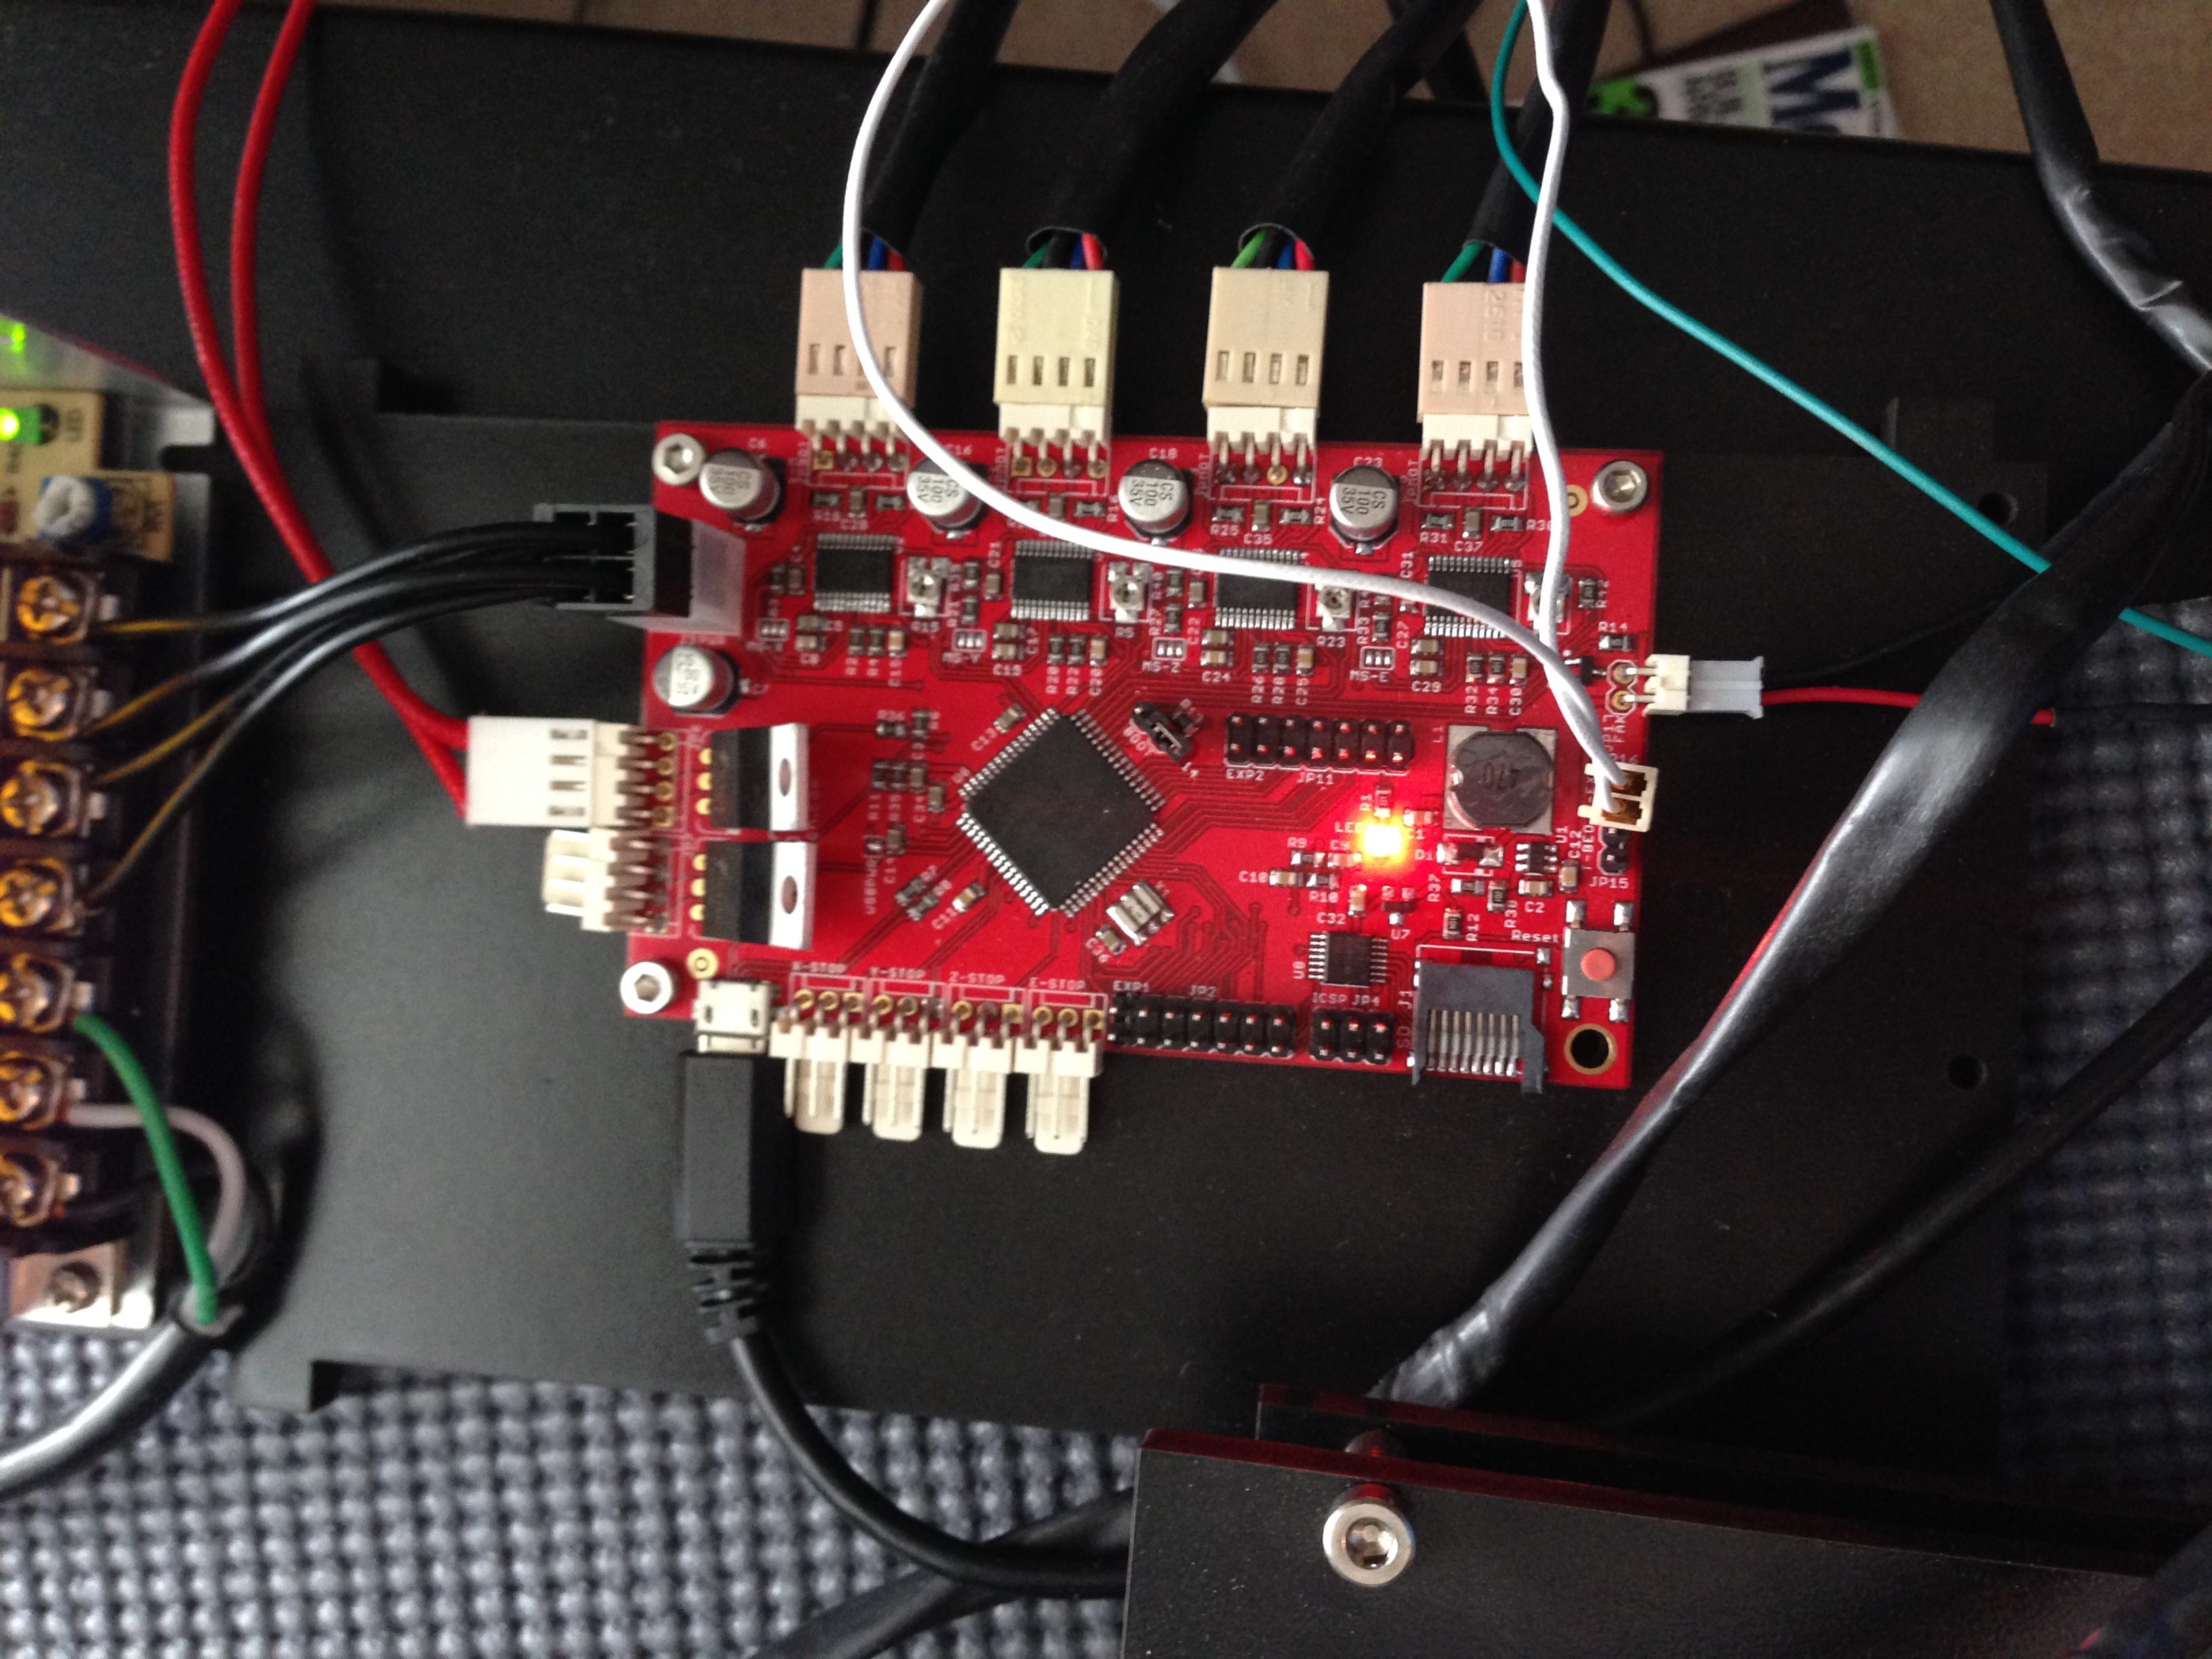
After unboxing and plugging everything in, I was ready to start testing. With the OneUp, the motor controller board and power supply are mounted on an external board — all the wires from the Extruder, the fan, the motors, and the HotEnd terminate on the board, and the board communicates with your computer via an included USB cable. I was already quite familiar with the recommended Repetier Host software — I run it on my Mac, but it also works on Windows. (It’s also free for hobbyist users, although if you’re like me and find it very useful, you might want to consider making a donation to keep the updates and development going.)

Set up for the OneUp is pretty straight forward, involving a few setting tweaks in Repetier. You can find a detailed set of instructions here that include screenshots. The only real trial-and-error I had to perform with the OneUp was dialing in the proper temperature for the PLA filament I was feeding it. My other 3DP also uses PLA, and I have the temperature set to 203 degrees F for just the right melting point and solidification upon exiting the HotEnd. With the OneUp, I found that a setting of 193 degrees F worked the best. This took me about 5-10 minutes of tinkering, and once I had it dialed in I began tweaking a few other items such as movement speeds and Fill settings.

One of the first things I noticed with the OneUp is that it runs a little bit slower than the other 3D printers I’ve tested and used in the past. Not a LOT slower, but slower. Maybe 60% of the standard speed I’m used to seeing. This is fine… I’ve long accepted the fact that printing ANYTHING with a 3D printer that you wish to actually use will take some time. If you’re looking for a speed-demon 3DP, this is not going to be the machine you want. But I’m going to add this in there (and quite often) — at $200, you’re going to be quite satisfied with the quality of print you can obtain if your patient.
The specs on the OneUp are quite good — the motors are NEMA 17 and are quite typical. The filament used is 1.75mm and the 0.4mm nozzle on the Extruder began to give me pretty much identical results with some additional tweaking and testing. Print area is going to be on the smaller size — 4″ x 4″ x 5″ (inches) but again… you’re dealing with a $200.00 3D printer versus a $500+ printer for a slightly larger print area.

During printing, the OneUp is surprisingly quiet. It’s not noise-free by any means, but I’ve seen more expensive 3DPs produce much louder movements. The OneUP uses notched belts for movement for X and Y axis moves and a lead screw for the Z axis — movement in all directions was smooth and not jerky. I’ve seen some 3DPs that shake quite a bit with all the motor movement, so I was quite surprised and happy to see that the OneUp wasn’t going to walk itself off my desk. (I still set it on a small grippy pad, but it was probably not necessary.)
It took me about five or six prints to get my standard Maker token to come out at the print quality level I expect. This is not typical — you will likely spend MORE test prints dialing in your own 3D printer and getting it just the way you like. I have prior experience on my side which allowed me to reduce the time spent on tweaks and such… that said, I have no doubt there are still some tweaks I could make for even further improvements in the quality of my prints. (If you’ve never owned a 3DP, you should know that the tweaking of settings is a never ending thing, and users are ALWAYS looking for a small value change here or a decimal tweak there to eek out a subtle improvement.)

I said earlier that I didn’t build this machine, but I did examine its assembly to see what’s involved. The laser cut parts are going to fit together nicely… and tight! I tried to pull one side of the base off (because it’s designed to come off) and I was glad to see that while it didn’t come off easily, it also didn’t require ultra-strength to pull it off and a risk to damaging or breaking a part. I’m including a photo closeup below so you can see the notched assembly method that many of the melamine body parts use to “snap” together.
So, the first question is this — is this a good 3DP for the price? Absolutely. Just examining the hardware by itself, it’s a great deal — the NEMA motors are reliable, the Anubis hot-end (with user-replaceable nozzle) is reliable and produces quality layers and final results. The belt-driven movement of the print bed is smooth due to high quality bearings and chrome-plated steel rods.
Another question — is it suitable for beginners? This one’s a little trickier to answer. First, it’s a DIY kit, so the print results you get are going to be partially based on how well you put the thing together. My test machine was assembled by the QU-BD crew, so you could argue they’ve probably built enough in their day to know every little in-and-out of assembly and provided me with the most accurately built machine possible. This is where I would point a novice to the company’s forums and tell them to use it whenever in doubt about a step. The assembly instructions are good, but nothing beats reaching out to experts when you have a question. (The other half of the question relates to configuring the Repetier software — and again, there’s PLENTY of advice and instruction on the forums to help a novice figure out what all the settings mean and how best to test for the right values and settings for an individual’s OneUp.)
And another question — is it suitable for kids? At the $200 price point, I can certainly understand why parents would be interested in this printer. But you can’t just drop this kit on a younger user and expect perfect results. This is a great kit for a parent-child project — your patience will probably be tested on more than one occasion (and this happens with ANY DIY 3DP kit), and you want to make certain that your expectations are reasonable. You’re not going to be printing out glass smooth prints 30 minutes after assembling this printer. The assembly process is a learning experience and so is the software configuration. If you’ve got a child who wants to be up and printing as fast as possible… this may not be the path you want to take. I’m a big proponent of DIY — when you build something, you will typically also know how to fix it. If your child has a certain comfort level with tinkering, they may very well love this kit. At age 10 or 11, I would have gone ga-ga over this thing.
 Final thoughts? I mean, it’s a $200 3D printer (and for only $80 more, you can have a printer that prints in two colors)! Five years ago, something that couldn’t even provide this quality of final print would have cost about $1000 or more. If you’re expecting to match the speed and quality of a (current) $3000 3DP, you’re going to be disappointed. This is an entry-level 3DP, but it’s certainly capable of producing some outstanding results. But those results will come from time spent with your machine. The melamine pieces are certainly sturdy enough, but you can’t go dropping this thing on the floor from any height. And the electronics are exposed — if this bothers you, you’ll need to create your own enclosure. But again… $200.00 for an honest-to-goodness PLA-printing machine that uses the standard 1.75mm filament with a 0.4mm nozzle. Not. Too. Shabby.
I’d like to thank Nathan and Adam with QU-BD for all their help in arranging for a test machine and for answering my technical questions. I think they must have some really happy customers because they continue to sell out of the kit — I had to wait a bit to get mine, and it was worth the wait to see just how compact and quiet and light this little machine really is… such a great little deal for a very reasonable price.


just another Shill review
Curious why you feel that way? I spent many hours printing with the OneUp, and I finished up with mixed thoughts that I thought I conveyed appropriately. The OneUp is a good printer, and will deliver good results… surprising results given the $200 price.
The OneUp is being returned to the vendor; I am not keeping it. I was not paid to conduct my tests, and I reached out to them to request a test unit, not the other way around.
I always expect better from our geekdad readership, but comments like this one remind me that GeekDad.com also suffers from trolls and those who are incapable of expressing any more complex responses than a grammatically incorrect “just another [s]hill review[.]”
Thanks for the review, James. I was curious why you’re using tape on the printing platform. Does it help with the print quality or simply make it easier to clean?
Hi, Michael. Good question. A lot of 3D printer owners put down painter’s tape on the surface to make it easier to remove the finished piece when printing is done. When that plastic cools, it REALLY sticks to the surface. This is melamine, and I really didn’t want to risk damaging the surface of my review unit.
(For my own 3D printer, I go one step further and put down the blue tape and THEN I rub the Elmer’s glue stick over the area to give some additional stick for that first layer that is put down. I use the kind that is purple and disappears to let you know when it is dried… does wonders for making that first layer stick.)
Thanks for the reply! I’ll give that a shot. My test prints start off fine but end up spinning on the platform as the plastic cools.
You’re definitely not getting good adhesion of the first layer. That’s key. The glue can help, but remember you’ve got to have that first layer almost ‘squished’ on the surface to get good binding. It differs from printer to printer, and takes some time figuring out just the right height for the nozzle to be above the surface.
Thank you for your time on this review. As stated in the review this printer can be used by beginners but it is a little tricky. Are there 3D printers that are suitable for beginners (I know the makerbot will come to mind here and I have looked at the makerbot mini and spark fun just got in the Taz 4 3D printer https://www.sparkfun.com/products/12944. Also I don’t know if you have seen tested’s print the mystery object as well. (the link here: http://www.tested.com/videos/print-the-mystery-object/ I think they shifted from a makerbot to a printbot which is linked here: http://printrbot.com/compare-printers/)
Sorry for the long comment and all the links but will you be getting more 3D printers in for review?
For beginners, I would definitely suggest a pre-assembled over a DIY kit most days. If you’re comfortable assembling tools, then building your own does have its advantages (such as knowing how to repair it or replace a part should something horrible happen).
I’m always open to testing 3D printers, but I hesitate to open the floodgates and welcome vendors to send them to me. Time is always an issue for me, and putting a 3DP through its paces often requires troubleshooting and experimenting before I get to where good prints are the norm.
With the OneUp, I reached out to them because I saw it at Maker Faire and was curious to know if it would be a good fit for a summer camp I’m putting together. For $1000, I could buy one really advanced 3DP and deal with queuing issues or five OneUps… giving more kids an opportunity to try them out simultaneously.
I may in the very near future invite geek dad readers to give me feedback on their experiences with various 3DPs and share them in a post.
which 3d printer could print 2 colors for 80$ more?
The Two-Up from the same company costs $80 more.
but the Two-Up has only one print head the difference is in the printing area.
Weird… it used to be a dual-head printer. Odd that they changed it.
I am Considering buying this printer. should i buy it?
Please do not support this company until they fulfill the debt owed to numerous Kickstarter supporters that paid US$413530 for the original design and manufacturing of this product. In October of 2014 they claimed to be shipping the last of the Kickstarter Printers, but now it is August of 2015 and I have received nothing. They refuse to answer communications, have built a wall of technology around themselves to avoid direct contact, and continue to evade responsibility. It takes very little effort to see that there are many, many people in the same situation as I am. Google any 3d printer blog, the comment section of this site, Kickstarter, etc., etc., and you will find numerous victims of Chelsea Thompson and this company.
We are a growing community of small scale, under funded inventors, designers, teachers, students, hackers, who cannot afford, and should not allow thieves and scoundrels to be in our community. Stop them and help like minded people to get some justice.
Beware also that Kickstarter will do little to nothing to help you.
Hi, John.
This is very disturbing to hear. I’ve had almost zero communication with the company since I returned their test unit, but I’m going to look into this.
Company ever get back to you on the Kickstarter comment above?
Hi, Jim. Nope… never heard back on the issue, although I believe the company is still selling them because I saw them on sale at the Atlanta Maker Faire in October. I asked one of the people at the booth about the Kickstarter but she didn’t know anything about fulfillment (or issues with it).
Were you a backer? If so, did you receive yours?
I was not a backer, but I did get one for Christmas. I got it all put togther, but I am struggling with the extrude. It does not seem to be pushing out plastic, its melting and feeding correctly as far as i can tell but its not really coming out of the extruder. I just get little bits to come here and there…I will figure it out eventually.
Great review!!!, but one question. How did you get QU-BD to assemble the kit for you…?
This printer is awful for someone who just wants to buy a 3d printer and have it work. Poor design, poor customer service, poor reliability. One of the most critical aspects for reliable printing is to have all our axis perfectly square, and they decide that kind of responsibility should be handled by a zip tie….. You will be required to go buy spare parts and look up a TON of mods in the community for nearly every single component. The time and money you’ll spend on this thing to upgrade it from total failure to flakey kludge would have been soooo much nicer to buy a better printer from a better company. Save yourself the frustration. This 3d printer should be in an infomercial for its level of under-delivering.