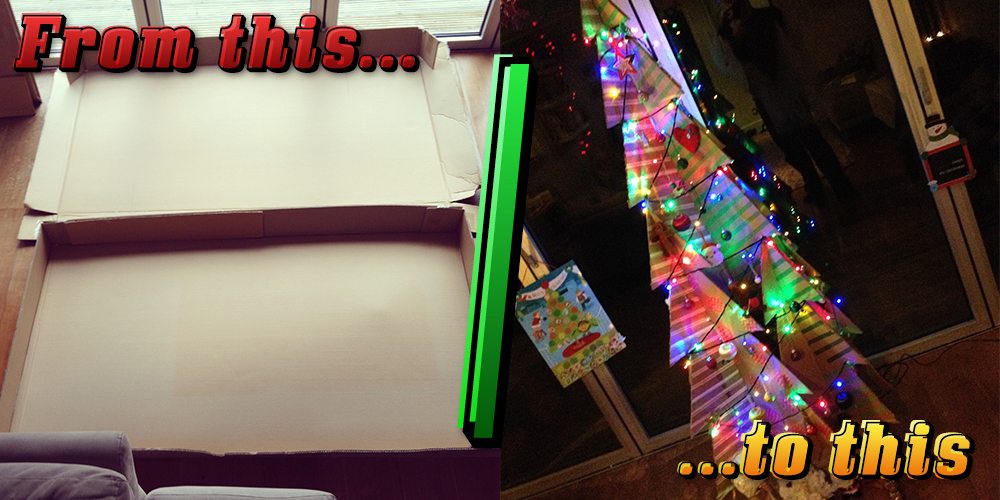
The tradition of chopping down a perfectly healthy tree and bringing it inside the house at Christmas time started about 400 years ago in Germany and they decorated them with apples, nuts or dried fruit. In the mid-1800s, Prince Albert brought Queen Victoria a tree from Germany and it was placed in Windsor Castle. The rich people of Britain copied them and the craze spread from there. I’m not adversed to the idea per se, but I don’t like having to transport the tree on and off the island where I live, watering it to try and keep it alive and deal with all the dropped needles. So this year I decided to make my own Christmas Tree using from already dead trees – cardboard!
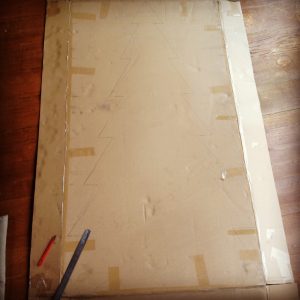
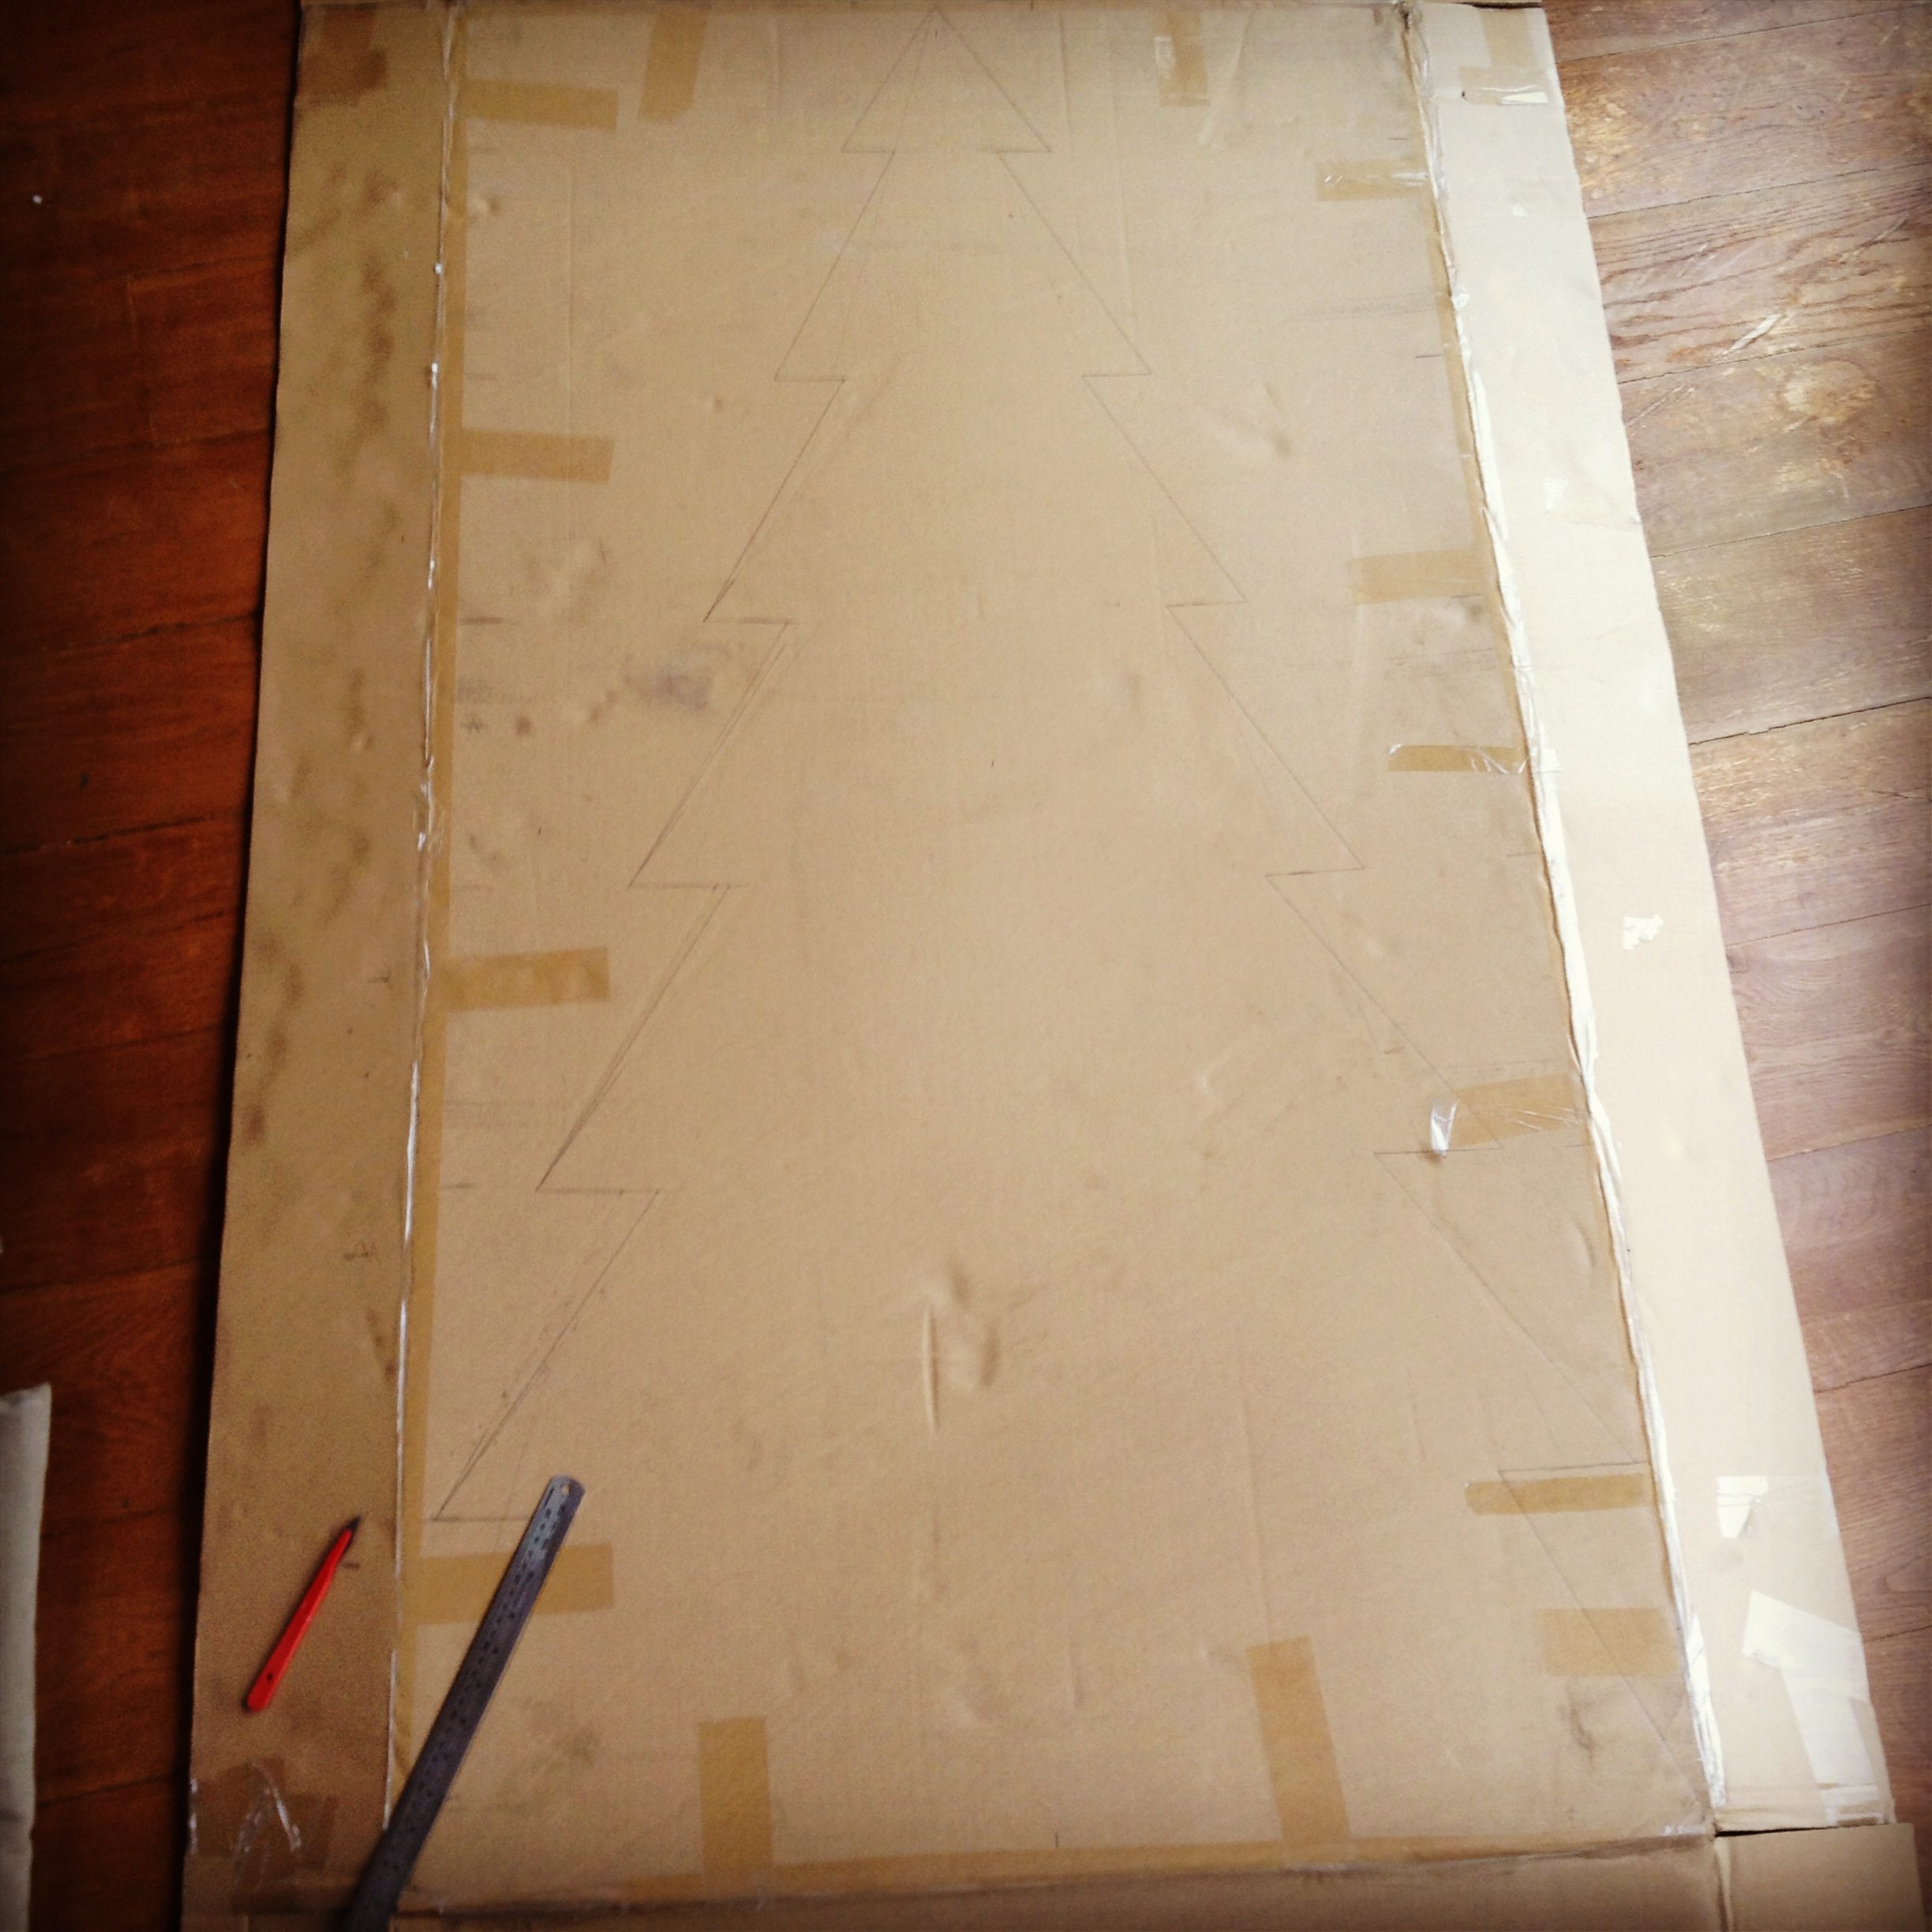
First section marked outWe had some large boxes lying around from a new bed delivery. I took the two largest pieces, drew a big isosceles triangle on them and divided them into 25cm sections.
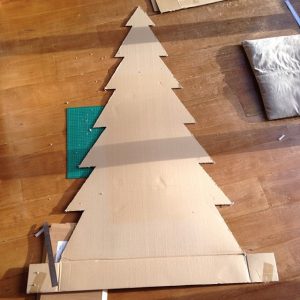
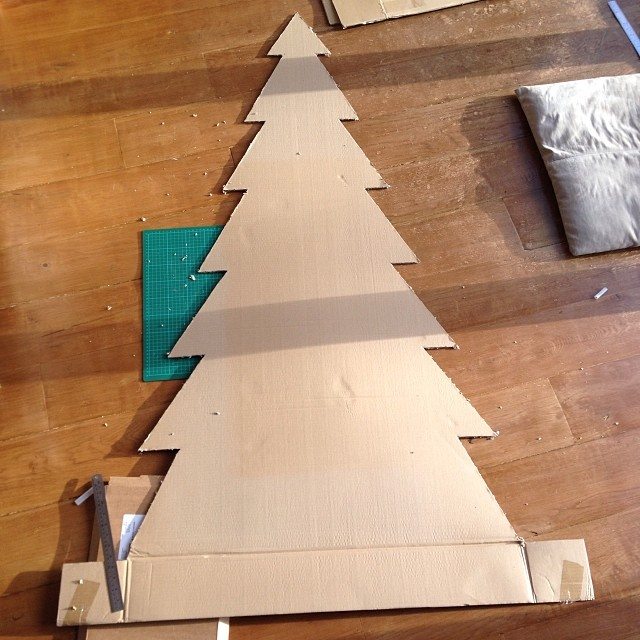
First section cut outThe zig-zags were made by initially marking 5cm to the left and right on the line on the big triangle where it met the divisions. Then there was a little bit of tweaking to allow for the fact that it’s obviously much narrower at the top.
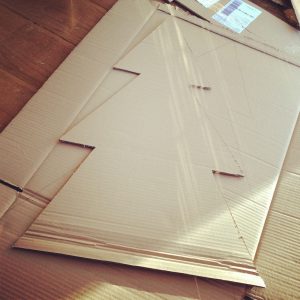
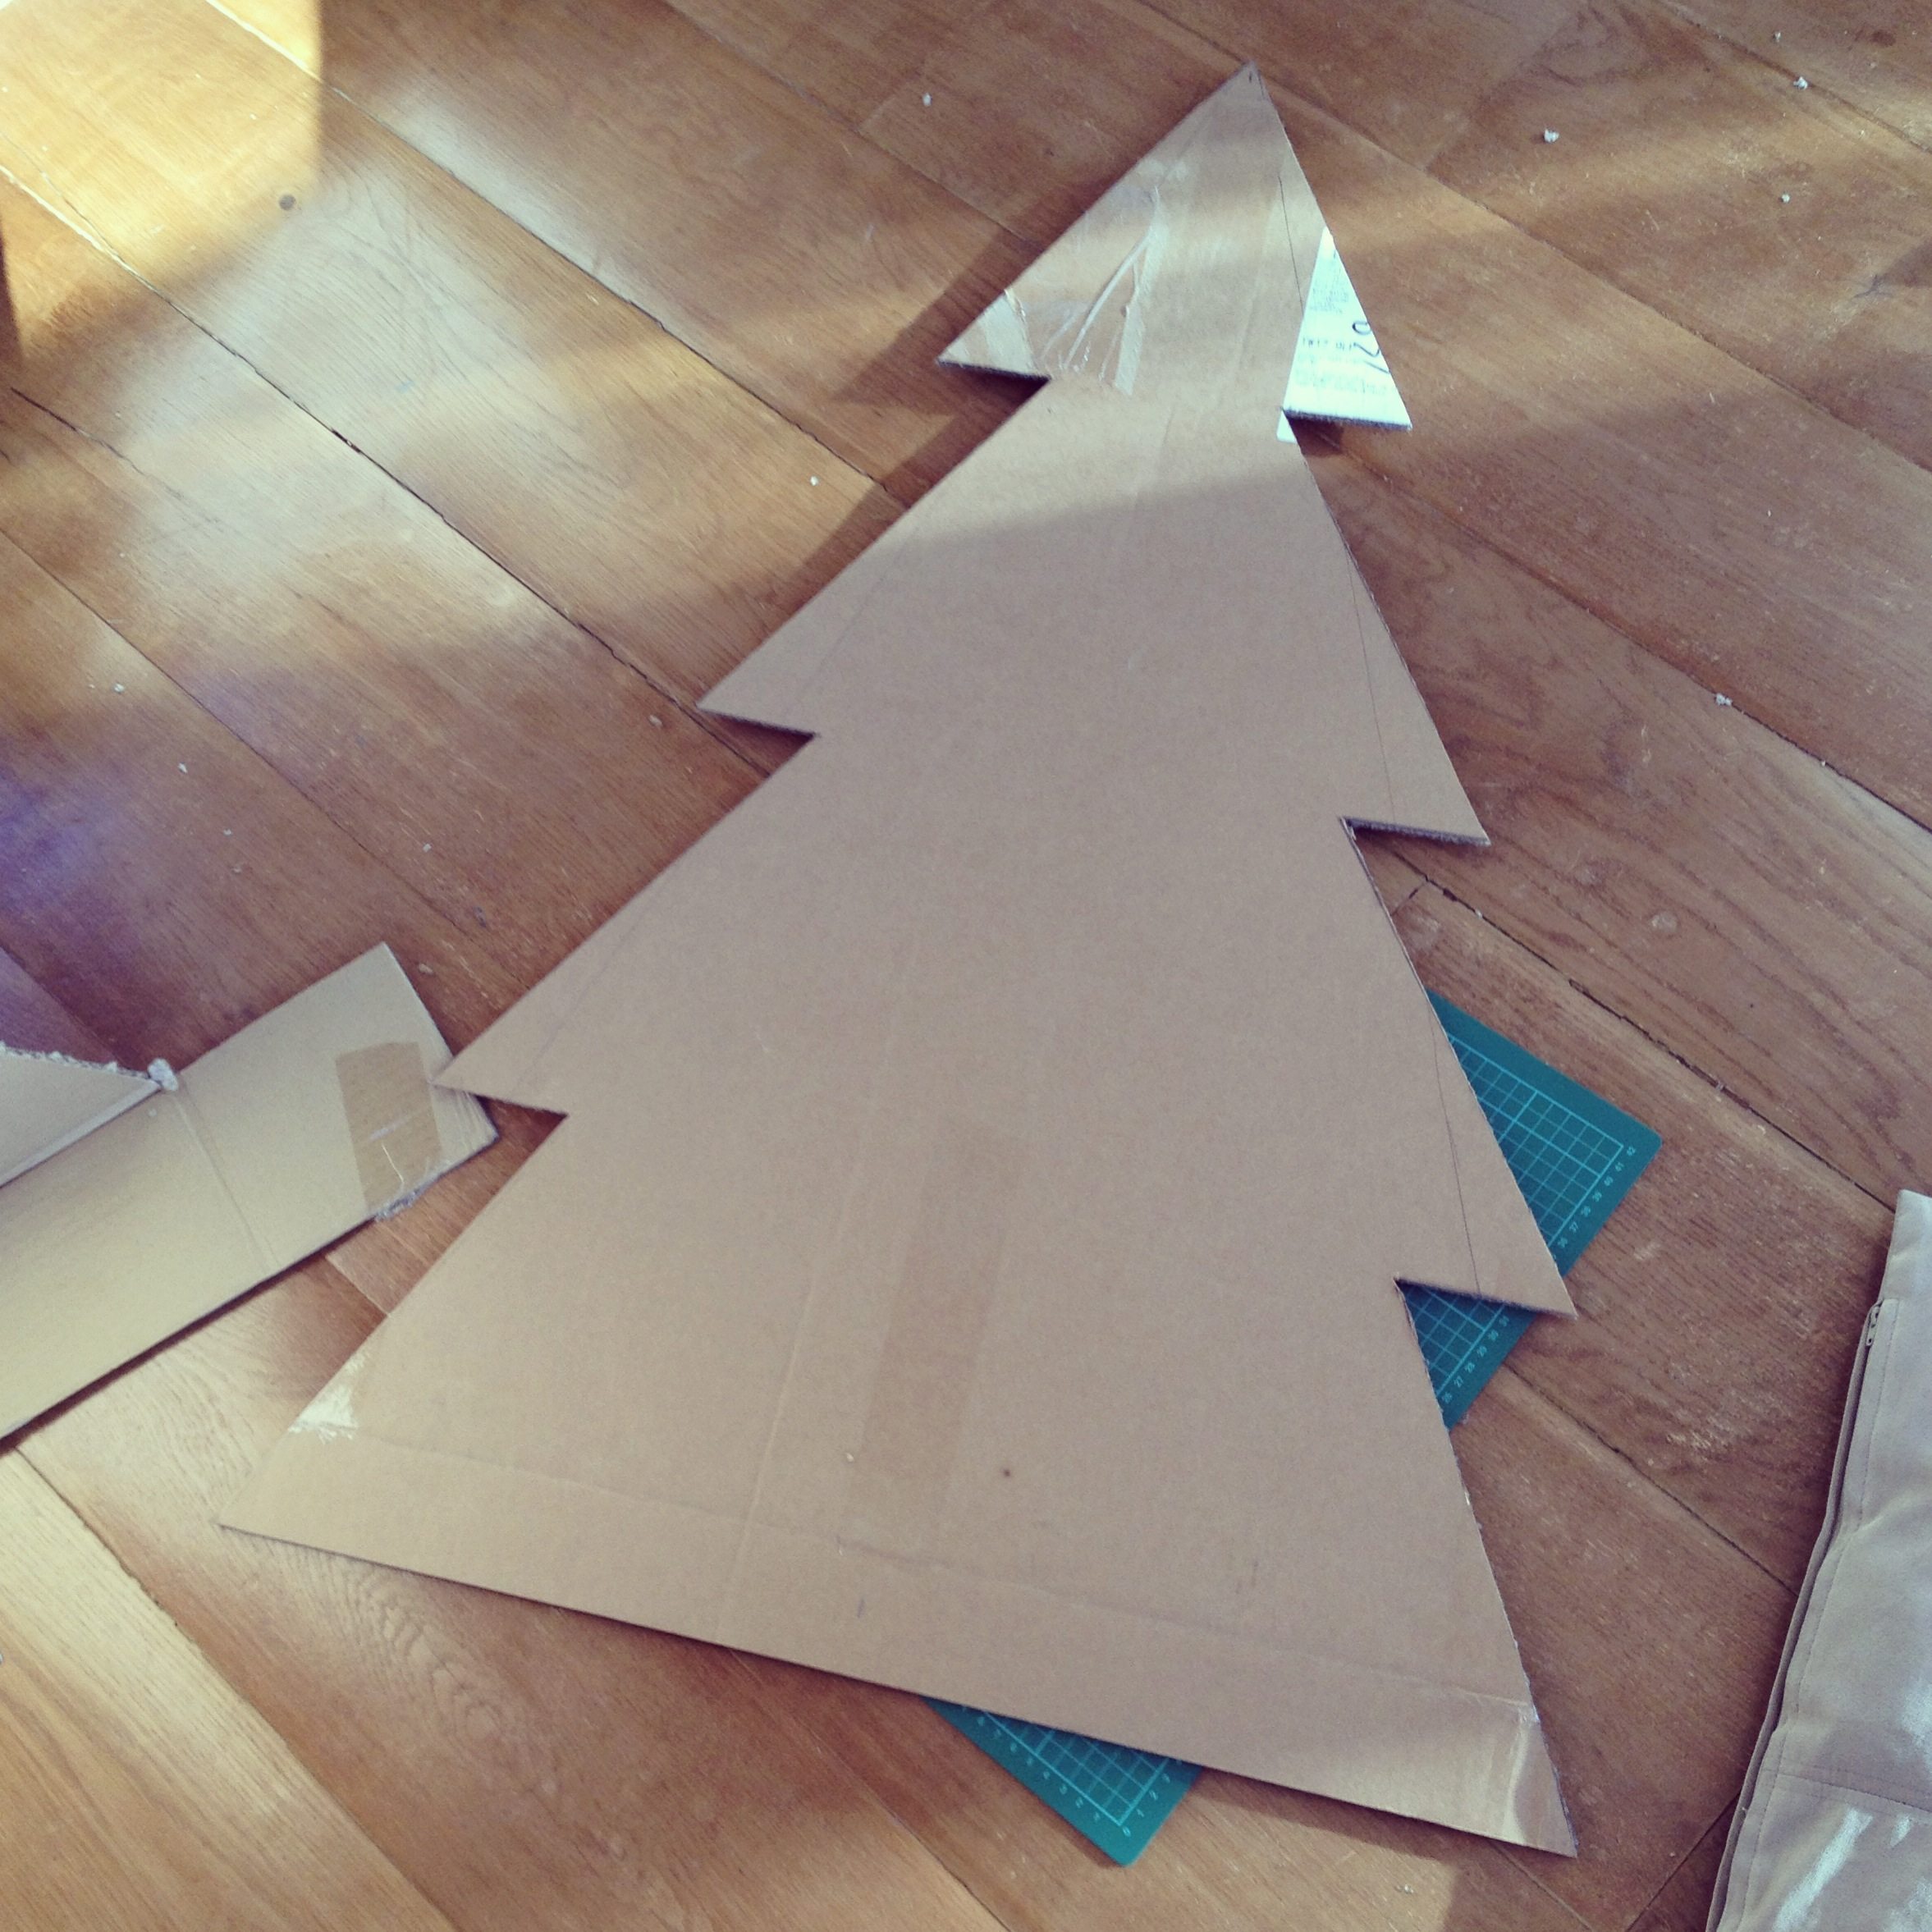
First sections slotted togetherOnce you have both sections cut out you next need to cut a wide slot (almost as wide as the thickness of your cardboard) from the top to the middle on one of them and from the middle to the bottom on the other. Then they can slot together and stand up on their own. At this point, I put on some MakeDo reclips and locked hinges to give it a bit of rigidity.
Second level cut outYou could just stop there if you want to, but we still had quite a bit of cardboard left, so we decided to make extra levels. The biggest pieces we had left were enough for two panels with four 25cm sections. They were marked out in the same way as for larger ones.
Second level slotted inThe slots were cut in the same as before too, but might be different for you depending on what size panels you have.
Third level cut outThere was still some cardboard left, so we did a third level with three 25cm sections. This one proved much trickier to slot together as it was joining with three other sections, but we got it there with a bit of pushing and shoving, and swearing and eventually, duct taping!
Third level slotted inAll the time I was cutting the cardboard, my other half and daughter were cutting shapes (stripes, baubles, trees, candy canes etc) from any paper they could find and decorating the plain cardboard with them. We used leftover wrapping paper to completely cover some of the panels that had printing on them.
Finally, we wrapped the fairy lights around the ‘branches’ and hung all of our decorations from the little LEDs themselves as there were no actual to branches to do it from!
The finished tree
It took the best part of a day to do it all, with the Christmas music playing in the background and there was a mince pie and a Bailey’s as a reward at the end whilst we watched ‘Elf’ and caught the twinkling of the lights out of the corners of our eyes every now and then. Happy Christmas everyone!
Liked it? Take a second to support GeekDad and GeekMom on Patreon!
3 thoughts on “Make Your Own Cardboard Christmas Tree”
Hey Nathan, this is all kinds of awesome. I normally leave the artsy crafty stuff to my wife as I find I don’t have the patience and attention to detail for it, but this looks doable, just need to get the right box! Happy Christmas anyway!
This idea couldn’t be more perfect. I’m short on money. My daughter is so excited about a tree. Not only are we saving money, doing something fun together but the outcome of the tree is beautiful. thanks!
Thanks guys, I’d love to see the results of your endeavours!

reclips and locked hinges to give it a bit of rigidity.


Hey Nathan, this is all kinds of awesome. I normally leave the artsy crafty stuff to my wife as I find I don’t have the patience and attention to detail for it, but this looks doable, just need to get the right box! Happy Christmas anyway!
This idea couldn’t be more perfect. I’m short on money. My daughter is so excited about a tree. Not only are we saving money, doing something fun together but the outcome of the tree is beautiful. thanks!
Thanks guys, I’d love to see the results of your endeavours!