I’ve tested a number of home surveillance systems over the past year or more, and all of them shared one major characteristic — they were designed for indoor monitoring. The two I’m using right now are small, easy to relocate, and easy to hide. But they’re also not even close to being waterproof. Without some sort of protective enclosure, these things wouldn’t last through a light rain… and definitely not a Georgia summer.
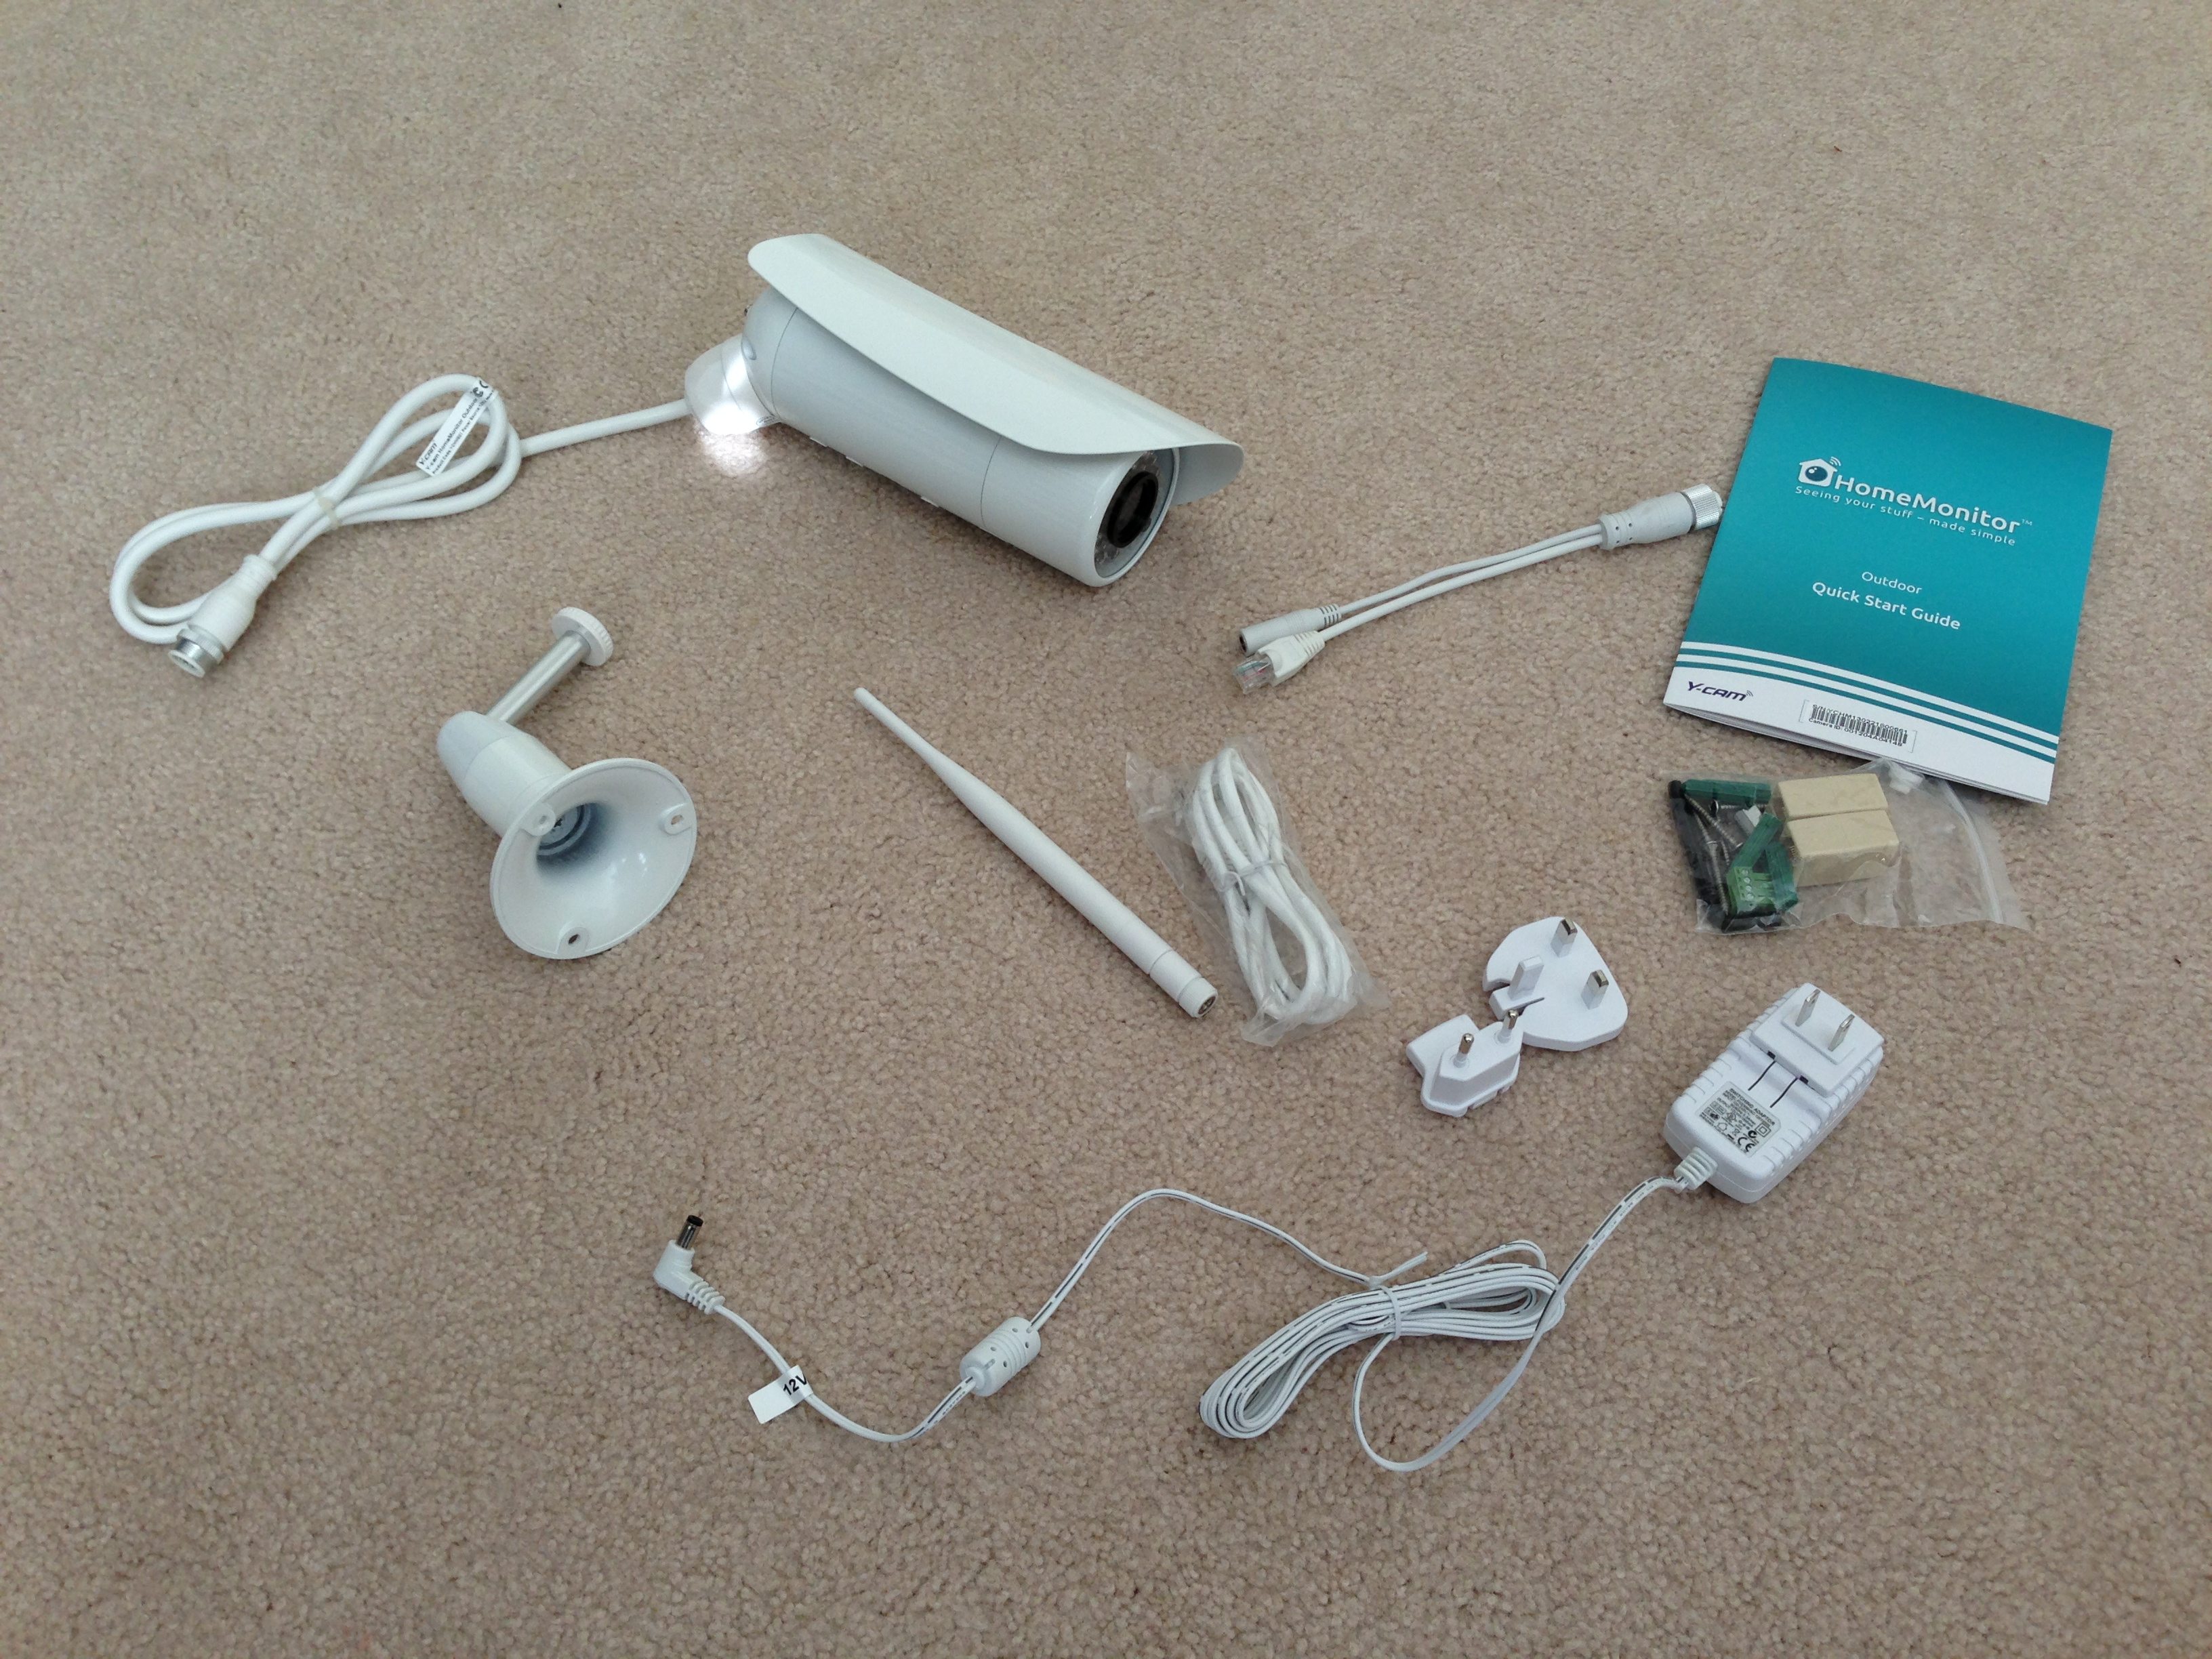
Y-Cam recently sent me their new Outdoor HomeMonitor system to test (model # YCHME01), and I’m happy to be able to report that the camera got perfect scores on the three areas I focused on during my testing:
1. Setup
2. Installation of Camera
3. Quality of Signal/Ease of Use
SETUP
For the Setup, the HomeMonitor camera comes with a very easy to follow 11 page manual — your only decision on page 3 (where the installation instructions really begin) is to decide whether you’ll wire up the camera to use WiFi or hardwire it to your router with an Ethernet cable. I initially setup the camera connected directly to my router, only so I could see the video quality and listen to the audio feed provided by the built-in microphone.

After plugging in the camera to the router and to power, the wizard asked me to create an account, provide the camera’s unique ID number, and a password. Once that was done, the wizard allowed me to define when the camera’s motion detection would be in operation — this is done by using a grid system of squares that you click on once to disable and once again to enable. Each grid represents one hour on a 24-hour clock. I chose to leave this alone, but I must admit it’s a super-easy way to setup a schedule — completely visual, and no typing required.

As for the image monitoring, you can draw boxes on the live video feed to define zones — each zone can have it’s area set for a low to high sensitivity using a drag bar. If you’re mounting the camera above your front door, for example, you could configure a zone that is very sensitive for your doorstep and another that is low sensitivity for a portion of a cul-de-sac that has a lot of cars coming and going. The instructions give another example of creating a zone that monitors up to a few feet above the floor that would ignore pets moving around.

Finish up the configuration and your camera is in business. I went ahead and used the control panel that you login to with a web browser to configure the camera to use WiFi… it found my router (during a 90 second scan — this is a fixed time period of scanning, so I’m unsure if it found it right away and then continued to scan for other networks). I provided the SSID key and I was in business. I unplugged the camera from the router and wall power and took it downstairs for the next test.
INSTALLATION OF CAMERA
This was the easy part. The camera comes with a very solid mounting base that swivels in all directions but can be locked down with just a twist of your fingers. An included Allen wrench lets you change the angle of the camera once it’s locked down on the swiveling arm. The kit comes with a small bag of mounting hardware for drywall but I only needed the three wood screws to secure the camera to my backyard deck.
Now, I was somewhat limited in where I could place the camera because it still requires power. The power cord will give you maybe 8ft of distance, and I only have one power outlet on my deck. If I intended to mount this high up, I would probably have to do some extra work to extend the power cord inside the house — certainly possible, but I’d probably do what most folks would do and call an electrician to make sure it was done properly.
Here’s the thing — this camera is solid. It is heavy. There is no doubt it was designed for outdoor use, and it’s got a small metal shield mounted over the top of this that can be moved/shifted to keep rain off the lens. The camera is also very noticeable, so mounting it out of reach is probably an absolute requirement (well, unless you choose to use it indoors).
QUALITY OF SIGNAL/EASE OF USE
Once mounted, I did a quick check with my phone — WiFi signal fluctuated between two and three bars. I was a bit worried, but once I got upstairs and checked the Live video feed, there was no problem. The image was sharp and in color and the sounds of the birds chirping was unmistakeable. It’s a well-made camera with excellent image and sound quality.
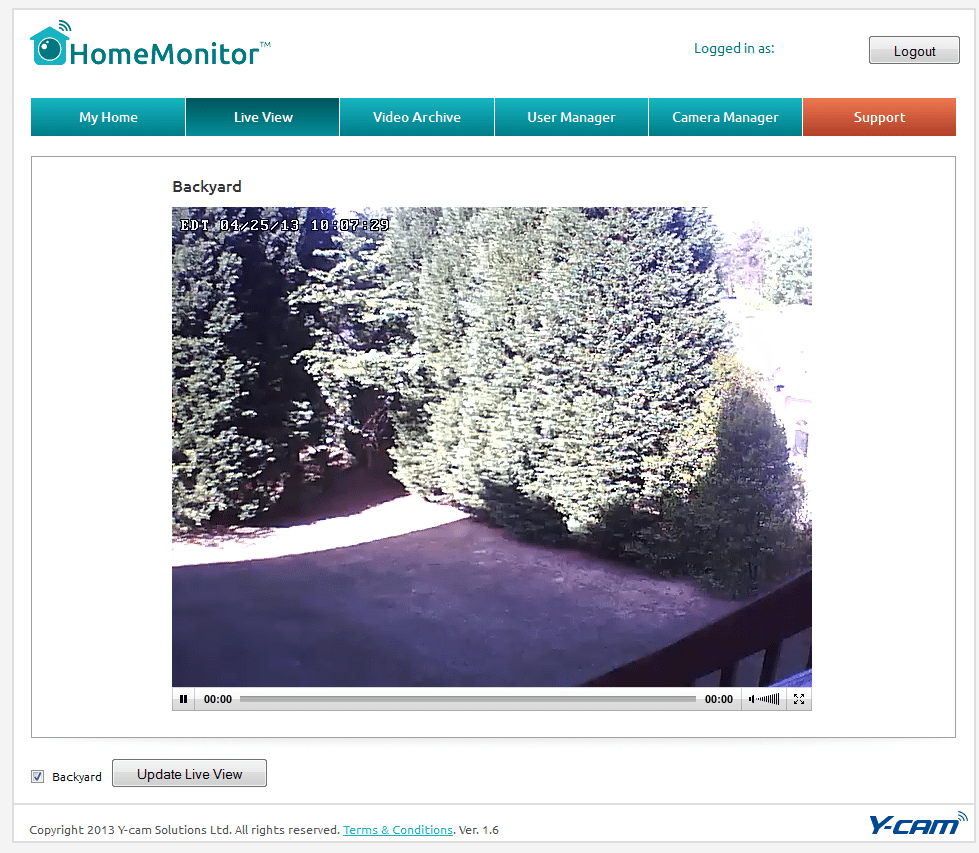
I rarely monitor my home video feeds from a computer, choosing instead to use apps for my iPhone. The HomeMonitor app is free, and after providing my username/password, I was presented with a very simple interface. Three buttons allowed me to turn off power to the camera, turn off alerts (email notifications), or turn off motion detection.

With both the PC image feed and the phone app feed, the video lag was about eight seconds behind live. Wave your hands and eight seconds later you’ll see your hand. I can live with that, but there might be some users who need real-time feed — I don’t think you’ll get that with a WiFi system, but the delay here was maybe six seconds when wired via Ethernet.
OVERALL THOUGHTS
All in all, I am very impressed with the system. A non-technical person can install this with no issues — the documentation is good and the wizard that leads you through the process is short and super-simple. Configuring the motion detection, alerts, and schedule is also easy to do, and the wizard will lead you through those setups as well.

If I have any concerns with the camera, it’s not with functionality or quality. I am worried that someone could see the camera and damage it with a well-placed rock or brick. For a serious installation, I believe an enclosure of some sort would be an absolute requirement. I also would never wire this up permanently with a power cable going to an outdoor power outlet… it really does require running the power cord indoors and maybe even splicing it to be a permanent wiring solution.
The camera uses infrared LEDs to provide night vision up to 45ft if you’re looking for that functionality, and the company provides seven days of free cloud-storage of your video recordings. You can also purchase additional storage (30 days) if you think you’ll need it. You can also download the video stored to your own computer. Email alerts won’t swamp your inbox — the software is designed to reset every 15 minutes for a motion detection event, so someone (or an animal) running back and forth for 10 minutes isn’t going to get you 50 email alerts.
The HomeMonitor Outdoor Camera is a great solution for homeowners looking for an external video system that is affordable. Just be sure you’ve got adequate WiFi signal strength where you intend to mount the camera outdoors… otherwise you can always choose to wire it with Cat5/5e for a more reliable feed.