Gardening when you’re distracted or in a hurry is a problem. You wonder if you planted rutabagas in two rows or three. You can’t tell if the newly emerging Brassica plants are cauliflower or broccoli. And unless you taste them, it’s not easy to tell if you’re pulling weeds or tender garlic shoots. That’s why I rely on plant markers instead of my memory.
I’ve tried all sorts of markers. I like the rustic look of writing plant names on ribbons and tying them to twigs stuck in the ground, but my dogs are pretty sure those twigs need to be in their mouths. Plant names written on wooden popsicle sticks also work, but the sticks are small and hard to see after a few weeks.
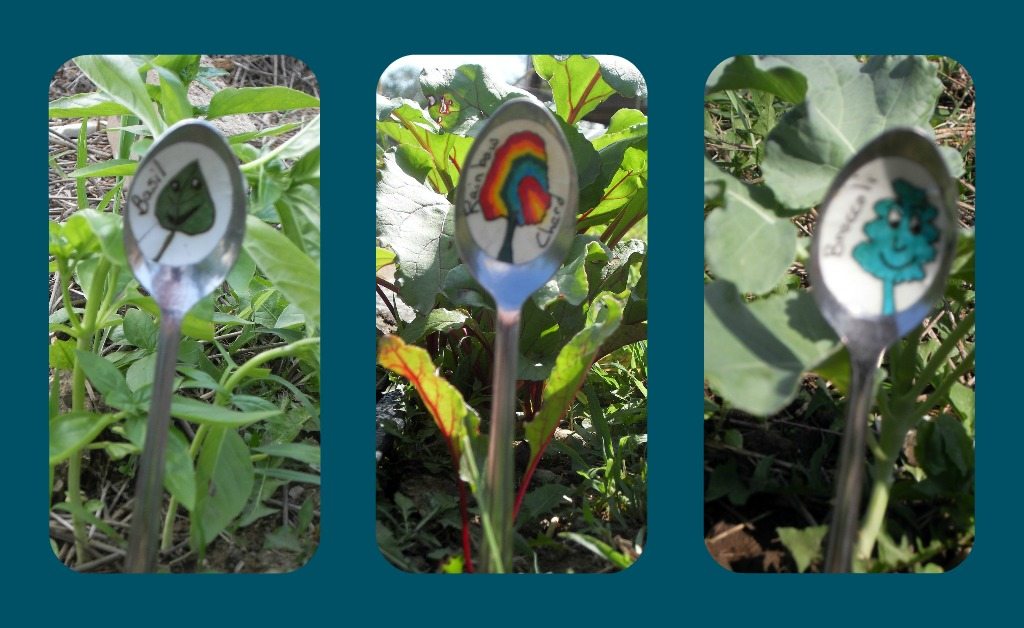
So I use iced tea spoons to make garden markers. They’re durable, easily visible, and can be saved for reuse. Your kids can do the artwork.
Materials
- iced tea spoons
- fine point permanent markers
- heavy paper (I used old file cards)
- Outdoor Mod Podge
- Acrylic Spray Coating
Instructions
1. Collect iced tea spoons from thrift shops, eBay, or the back of your drawer. Regular spoons work, but the longer handle on iced tea spoons is really helpful in the garden. It’s easy to sink the finished marker well into the dirt and still see the plant name. Make sure the bowl of the spoon is clean and dry.
2. Draw ovals approximately the size of the spoons’ bowl on heavy paper. As you cut out each oval, remove a very thin pie slice. This will help the paper lie flat in the rounded spoon when you glue it.

3. Now get out your fine point permanent markers. You might choose to draw an image of the plant’s seedling, to better help you as they emerge. Or do a nice botanical sketch. Or simply write the plant names. I have no drawing skills, so I scribbled a cartoon-y vegetable personality along with the name.

4. Using a Q-tip or paint brush, apply Outdoor Mod Podge to the back of each paper oval in turn, immediately placing it in the bowl of the spoon and smoothing out any wrinkles. Once you’re satisfied, paint a layer of Mod Podge over the paper as well.
5. Let the Mod Podge dry. This usually takes half the day to dry completely. Then add another coat, sealing the edges well. Let this coat dry fully.

6. Take your spoons outside, set them on a piece of cardboard, and spray them lightly with acrylic spray. Let them dry. This doesn’t take as long, an hour at most. Then respray.
7. Scamper out to your garden and ceremoniously place your markers!


Cute! Ive been up to this for a week now. Hoping to get mine in the ground here soon. We were having amazingly warm weather and then back to normal temperatures. I’m looking forward to doing some bigger garden signs next out of concrete that the kids can help me decorate.