A while back I posted up my plans for the cabin bed I was going to build for my daughter and promised to follow up that post with one detailing the actual build, so here it is. A bit later than I planned as the project took a bit longer than I anticipated due to life getting in the way once more, but better late then never as the cliché goes…
Hopefully, it you were planning to build one yourself, you’ve now got all your mdf cut to size and labelled up according to the plan. I’m going to refer to each part by their letters as marked in the plans. Here’s a list of the others materials and tools you’ll need to finish the job.
- ~ 400 Chipboard screws – 8 x 1 1/2″ (4mm x 40mm)
- ~ 50 Chipboard screws – 8 x 1″ (4mm x 25mm)
- PVA glue
- Wood filler
- Acrylic sealant/Painter’s Caulk/’No More Nails’ (plus the gun)
- Medium and fine grade sandpaper
- Electric sander
- Jigsaw
- Measuring tape
- Pencil
- Electric Drill/screwdriver
- 6mm drill bit
- Countersink
- Paint and brushes/roller
I should point out at this stage that I’m not a professional carpenter and have had no proper training in the art, so if my methods seem a bit odd to you please feel free to do it your own way! One thing I wished I’d done differently was to paint the pieces before assembling – mdf absorbs paint very easily, so you’ll probably need an undercoat and maybe two topcoats. I’d recommended getting at least the undercoat on before you start.
Don’t worry that this post seems long, it’s actually easier to do than to write! Each of the four main sections takes about half a day to build plus painting time, so you could get it done in a couple of weekends.
If you’ve got all that then let’s begin…
The Left Support
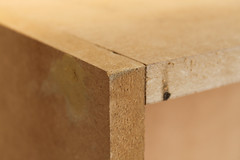
We’ll start with the left support so you’ll need parts A (x2), B (x2) and D. Take the top part (A) and one side (B) and lay them both down on their edges so that they form an ‘L’ with their shortest sides touching. It’s important here that the top section sits inside the side section as this means we only have to tidy up the screw holes and not a whole ‘seem’ for want of a better word for the join. The side should stick out beyond the top to allow for the back panel to sit in between the two sides.
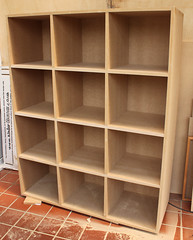
Drill, countersink and screw the top and side together, then repeat for the the other side and bottom piece. Little tip – before putting the screw in the hole, dip it into the PVA glue. When it dries inside the mdf it can help to prevent the mdf splitting. Now line your two ‘L’s up and join them together in the same way. It may be a little wobbly a this point but don’t worry, as soon as you lay the back panel (D) onto the top and bottom pieces, and between the two sides it should become very solid. Drill, countersink and screw the back panel into the top and bottom pieces and then go through the sides into the edge of the back panel to finish up the first ‘carcass’.
The inner shelves will be slotted together – I tried to find the technical name for this kind of join with no luck, so I’ll do my best to describe it. Take the three shelves, part A, and lie them down. We will be cutting two slots in each one the same thickness as the mdf – 15mm – extending halfway across the depth of the shelves.
With your tape measure, make marks near the edge of the shelf at 345mm and 360mm from each end and then repeat the marks near the center of the shelf (the center section will be a bit bigger than the outer two, but it’s easier to use whole number rather than getting into fractions of millimetres). Join the marks together from the edge to the center at about 193mm. Now get your jigsaw and cut out the two slots on each of the shelves.
The process for the vertical dividers, part C, is exactly the same, except your marks need to be made at 324, 339, 663, 678, 1002 and 1017mm, and again mark them to the middle (193mm) and jigsaw out the slots.
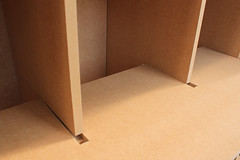
To assemble the shelves, put the two vertical dividers into the carcass at the same positions the slots where cut for the shelves, with their slots facing outwards. If they’ve been cut correctly they should be a nice snug fit – it’s easier to slide them in at a slight angle and then gently knock them into an upright position. Next, take a shelf and align the slots with the ones on the dividers and just slide it in. Again, it should be a nice snug fit – if you have to hit it to get it in, make sure you place an offcut of wood over the place you want to hit to protect the mdf. Repeat this for the other two shelves and you’re almost done. Drill, countersink and screw through the top, bottom and sides of the carcass into the shelves and dividers and then carefully work out their positions and put more fixings into them through the back panel.
That’s the support structurally complete, all that remains to do is fill over all the screw heads and sand them down, and while you’ve got the sander going, go over all of the front facing edges as they’ll probably be a little ‘furry’ – it’s also nice at this point to round off all the sharp edges. You can save yourself some time and effort here by only filling the hole that will be visible. You may have some small gaps where the shelves and dividers cross and this is where the ‘No More Nails’ or acrylic sealant/painter’s caulk comes in. Run a bead along the gaps and smooth off with a wet finger – I’ve never found a tool that can do this job better than a wet finger, but I’ve stopped myself from accidentally licking a finger covered in goo by using a jug of water instead.
Once your sealant has dried, break out the mini gloss roller and give it all a coat of your chosen colour, again you can save time, effort and money by only painting the areas that will be visible.
The Right Support
The second support is essentially the same as the first, but with only one shelf and one divider. The marks for the slot on shelf should be 527.5mm from each edge and for the divider, they should be at 324 and 339mm to put the shelf at the same level as the bottom one on the other side.
I used an offcut of the mdf to make a vertical lip on the front of the shelf as it was designed to hold my daughters ever-growing shoe collection. Another offcut was fashioned into a hanging rail for all the fancy dress costumes she seems to have amassed.
Fill, sand, paint…
The Bed Section
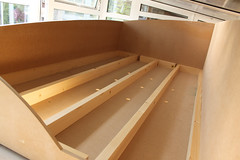
Cut your five lengths of timber to match the length of the bed base, part M. Lay them out on the floor and place the base panel on top. Arrange the timbers evenly across the width of the base with the two outermost ones right against the edges and then screw through the mdf into the timbers. I decided to install a set of colour changing LED lights to shine down underneath the bed, so I marked and drilled the holes for them at this point.
Turn over the base and locate the left end panel, part Q (I made a small mistake on the plans with this piece – it should only be 450mm high, sorry – it was because I changed my mind about having it and the back panel curved too). It should be the same width as the base and sits flush to the bottom of the base mdf. Screw the panel on, making sure your screws go into the timber beams.
The back panel, part P, can now be aligned to the base and left panels so that it fits flush at the left end, but sticks out to the right, as it joins to the stair piece. Fix it to the base and then into the left end panel. The front panel is fixed in the same way. I used a strip of uPVC cladding to mark out the gentle curve, clamping it at each end before drawing a line to jigsaw. The right end, part N, was marked and cut in the same way and if it’s been cut correctly should line up with the steps section perfectly.
The top of the base, another part M, needs to have it’s edges and corners sanded down so that it can be dropped in when everything is assembled. I cut a lozenge-shaped hole in the middle of the front edge to enable it to lifted in and out more easily for access to the holes for the downlights.
Fill, sand, paint…
The Step Section
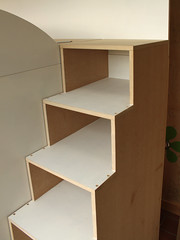
This is the trickiest piece. After you’ve jigsawed the two step sections, part J, stand them up on their longest edges and grab one of the part Ls. Drill, countersink and screw through part L into the edges of part J. Do the same for the top step, part I, and then get the back, part B, line it up with the bottom of the steps and fix it there. There should be a gap at the top which will join up nicely to the overhanging part of the base section.Each of the steps (parts E, F, G, H and another L) need to be cut into a kind of ‘T’ shape. Make a mark 140mm from the front edge of each step and then two more 15mm from each side. Now make two more marks at the back of the steps, 15mm from the edges. Join up your marks and cut them out.
Take the longest step, part L, and slide it into the carcass, pushing it down so that the ‘arms’ of the ‘T’ sit on the carcass. Drill down through the step into the edges of the big step walls. It’s useful at this point to fashion a temporary support for the back of the step to help you keep it level as you drill through the sides of the step wall into each step – cut a offcut down to 230mm and wedge it in near the back. Repeat this process for the other four steps.
The curve for the big end panel, part K, was marked out using the uPVC again and jigsawed. I forgot to mark the size for this piece on the plans – it should be 110mm x 182mm. It’s worth taking the time to get this curve nice and even using your sander as it doubles as a hand rail. Screw it to the steps, either by working out where the edges of each step are or by using shorter screws that won’t pop through the side panel.
Fill, sand, paint…
Assembling the bed
Now that all four sections are built and painted it’s time to put them together. Grab a friend to help you move each of them into place, supports first, then bed base, and finally the steps. Get them all lined up nicely and screw them together – you’ll need to use the shorter screws for this so that they don’t pop out the other side. If you screw through the base into the supports you won’t need to do anymore filling. Pop a couple of extra screws through the curved hand rail panel (K) into the back panel of the base (P).
You should only end up with two visible seems, between the two supports and the bed base. I find that filler tends to crack in joins like this, so it’s much better to make a ‘feature’ of them and just run thin bead of sealant between them and leave it looking like a groove. Run some more sealant along the joins where the steps meet the support and where the supports meet the base.
This is the point where I fixed in the downlights and also a ropelight around the top edge of the base section – it throws a nice bit of ambient lighting up the wall. Now the top part of the bed base can be dropped in, again get some help to lift it up there.
All that remains is one final coat of paint to cover up any scuffs and the sealant and you’re done!
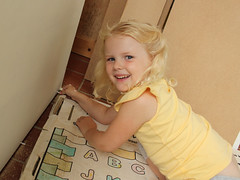
My little girl is now loving her new bed especially as we’ve decorated the room with flowers and butterflies in her favorite colours, keeping the overall style quite minimal and graphic to fit with the rest of our house. Of course, you don’t have to go so minimal – the design of the bed would lend itself perfectly to being painted like a London bus, or two big trees, or maybe even an AT-AT!
Thanks for bearing with me and feel free to ask me any questions, either in the comments or via twitter, @geekDadNath and finally, here’s a slideshow of my photos of the work in progress for you…

