
About the time I finished the draft of the first Nerdkits article, my wife walked by and asked if it was getting warmer in the house. I told her it was just her imagination and went back to tinkering. By coincidence the next project was a thermometer, and since our digital indoor/outdoor thermometer died recently it sounded like a good project for the kids and me.
This project takes a lot less time than the initial one and managed to hold the kids attention span a bit longer. They didn’t want me to explain too much, but they did hang around when I wired it up and kept coming back to check the temperature.

 Before we can get too crazy adding parts to our kit we will need a way to program it. The USB Nerdkit comes complete with a USB to Serial adapter, and a programming header. Wiring it up is pretty straight forward. Plug in the obvious bits and connet 4 wires to the breadboard.
The pdf goes into a little detail about how to setup the USB driver in Windows, but if you are on a modern Linux it will just work. For me it popped right up as /dev/ttyUSB1. You’ll also need some software to program the chip and to compile the sample tempsensor code. They provide WinAVR on the CD.
Linux users should be able to install avr-gcc and avr-libc. A word of warning though, be sure you get the latest version of avr-libc. Ubuntu is only up to 1.4 so search for 1.6 from Debian Sid, it works great. I used apt-get to install avr-libc, avrdude, binutils-avr, gcc-avr, and avr-libc then googled for the updated avr-libc and upgraded to it.
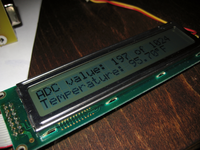
Once you get through compiling and installing your first program it is time to setup the sensor. Wiring it up took just a moment and with a flip of the switch the LCD should come to life and give you a reasonably accurate temperature. If for some reason you see "nan" instead of the temperature then you probably have avr-libc1.4 and need to upgrade to the better floating point math in 1.6.
Of course by now I’m starting to wonder if my wife was right, it is warm in the house. The Nerdkit tells me it is just over 80 degrees. Is that right? I know the thermostat is set at 76. I go check, and sure enough the thermometer on the wall is hovering right above 80. This isn’t going to be fun, the AC is dead half way through a 95 degree Memorial Day Weekend.
Before the weekend was up and things cooled off we saw the Nerdkit register temperatures just over 100F. The kids were very happy to see it click over from 99 to 100. I can’t say I shared their enthusiasm.
I’m going to pass the Nerdkit on to another GeekDad, hopefully he will get a chance to write about some of the other projects, and his kid’s experience with it. I’ve got the AVR bug now and have got a few ATmega168s (same as the Nerdkit) and some ATtiny24s to play with. I think my first project will be to build a replacement for the old indoor/outdoor thermometer.
I failed to mention too that Nerdkits has produced a set of videos aout their kits from the basics to advanced projects. The latest video takes apart a $20 electronic scale and wires up the strain gauges to the nerdkit.
