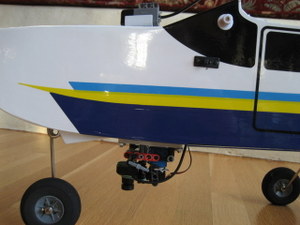

This weekend we added the next elements to the "sub-$1,000 UAV" (breaking the $1k barrier is the first step on what I’m calling the "Minimum UAV Project", an homage to Craig Venter’s minimum genome project. The next step cheaper is totally mind-blowing, but I’m waiting until I’ve got something to show before blogging about it). In keeping with the cheap Lego autopilot, I wanted to use Lego for the video system.
The camera and radio downlink hardware are off the shelf, but we built our own remotely-operated pan-tilt gimbal with Lego Technics parts. Commercial pan-tilt gimbals are expensive and tend to be too big, so avoiding that was one incentive. The other is that mechanically, this is a pretty straightforward project. The video subsystem has its own radio-control transmitter and receiver, so the video operator (that would be my eight-year-old daughter) can "steer" the camera with one transmitter by watching the video downlink on a laptop while somebody else (or the autopilot) flies the plane. In other words, the plane has two RC receivers and there are two transmitters on the ground; one controls the plane when the autopilot is off, the other controls the camera.
One servo controls the pan, the other controls the tilt. Each axis has about 90 degrees of range. (The Z axis–zoom–is controlled on the ground with digital zoom.) If you want close-ups of the Lego set-up, just email me.
Here’s a video of the gimbal in action:
The other thing we did this weekend is start integrating the Bluetooth GPS receiever. We’re using a Holux GPSSlim236, which a lovely (and tiny) piece of gear, but it’s going to take a bit more software work to get the Mindstorms NXT brick to read data from it properly.
