
The base set of Pathfinder Adventure Card Game: Mummy’s Mask includes two adventures, a “Deck B” adventure made up of cards from the base set, and then the Deck 1 adventure deck that gets mixed in later. My party just wrapped up the Deck B adventure, “Cross the Pharaoh’s Land.”
(In case you missed it, here are my overview of Mummy’s Mask and an introduction to the characters in my party.)
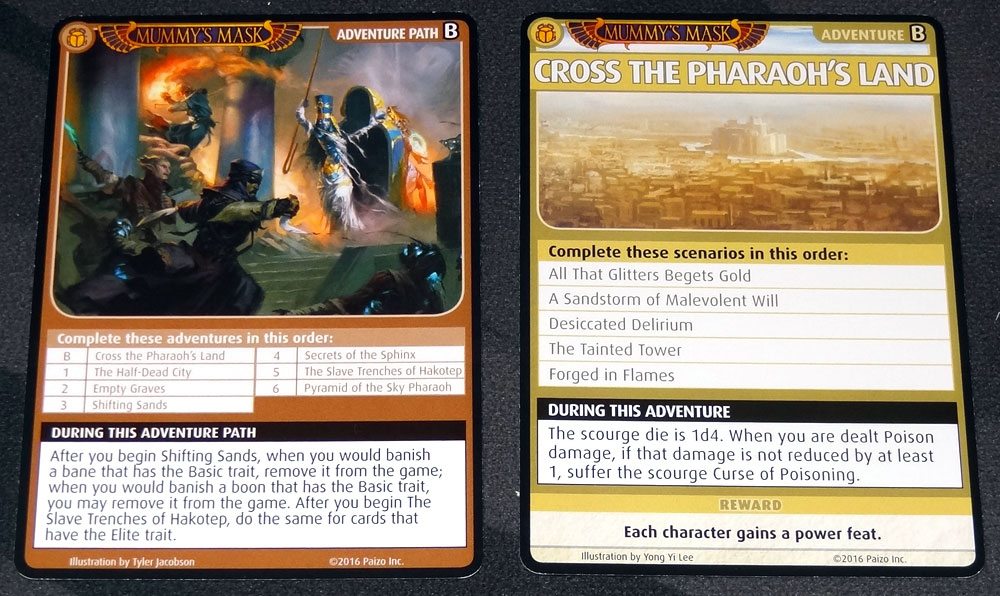
There are five scenarios in the adventure, and in Mummy’s Mask, there are also special scourge rules that apply during the entire adventure. For “Cross the Pharaoh’s Land,” any time you are dealt Poison damage and don’t reduce it by at least 1, you’ll have to suffer the Curse of Poisoning. The Curse of Poisoning sits in front of you, and forces you to recharge a card after resetting your hand, effectively reducing your hand size by 1 for each curse you have. The scourge die is 1d4: whenever you suffer an unnamed scourge, you roll the die and consult a chart—the higher the roll, the worse the scourge. (My one complaint: the scourge chart is only inside the rulebook—there’s no reference card and it’s not printed on the back of the rulebook with the turn summary. I made myself a reference card.) At the end of the adventure, if you’re successful, each character gains a power feat.
Before I dive into the scenarios, I wanted to mention a little bit about some of the armors and blessings in Mummy’s Mask, and how they differ from those in previous sets. This may be a minor spoiler, but doesn’t get into scenario plot points.

One of the new shifts in Mummy’s Mask from previous sets is that armor doesn’t always work the way you think it will. Sure, some of them reveal or recharge to reduce damage, or can be banished or buried to reduce it even more. However, some armors do not work for Combat damage at all—the Filter Hood is good for Acid, Electricity, and Poison damage, but doesn’t protect you in a fight. The Armored Kilt reduces damage by half when you recharge it, but if it’s damage dealt “before you act,” then you only have to reveal it instead. So far there are also several armors that will reduce damage by 5 if you bury them, rather than reducing damage all the way to 0, so in general armor doesn’t offer as much Combat protection as in previous PACG sets, but it does tend to defend against more types of damage.

We’re used to blessings that add 1 die for any check, 2 dice for particular types of checks, or can be used to explore. And if it matches the top card of the blessings deck, you get to recharge instead of discarding. In this set, it doesn’t always work that way.
There are two basic blessings included in this set. The Blessing of the Ancients adds 1 die to any check, but if you use it to explore, you must first examine the top card, and then you may explore. Of course, if the examination causes some sort of trigger effect, then you’ll have to deal with that first. If the top card of the deck is a Basic blessing, then you may recharge this blessing instead of discarding it. The other Basic blessing is the Blessing of the Elements. This one also adds only 1 die to a check, but can be recharged if the check invokes Acid, Cold, Electricty, Fire, or Poison.
The Blessing of Bastet is a gambling blessing. You can recharge or bury it to let somebody at your location reroll dice, or use it to examine the top card of your location. If it matches the top card of the blessings discard pile, you can search your deck for a non-blessing Gambling card and put it in your hand. The Blessing of Horus, on the other hand, offers the bonus that if you play it when the top card of the blessings discard pile, you may move. Because the blessings have different effects and abilities, it really changes up which blessings each character wants to collect.
Spoiler warning: beyond this point, I will be sharing plot points and pictures of the villains and henchmen in the adventures, so if you’d rather discover it all for yourself, stop reading here!

Scenario 1: All That Glitters Begets Gold
We’ve reached Osirion, and are headed toward the Half-Dead City of Wati, so we’ve joined up with Falsin Deek’s caravan. Falsin has hired us to keep his gold and silver safe, but the shipment hasn’t arrived. Seems like somebody has been stealing from his mines…
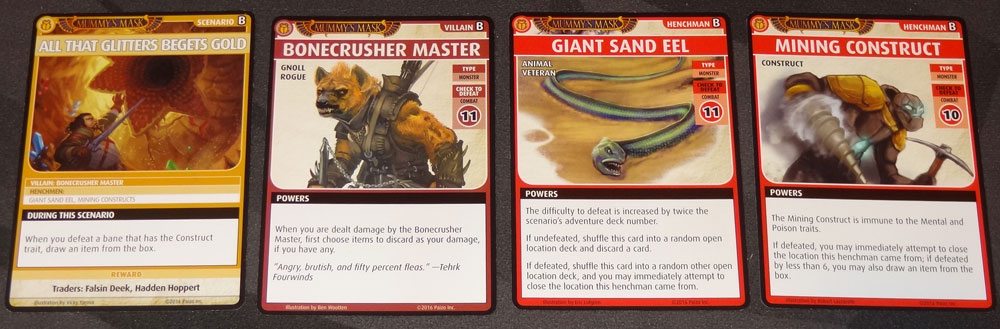
The first scenario is a standard find-the-bad-guy routine, and the special rule is actually a bonus: when you defeat a Construct, you get a free item. Conveniently, most of the henchmen in this scenario are Mining Constructs—they’re basically robots, but in a fantasy setting. I mean, look at it: it’s one of those Constructicons, right? The Mining Construct itself also provides a bonus item, if you defeat by less than 6. (Otherwise, presumably you’ve destroyed it too completely to salvage anything.)
The other henchman included in this scenario is the Giant Sand Eel. There’s just one, and we never actually encountered it in our playthrough, though it does make an appearance later. Unlike the standard “if defeated you may attempt to close this location” rule, the Giant Sand Eel is hard to get rid of permanently: whether it’s defeated or undefeated, it gets shuffled into a random open location.
In our adventure, Estra found the first Mining Construct at the Sulfur Pits. She defeated it, and then closed the Sulfur Pits by taking some damage. Mavaro found our next Mining Construct in the Stonework Passages and defeated it, closing the location by passing a Wisdom/Survival check (by calling on his special power to use cards to gain skills).

Ahmotep encountered the Dry Quicksand barrier at the Precious Mine—it’s one of the new barrier types that can trap you at a location for a while. If undefeated, the barrier stays next to the location, and you shuffle your token (the character card) into the location deck. When your token is in a deck, you can’t move away, you must evade all banes. Once your token is examined, explored, or would be banished, you put it back at that location. Fortunately, I passed the check and didn’t fall in.
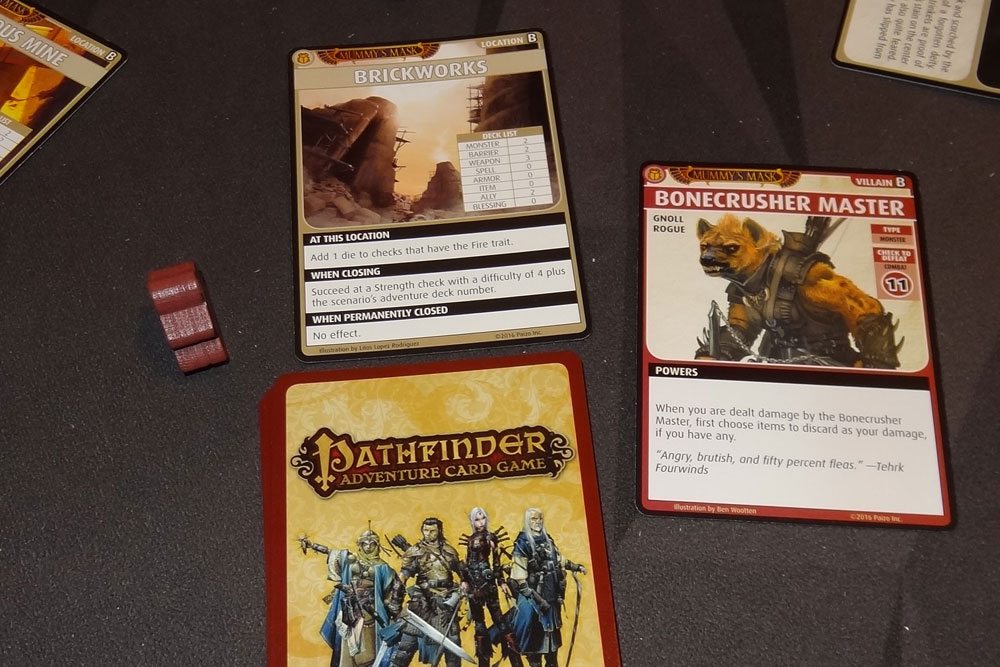
Mavaro did encounter the villain, Bonecrusher Master, at the Brickworks, but we weren’t able to close the Quarry. Bonecrusher was defeated easily enough, and fled to the Quarry. Knowing the location, we worked to close out other locations first before tackling the villain again. Bonecrusher Master isn’t terrible—a Combat 11 to defeat—and he discards items first if you take damage.
Yoon encountered a Mining Construct at the Ruined Temple but couldn’t quite defeat it, so it got away, for now. Estra defeated a Mining Construct at the Volcanic Vents and closed the location. Mavaro went after that Mining Construct that bested Yoon … and also failed. Oops. However, with enough locations permanently closed, we got ourselves set up, and Yoon went after Bonecrusher Master at the Quarry. Everyone else temporarily closed all the other locations, trapping the villain, and Yoon defeated him for the win.
Our reward for this scenario was our first two traders, Hadden Hoppert and Falsin Deek. Hadden offers spells, and Falsin offers items. After the scenario is over, each player can choose one of the available traders to visit, and then each trader displays one more card than there are customers there. To buy a card, you must banish two other cards, so you must have acquired at least a few extras in order to make a swap. Sometimes you get good stuff, and sometimes the wares on offer are a little overpriced.
Scenario 2: A Sandstorm of Malevolent Will

Having secured the mines, we continue on our way to Wati—but now we face a massive sandstorm, and there’s something big in the middle of it. In the second scenario, four of the blessings are replaced with Sandstorm villiains, which trigger when they are discarded, wreaking havoc … not to mention the Aghash henchmen. This scenario actually took us two attempts, because the first time we ran out of time. We managed to get four locations closed, and almost closed the fifth one when we ran out of time and also realized that the villain was in one of the locations we hadn’t even explored yet.

The Sandstorm is an obstacle-type barrier, and it also has a Trigger effect. If you examine it or (what happens in this scenario) discard it from the blessings deck, everybody moves to random locations. Then, each person examines the top card of their deck—if it’s a boon, reshuffle. Keep that in mind.

The Aghash henchman requires a Combat 11 or a Divine 8. The Aghash is the embodiment of the evil eye—its face is just a giant eye surrounded by fangs, and it gives you a scourge if undefeated. It also has a Trigger effect: if you examine it, you must discard a card from the blessings deck, then shuffle another Sandstorm into the blessings deck. Together, the Aghash and Sandstorm can be quite devastating. On the first turn of our second attempt, the first card in the blessings deck was a Sandstorm. Three characters got moved to the Windswept Chasm, which had an Aghash as its top card, so all three of us had to discard a card from the blessings deck and shuffle a Sandstorm in. Well, one of those cards discarded was a Sandstorm—which triggered another movement, and more people ended up at the Windswept Chasm. Fortunately, we didn’t discard any more Sandstorms this time, but we ended up adding in all of the available Sandstorm cards just in the first turn.

Having made it through this initial sandstorm blitz, Estra found an Aghash at the Hot Springs, and used her Divine skill to defeat it. Then she defeated the Acid Pool barrier to close the location, making the Hot Springs a location that provides healing.
Ahmotep went to the Windswept Chasm (where, as noted before, we knew there was an Aghash on top)—she was pretty sure she could defeat the Aghash. The problem is, to close the Windswept Chasm, you must discard your entire hand. First, she cast Elemental Treaty, which reduces elemental damage at that location until it is closed. Then, she explored and attacked the Aghash with her Flame Staff: the staff is recharged, and her power means that the spell she cast with it is also recharged. That let her use a Blessing of the Elements, which can be recharged if the check invokes an element (in this case, Fire). The Aghash was defeated, and Ahmotep only had 2 cards left in her hand, which she discarded to close the location. When permanently closed, the Windswept Chasm allows you to draw 1d4 cards from your discard pile—Ahmotep rolled a 2, getting those 2 cards back. Success!

Tup, meanwhile, had been hanging out at the Howling Sands, where you have to discard cards with the Cold trait at the beginning of your turn. He found and defeated an Aghash, and then closed it with a Dexterity Acrobatics check. Two down.
Mavaro was at the Glass Pavilion, where you must examine the top card at the beginning of your turn: it was an Aghash, which meant it triggered—but by this point we were out of Sandstorms to add to the blessings deck, so it just discarded the blessing. And then he failed to defeat the Aghash, so it went back into the Glass Pavilion deck.
Yoon found our next Aghash at the Shifting Sands, and defeated it, and then had to fight a Giant Sand Eel to close it. Tup “helped” in that fight by lighting things on fire, and closed it—and fortunately Yoon didn’t take too much damage from Tup’s fire. The Giant Sand Eel went to the Crypt. Then Estra was able to battle the Aghash at the Glass Pavilion and close it out with her Divine skill.
At the Crypt, Ahmotep found the Giant Sand Eel that had run there, giving an extra chance to find a henchman, and closed it, chasing the Giant Sand Eel to the Scorched Ruins—and that’s where Yoon tracked it down, defeating it and closing it out, leaving—finally—the villain at the Scorched Ruins.

With the enemy trapped and all the locations closed, Tup joined Yoon at the Scorched Ruins, and the two of them took battled Tukanem-Hanam, an undead mummy dragon who shoots electricity at you. He’s immune to Electricity (naturally), Mental, and Poison, but is especially susceptible to Fire. Oh, look: Tup and Yoon are both really good at lighting things on fire. And that was the end of Tukanem-Hanam.

In this scenario, the fights themselves weren’t so terrible, but running into Sandstorms just wastes a lot of time, and also moves you around so that you’re not set up to close locations if anyone finds the villain. Our reward was the Scarab Buckler loot card, an armor card that Yoon claimed. The Scarab Buckler has three uses: to reduce various types of damage, to add 2d8 to Swarm or Poison checks, or for healing. At the end of the scenario, we also got to go back and trade with Hadden and Falsin.
Scenario 3: A Desiccated Delirium
Well, we made it through the sandstorm, but we’re low on water. Luckily, there’s an oasis right there… right? Wait, that’s an acid pool. Okay, over there. Nope, also an acid pool. How about that one? Nope, a mirage…

We’ve learned from previous sets that if there are fewer locations than normal, it usually doesn’t mean that it’s going to be easier to complete. This scenario has 1 fewer locations … but you can’t temporarily close anything. Every time you encounter the villain, the Mirage, it just moves to a random other open location—so you must close everything before you can even attempt to defeat it. In the meantime, hello, Acid Pools.
Since we couldn’t temporarily close locations, we decided to stick together a little more than usual, just plowing through locations together. We all started at the Caravanserai and worked through it together, and Ahmotep finally found the Acid Pool henchman almost at the bottom of the deck. The Acid Pool is an obstacle barrier, and requires Intelligence/Craft/Wisdom/Survival to defeat, or it does Acid damage to you, but Ahmotep didn’t have much trouble defeating it or closing out the Caravanserai—banishing an item, but we’d gotten several during the exploration.
Later, Mavaro found an Acid Pool at the Thornscrub, but we didn’t have the right cards to feel more comfortable with the check. So Tup “helped” with his Fire power, and Mavaro succeeded … and then Mavaro and Ahmotep both took 2 Fire damage. Thanks, Tup. And then Mavaro took another Poison damage to close the location.

Tup was fighting monsters with fire, meanwhile, and faced off against the two-headed Death Hound, which requires two Combat 7 checks to defeat. However, if you don’t get higher than 11 on both checks, you suffer a Curse of Vulnerability, which prevents you from reducing certain elemental damage. Fortunately, both Ahmotep and Estra have the Remove Curse spell, so Tup wasn’t vulnerable for too long. Tup managed to find the Acid Pool at the Howling Sands, defeating it and closing the location.
Ahmotep found an Acid Pool at the Shifting Sands, but missed the check to defeat by 2. Fortunately, her power lets her discard a card to add 2 to her result, so she threw away her Frost Staff and saved the check, and then fought a Giant Sand Eel to close it. The eel went to the Quarry, where it became Yoon’s quarry—she also bested the eel and sent it packing to the Earthworks, and closed the Quarry.
Our first encounter with the Mirage came at the Earthworks. Ahmotep found it while trying to chase down the Giant Sand Eel, and the Mirage moved to the Sulfur Pits. So then we knew to save the Sulfur Pits for last. Ahmotep did manage to track down the eel after all, though she used her entire hand, and then had to bury an armor to close it. After resetting her hand, she was down to 2 cards in her deck. Yikes! Too close for comfort.
But now we were down to the last location, the Sulfur Pits. Yoon encountered the Acid Pool, and defeated it, took the Acid damage to close the location, and then explored again, finally finding the Mirage (and trapping it so it couldn’t move). The Mirage requires a Wisdom/Perception 7 check to defeat—not too hard at all, because the primary difficulty is pinning it down. We chalked up another win, and each character gained a skill feat.
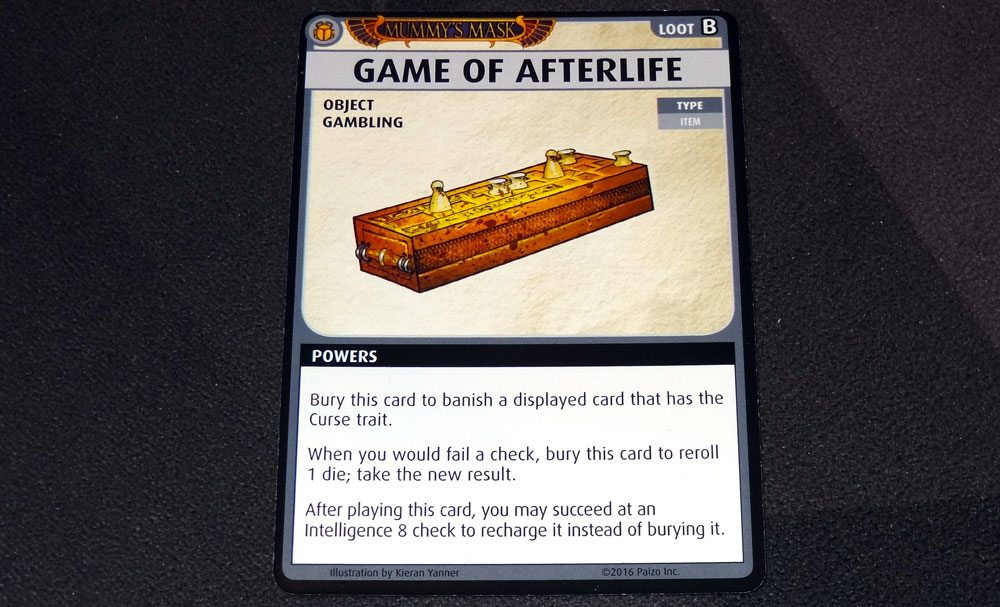
We also gained a loot: the Game of Afterlife (heh), an item that lets you bury it to banish a curse or to reroll 1 die on any check, and it can be recharged instead of buried with an Intelligence 8 check. Mavaro took it at first as an item, but eventually dropped it because it doesn’t have any checks to acquire, and thus doesn’t give him a boost in skills.
Scenario 4: The Tainted Tower
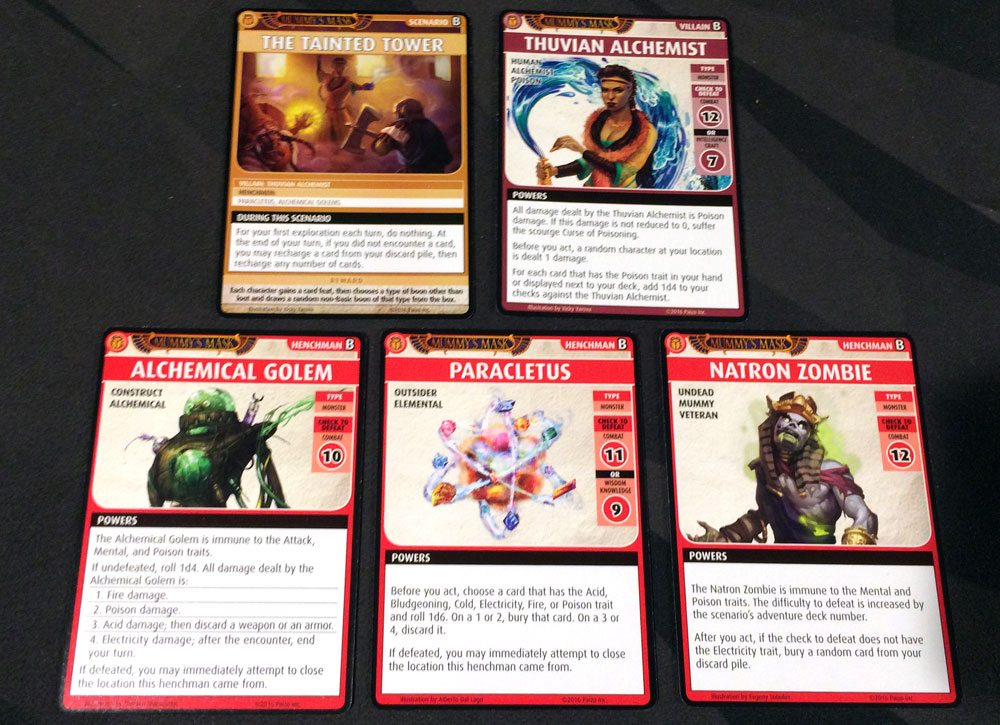
Whew! Having survived the desert and found water, we discover that this oasis is poisoned. The antidote lies with the Thuvian Alchemist—and meanwhile, we’re all suffering from the poison and running out of time. The alchemist has a few Alchemical Golem henchmen, who cause different types of damage. There’s also the Paracletus elemental henchman, which can randomly bury or discard an elemental card from your hand. Finally, the Natron Zombie is a henchman that shows up when you try to close the Embalming Parlor location.
Once again, there were fewer locations available in this scenario, but the really nasty special rule is that, for your first exploration each turn, you do nothing. However, at the end of your turn, if you ddin’t encounter a card, you can recharge a card from your discard pile (healing!) and also recharge any number of cards from your hand, helping you cycle through your deck. However, it does mean spending a lot of cards to explore and examine cards.

This week it was starting to snow in the Portland area, with expected ice in the late afternoon, so our Vancouverites decided to stay home and phone it in. We set up my iPad with Google Hangouts, and Wink and I were in charge of managing everyone’s cards and moving things around, though all the players rolled their own dice. But unfortunately, I didn’t take very good notes because I was managing more things.
I do know the results of a few major battles—for instance, Yoon encountered an Alchemical Golem at the Embalming Parlor, but failed: he had to roll a d4 to see what type of damage the Golem dealt—and fortunately was able to avoid it with his power. After that, it was just slow going, where we burned through the Blessings deck while trying to explore and look for henchmen or the villain.

Tup finally managed to find the villain, the Thuvian Alchemist, at the Dilapidated Plaza, but we were only able to temporarily close three other locations: the Oasis, the Glass Pavilion, and the Embalming Parlor. Tup defeated the Alchemist, who was then free to run away … to the Thornscrub. Knowing where the villain was, we stayed spread out to cover locations and tried to work our way through the Thornscrub.
On the penultimate turn, Mavaro found the Alchemical Golem at the Thornscrub, defeated it, and closed the location, leaving the villain, the Thuvian Alchemist, as the only card there. Ahmotep was going to have the last turn—but Ahmotep was covering the Embalming Parlor at the time, and we had exactly enough people to temporarily close all of the locations while one person fought the villain. If Ahmotep went to the Thornscrub to fight, then the villain would flee to the Thornscrub, and we’d be out of time to go any further. What to do?
Well, fortunately, Mavaro remembered that he had a Compass somewhere in his deck, so he discarded his entire hand at the end of his turn, drawing as many cards as possible … and he got the Compass, which allows you to move to another location. Mavaro moved to the Embalming Parlor, Ahmotep took her turn by moving to the Thornscrub, and we had one chance to defeat the villain.

The problem, though, was that it was going to be very close. We only had 3 blessings to spend among the entire party, but we needed to temporarily close four locations—and at least three of them were going to be really hard. The one location we did permanently close, the Dilapidated Plaza, allowed us to bury cards to re-roll one die on each check—we ended up using that ability a couple times, but just barely managed to temporarily close all four locations. Then Ahmotep defeated the Thuvian Alchemist once and for all.
Our reward for the scenario was a card feat (being able to increase the number of cards in our decks), as well as getting to draw a non-Basic boon of a type that we chose. Afterward, we still got to visit the traders to try to get even better cards.
Scenario 5: Forged in Flames
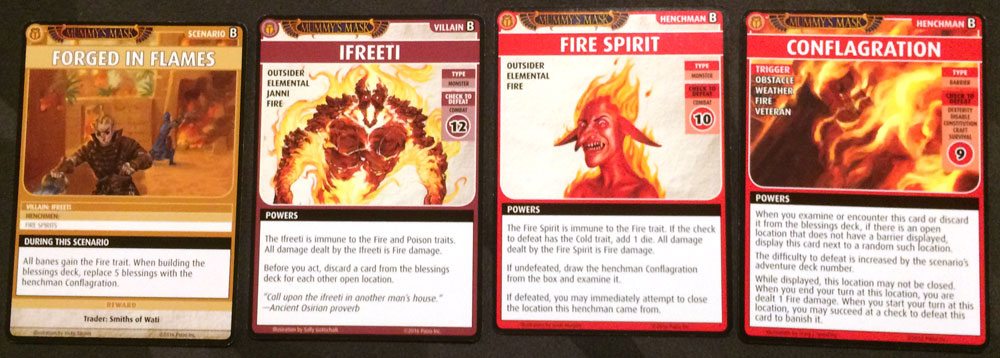
In our final scenario, we have finally arrived at our destination, the city of Wati, but the smithy district is under attack: an ifreeti and his fire spirit minions have set everything on fire. In this scenario, all banes have the Fire trait, and the Blessings deck has five Conflagration henchmen shuffled into it.

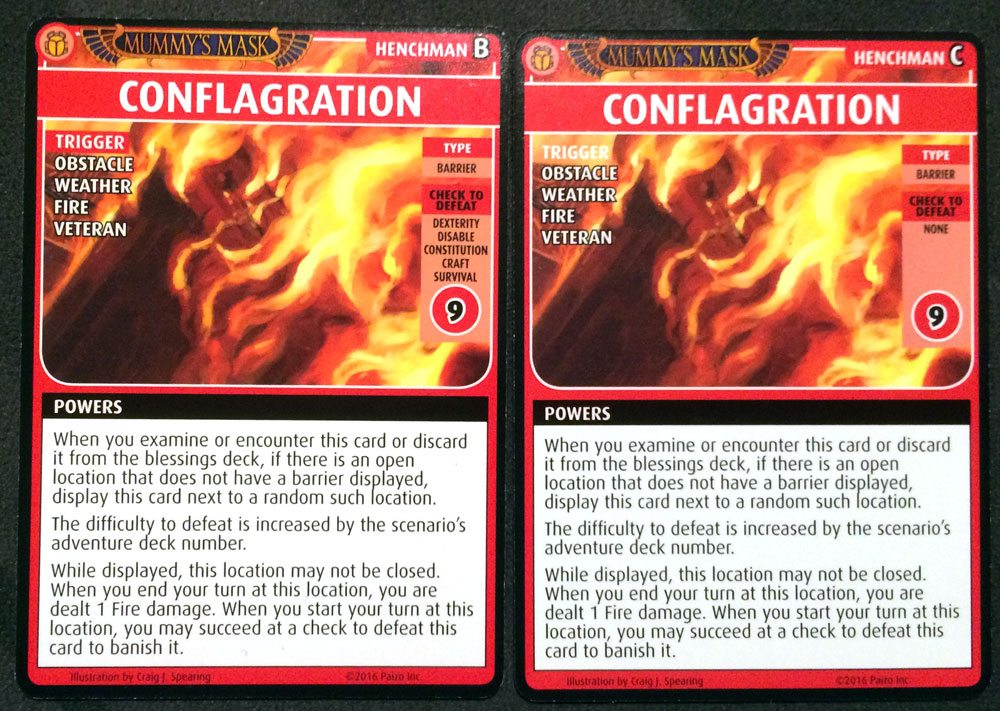
On the first turn of this scenario, Ahmotep started at the Scorched Ruins and immediately revealed a Conflagration from the Blessings deck. Well, I guess that’s what she gets for walking into a place called “Scorched Ruins.” The Conflagration is a barrier-type henchman, and is immediately displayed next to the location. It prevents the location from being closed, and deals 1 Fire damage to you at the end of your turn. If you start your turn at a Conflagration location, you may try to defeat it with Dexterity/Disable/Constitution/Craft/Survival 9.
Mavaro went to the Smoking Den (hmmm … that also seems like a good place for a Conflagration) to help with a Wall Scythe barrier that Estra had encountered. (Yelp review: “1 star. Would not recommend.”) He used a Tomb Raider ally to explore again, and encountered the Fire Spirit henchman—it’s not too bad, a Combat 10, though of course it’s immune to fire, and causes a Conflagration if you fail to defeat it. Mavaro defeated the henchman, but then had no Diplomacy skill to close the location, since he had just discarded his Tomb Raider.
Well, fortunately for us, Tup was able to ride Deliverance over to the Smoking Den, using his fire ability to add 4 to Mavaro’s check to close the location, which then succeeded. Turns out you don’t have to be very good at Diplomacy when there’s a goblin setting fire to everything. Unfortunately, Estra then took 4 fire damage, and Mavaro took 3. Thanks, Tup!
We had another Conflagration flare up at the Brickworks—Ahmotep was able to put it out, and Mavaro tackled the Conflagration at the Scorched Ruins. Estra, meanwhile, had gone to the Surgery … which also got a Conflagration. (Yelp review: “1 star. Smells like smoke.”) She tried to put out the Conflagration on her next turn, but failed, so then left and went to the Warehouse, where she immediately encountered a Fire Spirit. (Yelp review: “1 star. Wares are all burnt.”) She did defeat the Fire Spirit, but then needed a Dexterity/Disable 4 check to close it. Estra, as you may imagine, is not very dextrous. Tup to the rescue! He “helped” again—Estra only had 1 card in her hand anyway.
Tup defeated a Fire Spirit at the Dilapidated Plaza and closed it. Then Mavaro went to the Surgery to put out the Conflagration with his Key of the Second Vault, only to discover a new Conflagration. (“Mavaro, I told you that key doesn’t put out fires properly!”)
Yoon found a Fire Spirit at the Ruined Temple, but failed to defeat it, so then another Conflagration appeared at the temple. Tup wanted to ride over to help with the fight, but it turns out you can’t fight fire with fire, at least in this scenario, so he stayed put. Estra found another Fire Spirit at the Scorched Ruins, but couldn’t defeat it, and lost her whole hand. (Yelp review: “2 stars. Scorched as advertised.”)
Mavaro did manage to put the fires out at the Surgery (again), and Yoon put out the fire at the Ruined Temple and then encountered that Fire Spirit again. This time he was successful, and buried a blessing to close it. Estra got a second crack at her Fire Spirit at the Scorched Ruins, and defeated it as well, but then had to summon and acquire a weapon to close the location. Well, she has no Strength or Dexterity to speak of, so acquiring weapons is pretty tough. Here comes Tup to save the day (and set things on fire) again! Once again, Tup helped close the location … and Estra lost her entire hand. But she did acquire a new weapon that she couldn’t use.

Mavaro finally tracked down the Ifreeti at the Surgery. The Ifreeti causes you to discard a card from the Blessings deck for each open location, and we only had two cards left. Fortunately, Ahmotep was able to temporarily close our last open location, so no discards were necessary. The downside was that Mavaro didn’t have any cards on hand to give him Strength, so he just had a d6 to get a Combat 12. We all used as many additional bonuses as we could, giving him a whole lot of extra d4s to roll, and he managed to defeat the Ifreeti once and for all. Tup was sad to see him go … all that fire!
Our reward for this scenario is access to a new trader, the Smiths of Wati, who deal in weapons. And, since we had now completed the “Cross the Pharaoh’s Land” Adventure, we all got a power feat as well. Level up! Next time, we’ll find out what’s up with this Half-Dead City. (Yelp reviews are mixed.)


