
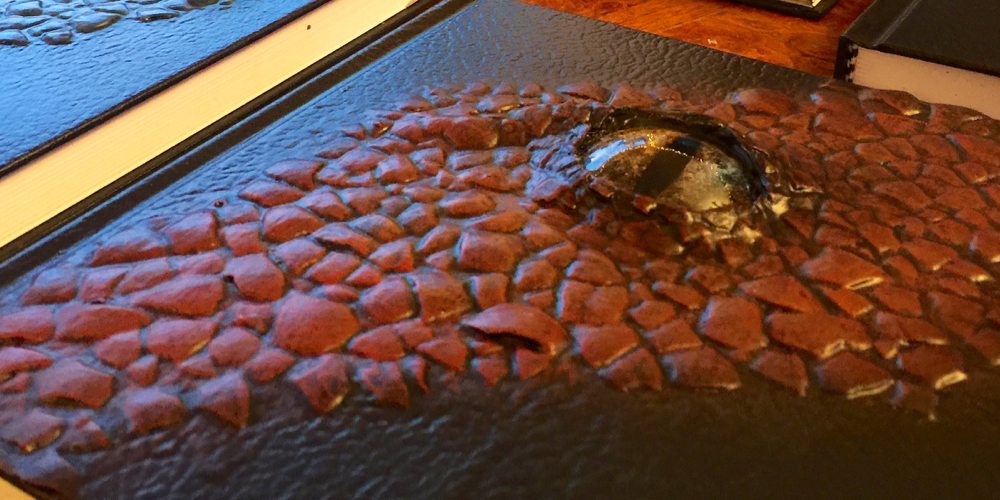
I often impose some large gift project on myself for Christmas. This year, in addition to lighting up a Borg Cube I wanted to make a couple of dragon skin books full of blank pages for my kids, because, nothing screams Christmas like poached dragon skin wrapped on a book. I was inspired by some custom books I purchased a few years ago that sported an eye with some shaped leather covering a standard sketchbook. These books were created by Randy Cieszynski of Abbots Hollow Studios. Check out his store, he has many great things for sale, and having now created similar books, I can attest that the prices are fair.

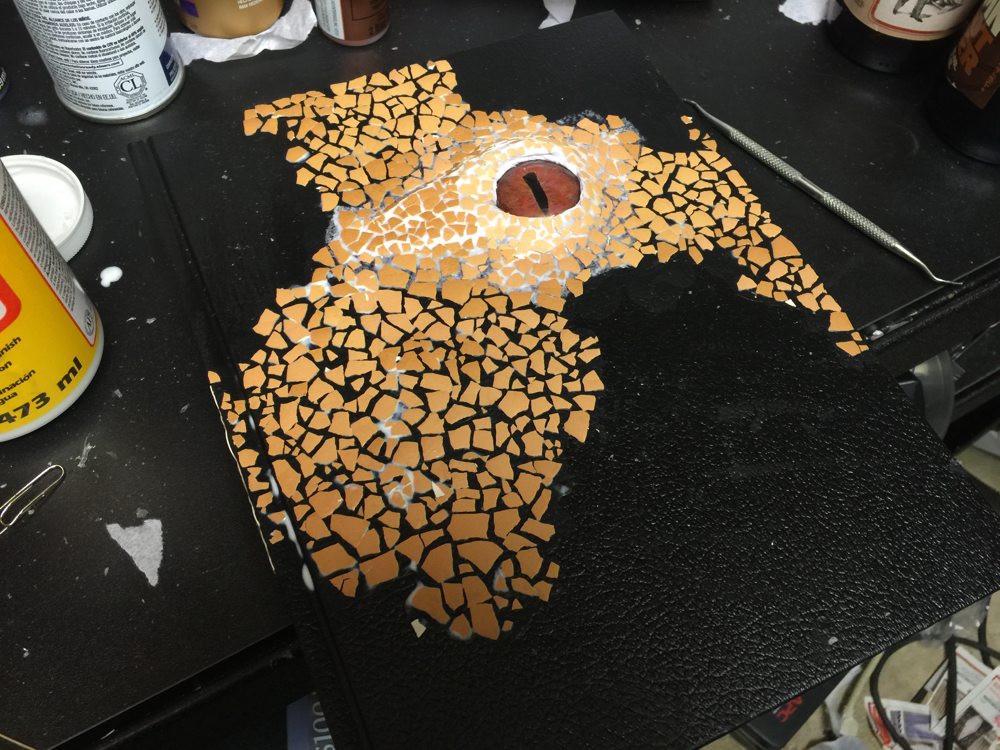
I wanted to create a book like this myself and set out to find out how this book was put together; how was the leather shaped and how was the eye created. So, off to Youtube. I did not find a tutorial for this exact method, but pretty quickly got distracted by an alternate method of creating dragon skin, using broken egg shells of all things. The first tutorial, Alchemy Themed Altered Dragon Book, I found shows how to make a dragon skinned alchemist’s book with little drawers in the book. I wanted to keep my project a sketchbook, and the eye in this tutorial was a printed eye. Instead, I wanted a nice rounded eye like in the book I purchased. Mainly what I got from this video was the excellent egg-shell dragon skin method. For the eye I found a Polymer Clay Dragon’s Eye Tutorial. All I used from that second video was how to paint the glass bead.
Materials for the project included:
- Hardbound Sketch book: In looking at multiple brands, some have a cover that already looks like leather, others are smooth. Go with leathery.
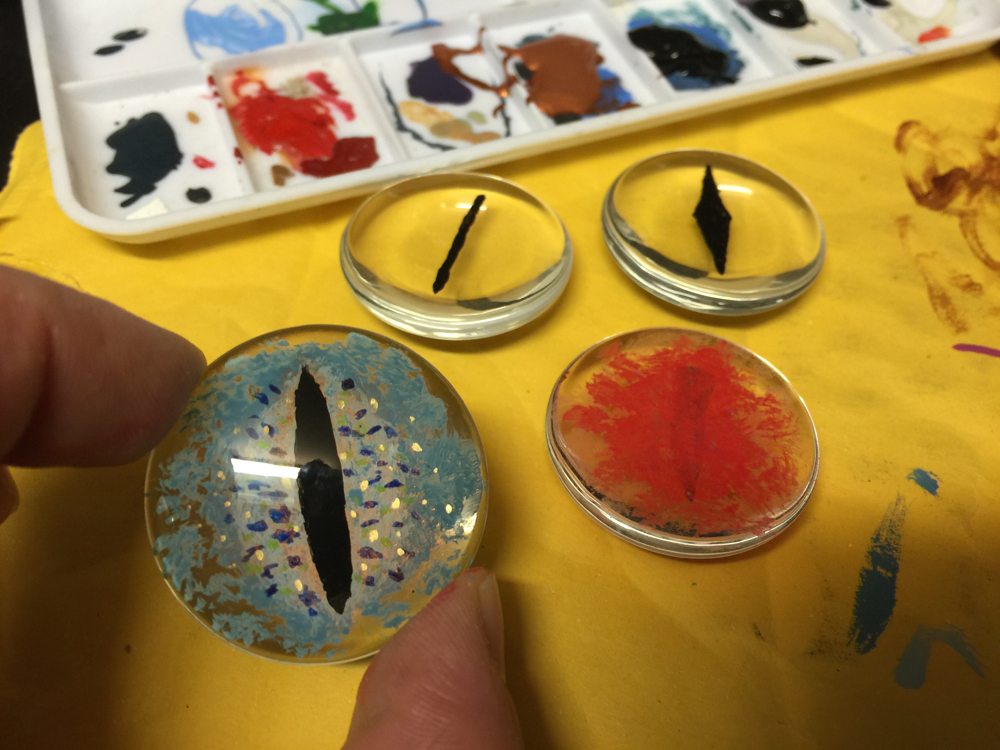
- 35mm Round Glass Cabochons: At first I bought some at Michaels, but they weren’t clear, so I could not see my painted eye through the glass.
- Tacky Glue: I seem to use this for everything. I attached the painted eye to the sketch book with it. Other glues would likely work fine.
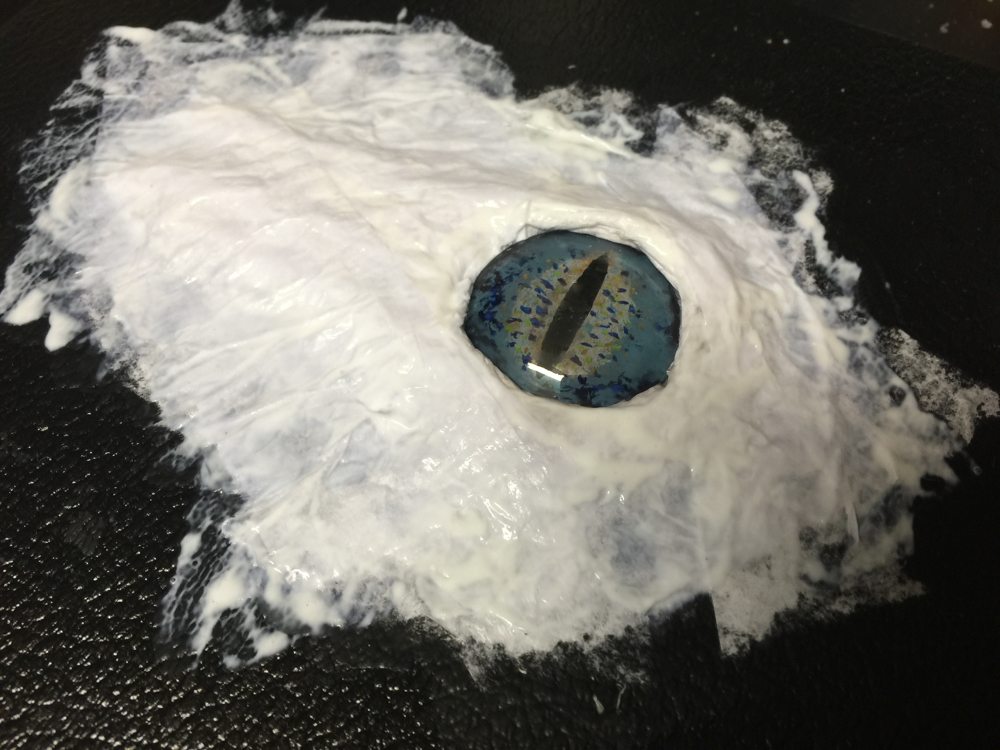
- Mod Podge Glue: Per the video. This did work great.
- Folk Art Paints: Pick a paint combination per your taste. I did not like white as a primer (as used in the video) since when I opened the book, cracks developed and the white became exposed. I used black. Get a large black acrylic for all the priming. I also had a large Reaper paint set that was useful for eye details, as well as dragon scale highlights. A good supply of Folk Art, or other paint brand would be fine too.
- Spray Finish: I used Matte, you may prefer glossy.
- Decorative Paper: (optional) I used this for end sheets. It’s not necessary, but it does result in a slightly higher-class looking book. If you do this you’ll also want spray glue.
- I also had a good supply of varying size paint brushes and tissue paper (gift/filler style).
- Last, you need a great many egg shells!
Again, everything you need to know is covered in the videos, Alchemy Themed Altered Dragon Book, and Polymer Clay Dragon’s Eye Tutorial. As already mentioned I made the following main modifications.
- Instead of printing a dragon eye, I painted eyes on 35mm round glass cabochons. This is the most enjoyable part and the eye ends up looking much more realistic.
- I kept the books as functional sketch books rather than making the alchemy book with drawers.
- I did not prime with white, instead using black.
- I just used the eye painting part of the Polymer Clay Dragon’s Eye Tutorial. I did not build the eye socket with polymer clay.
- Note: Be very careful when painting not to get paint on the edge of the book pages. Use wax paper as described in the video to protect the pages.
The following images show varying steps in my process of building eight of these for Christmas gifts for my kids and some of their cousins.


This was a fun project that without much necessary skill generated some pretty good results. My favorite was the red dragon as it was the most obviously dragon of the bunch. They all leave me wondering just how this slab of dragon skin came to be on these books!


Those are really cool! I think my kids would love this … might have to give it a try ourselves…
It was pretty easy. I think it would be a fun project with the kids if they have the patience for all the egg shells. Which reminds me, I also used a tool, like one in this set below, to move/position each egg piece.
http://www.amazon.com/gp/product/B000SVRSRY/ref=as_li_qf_sp_asin_il_tl?ie=UTF8&camp=1789&creative=9325&creativeASIN=B000SVRSRY&linkCode=as2&tag=ryan035-20&linkId=4O756UPG76F7CELO
Tweezers, toothpick, or the like would also probably work fine.