
I’ve built a number of 3D printers over the last few years, and I’ve had a chance to sit down and actually use even more of them… all mix of brands and models. One of the questions I hear most often from friends and colleagues about 3D printers is “how hard are they to setup and use?”
The answer to that question depends on the printer, of course, but the amazing thing about 3D printers over the last few years is just how out-of-the-box simple some of these things have become. I thought it might be fun to actually document the unboxing and setup of a 3D printer for GeekDad readers, so that’s what I’m going to do here with the new Metal Simple from Printrbot. I’m going to shoot some photos as I unbox, unpack, setup and begin printing… and hopefully convince anyone nervous about purchasing a 3D printer (or at least the Simple) that they needn’t worry.
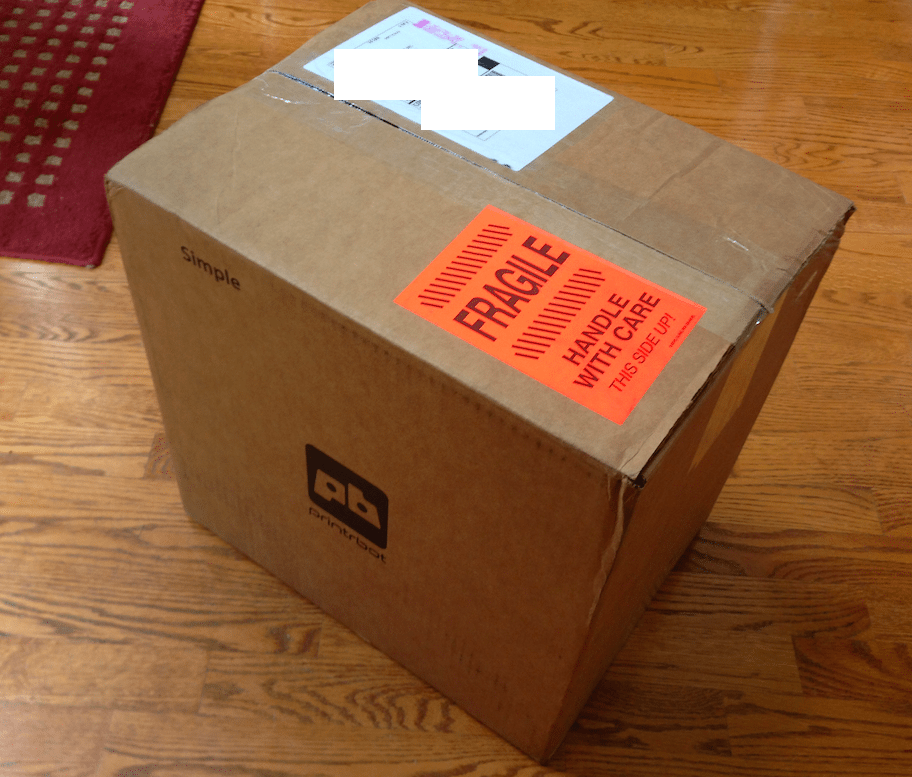
First, the Printrbot Metal Simple arrives in a big brown box with a big orange sticker — FRAGILE.
After opening the box, it’s probably best you don’t start pulling things out willy-nilly. The folks at Printrbot know this well, so look at that… another nice big notice that it’s best to open a web browser and visit printerbot.com/simple. Okay, I’ll do that.

Nice! The website appears to have a step-by-step walkthrough that will show me how to unpack and set my new 3DP up. I’ll just click that Begin button…

There really are two handles cut into the cardboard shell, so after lifting the 3DP out of the box, I’ve placed it on my wife’s nice dining table where it will make a great conversation piece with future dinner guests.

Sure enough, inside were all the items listed on the website — 3DP, power supply, filament, micro USB cable, and two small wooden wrenches and a plastic spacer. Also, the documentation says to cut the zip tie at the back and undo the small M3 screw and washer… so those are gone. Can I interrupt here and tell you just HOW COOL this thing looks on the dining table? My wife is going to going to love it… modern art, if you will.

Okay, four steps in and everything is unboxed and accounted for… there’s even a big “I Did It. Success!” button to click that will let me Tweet or send an email to my friends and family to let them know I am unstoppable!

Before I get too comfortable with my success, I noticed just above the blue button is a link for “Setting Up Your Auto-Leveling Probe and Your First Print.” Let me click that… and now I’m taken to another webpage where it appears I’ll be doing some configuration on my new 3DP. Cool!

The instructions tell me that the Auto-Leveling Probe was setup at the factory (for pre-built units like mine), so I get to skip that step and go straight to prepping for a test print. Do take note that there’s an actual YouTube video that walks you through calibrating the Auto-Leveling Probe — you’ll need to do this occasionally, and after watching the video it really doesn’t appear all that difficult — just don’t loose the two wrenches or that super-important spacer!
I’m told to put down some blue painter’s tape on the print bed… Okay… done! (A heated bed is in testing/beta for the Simple, so I’ll be upgrading to that hopefully very soon.)

Power plug goes in… and micro USB cable is connected to Simple and my laptop. Done!

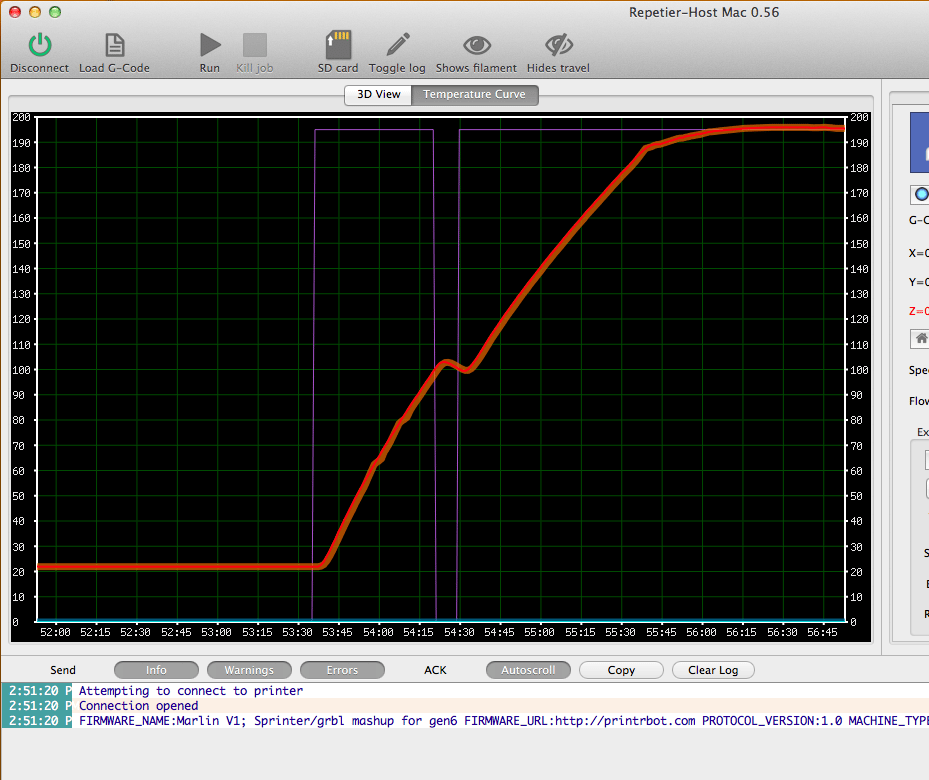
Now I’m supposed to open Repetier and click the Connect button. (Repetier is the software that my laptop will use to communicate with the Simple. A link to download the free software is on the Simple website and instructions for installing it were also easy to follow.) After opening Repetier and clicking the Connect button, I see the button is green and I’ve got a connection!

I’m told to next go to the Print Panel and make four settings in a very specific order — Heat On, Home X, Home Y, Stop Motor

I’m supposed to watch the Temperature rise… and it gets up there fast!
Next, I’m told to configure Slic3r, the special software (built into Repetier). Don’t confuse the Print Settings button with the Printer Settings button — two different buttons with too similar naming convention.

And now it’s time to add some filament! I compressed the spring as shown on the webpage and pushed the filament end down into the hole on top, through the notched gear, and into the hot-end. And yeah, there was some dark gray filament already coming out of the nozzle… from the testing at the factory… no worries!

Next I’m asked to rotate the top lead screw counter clockwise… this raises the hot end away from the printbed.

Next, I return to Repetier. After entering some G Code (M212 X0 Y0 Z0, M500, M501), the next step is to “load G Code” — I had already downloaded the g code file for the FirstCube.g so I just browsed to its location and clicked Open. The g-code is visible on the right and in the left window I can see the small square that will be printed.

Next, I’m told to click Run. Crossing fingers!
And, just as the documentation states… the first print is likely to be a mess! Not a problem! I expected this and now must do a little troubleshooting to dial-in the exact settings of my 3DP. This means double-checking the Auto-Leveling Gauge and probably reconfiguring it (I noticed that when the print job started, the nozzle was actually a few mm off the print bed and this isn’t correct… it should be much closer.)

But here’s the deal — I let the initial print run go anyway. It might have been a mess on the first few layers, but after those layers were done, the FirstCube started looking REALLY good. See photo below.

The instructions state that if the initial few layers are messy it most likely means the Z-axis starting position is too high (off the print bed). There’s even a small fix for that in the instructions. At this point, it’s just Rinse-and-Repeat until I’ve dialed in the correct starting distance for the Z-axis, and that will probably require 2-3 (or more) test prints. I’ve got time, and it will be time well spent.
[… a few hours later…]
I’ve dialed in quite a few configuration settings and also now have the hot end’s distance from the print bed figured out (mostly). I’m still learning to use some of the Repetier software settings I wasn’t already familiar with, and I’m seeing good results. Below is a photo of the first cube print (center), the second (left), and the latest (farthest to the right).

Now I’m going to spend some time with a few suggestions I’ve read online — applying some sand paper lightly to the blue painters tape as well as some isopropyl alcohol rubbed on the surface. Will try both separately and then together and see what kinds of results I get. (The alcohol is supposed to help with a cleaner adhesion of plastic and the sanded surface is supposed to help as well with that first layer.)
For grins, I downloaded an object I designed in Tinkercad (shameless plug here) — it’s a small dog tag I made to clip on to my son’s backpack for a special award he received at school. I didn’t finish printing it, but you can see below that the star is almost perfect; there are a couple stray plastic strands that, when cut away, will make that star hole stand out. The circle on the other end is almost perfect as well (a slight bump that was caused when I killed the job and the melted plastic continued to come out — I raised the Z-axis but not fast enough).

For anyone who’s been wondering about this 3D Printing thing, I do hope this provided you with some additional information that you might not have had. Just a few years ago, new 3DP owners would have had to spend hours and hours building their own 3DP plus additional hours troubleshooting it and tweaking settings and tightening belts and re-aligning bearings and all sorts of craziness. As you can see, 3DP has come a long way towards a true Out-of-the-Box experience. The Metal Simple did require a few tweaks on my end, but the videos created by Printrbot answered my questions and gave me the confidence to get my 3DP up and running quickly (and the forum was able to answer two questions quickly – responses were up in less than 5 minutes after I posted them).
Of course, this is the fully assembled version of the Metal Simple, so if you get the kit you can expect to spend more time on getting it assembled and printing. Most 3DP companies these days seem to be offering both kit and pre-assembled (although some 3DP companies are now offering only fully-assembled units, no kits).
If you’re looking for something that can get you printing quick, I can vouch for the Metal Simple. It’s solid and doesn’t have that homemade feel to it. It feels like a polished machine, ready to go.
I’m itching to go print some more, so I’ll wrap this up by thanking Brook Drumm and the crew at Printrbot for a great little 3DP. This isn’t a test unit… I bought this one. It’s mine, and it’s staying with me! My sons and I are really going to have some fun…


I had pre-ordered one of these as my first 3D printer ever. From this post… documentation and initial setup has been improved a LOT sine then.
I am fairly adept at picking up on tech, but no experience with this tech specifically. So I am not sure what it means when I say that I was able to run the thing without much difficulty.
There were stumbling blocks along the way. But with a pre-assembled printer, it worked fairly well early on, and so I knew that there was only one issue to figure out whenever something went wrong.
I did bang my head against a wall for a few weeks with one of the issues. But then I got onto the printrbot forums and started reading and asking, and now know a TON about 3D printers (and have cleared up my issue for the most part).
If you have the money available for playing with a new toy… this is a GREAT toy to play with. So many nice toys you can make for so cheap. Though you will rather quickly start drooling over bigger and fancier printers.