This is a guest post by Daniel H. Wilson, author of Robopocalypse and the brand-new Robogenesis. But he doesn’t just write books about robot uprisings—he’s also a geek dad himself. Check out this awesome spacecraft simulator he built for his kids.

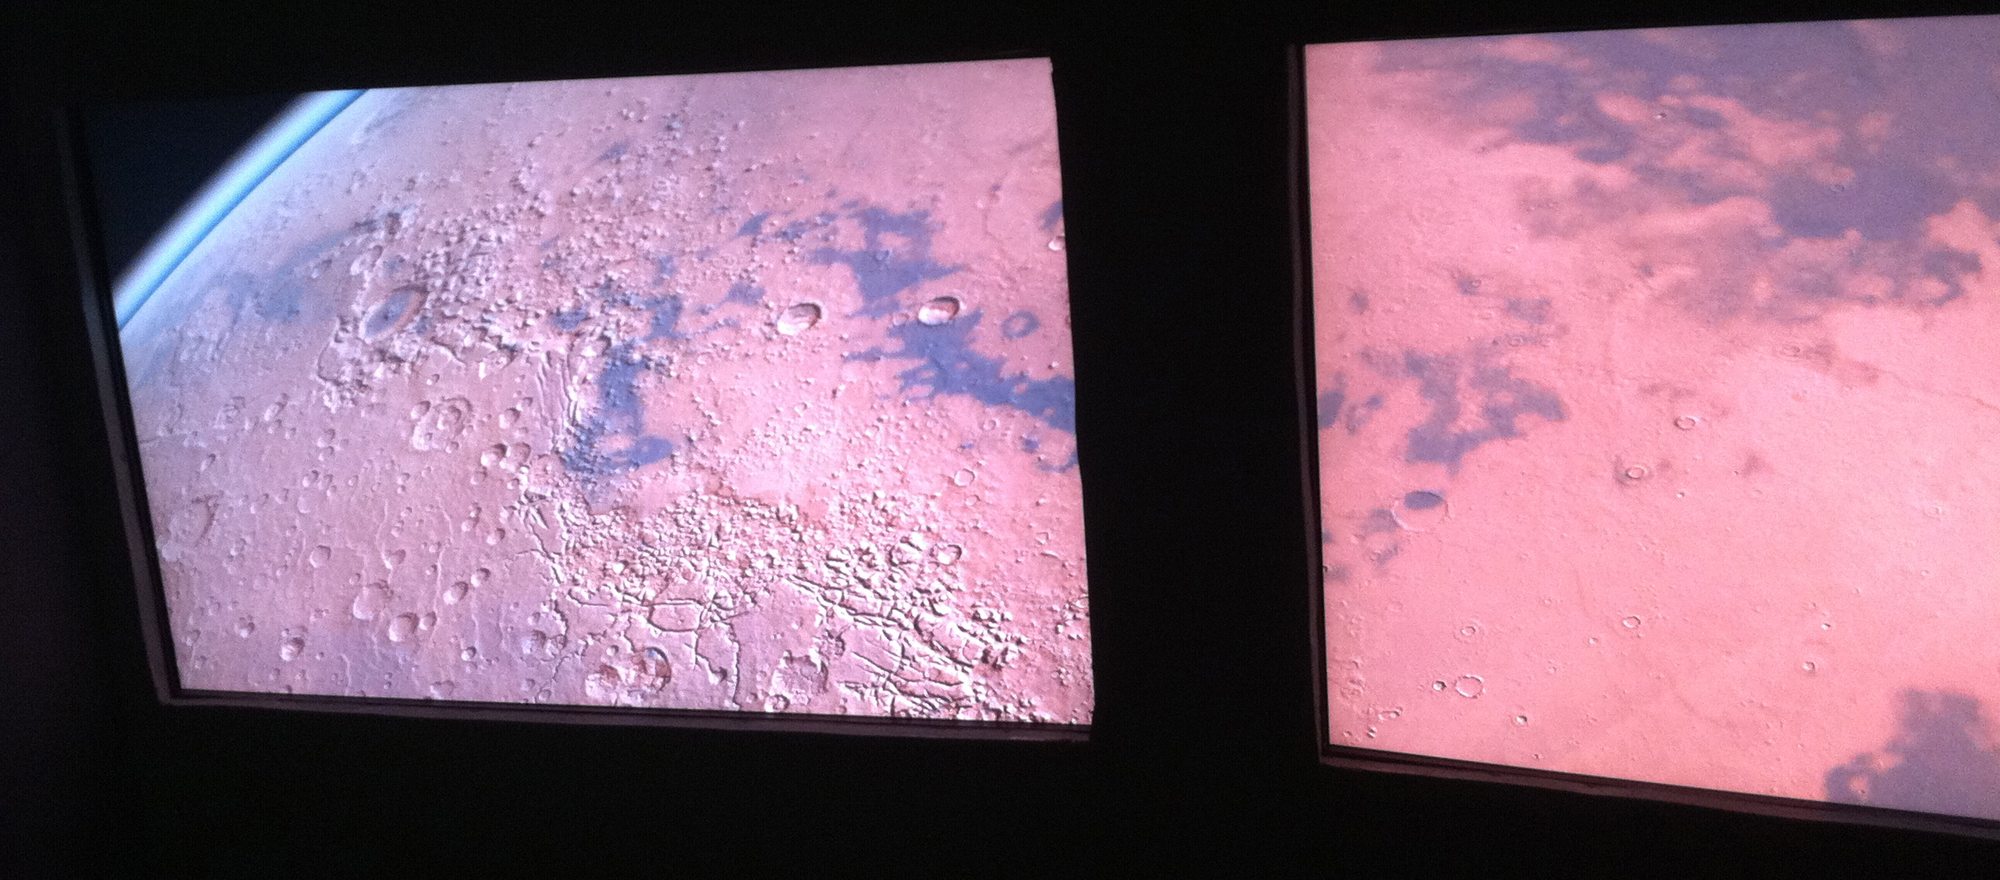
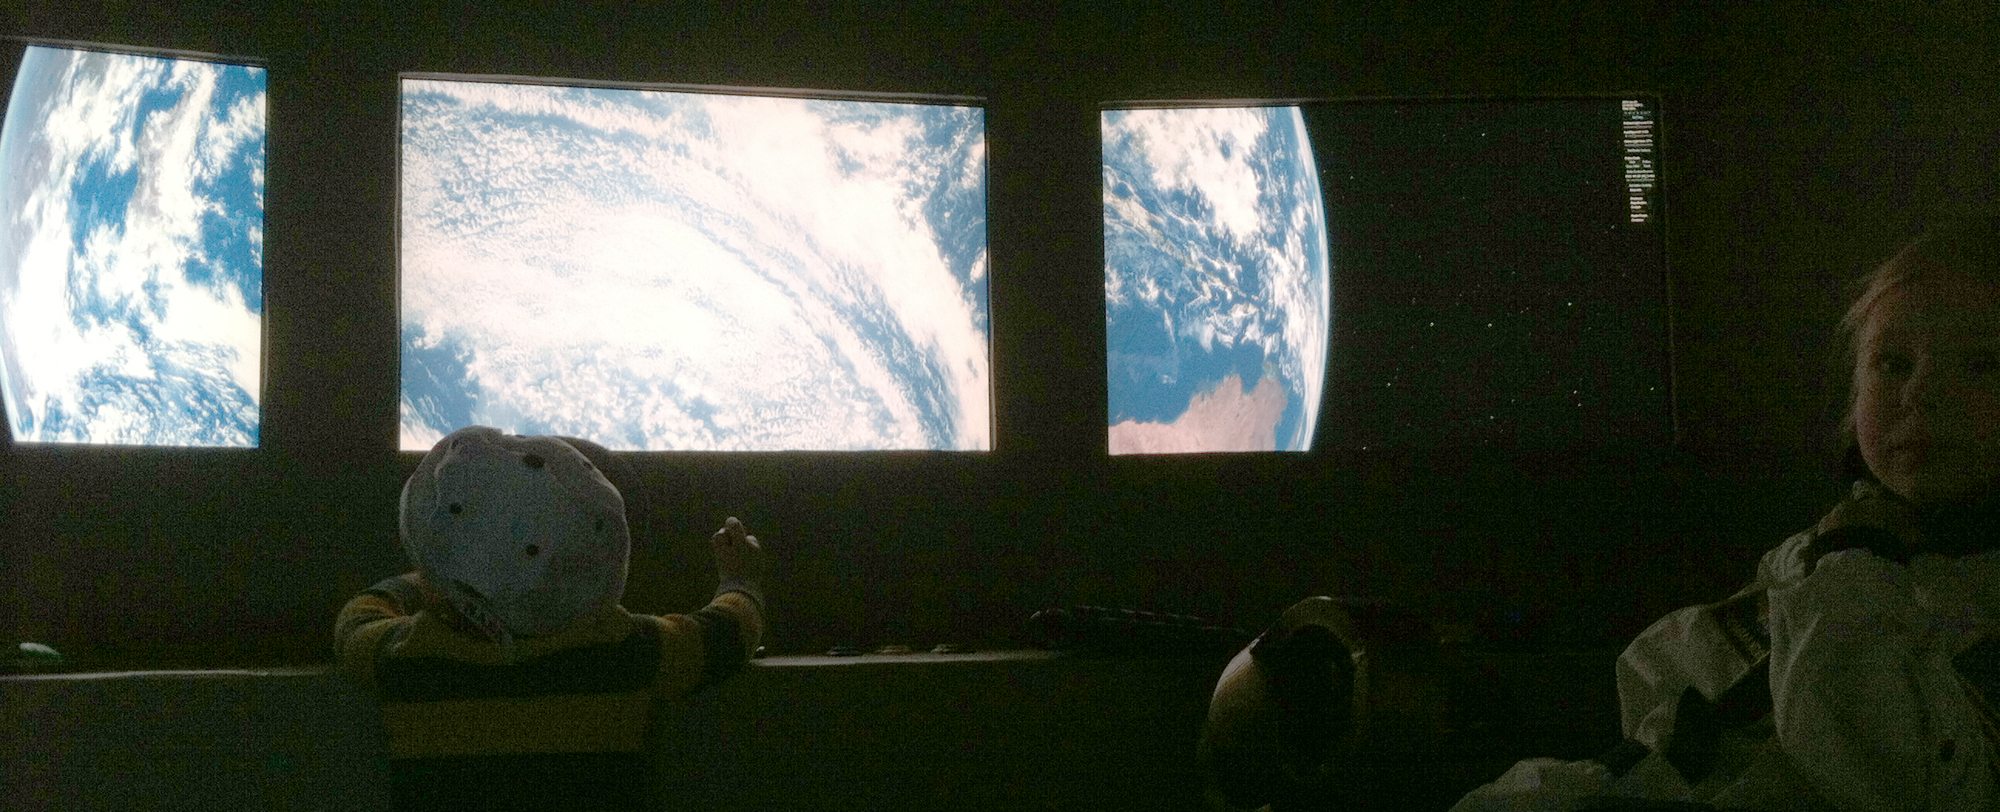
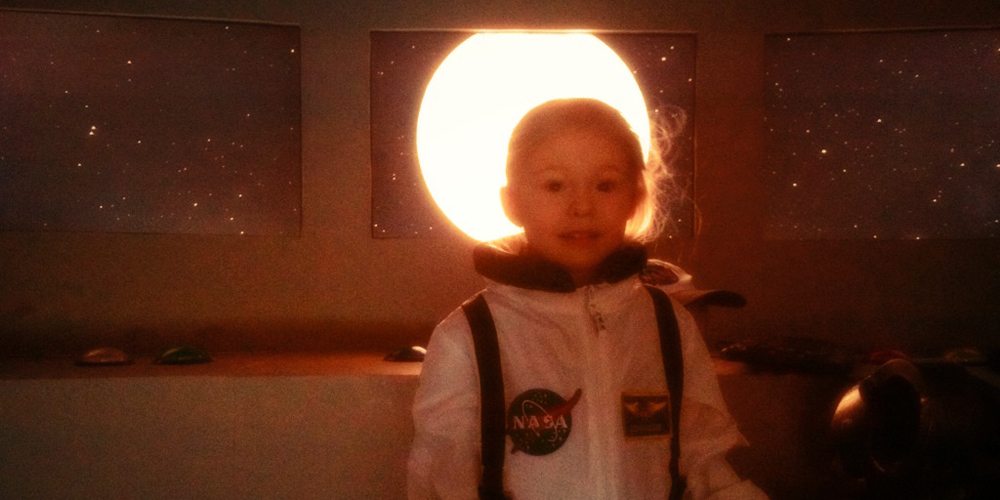
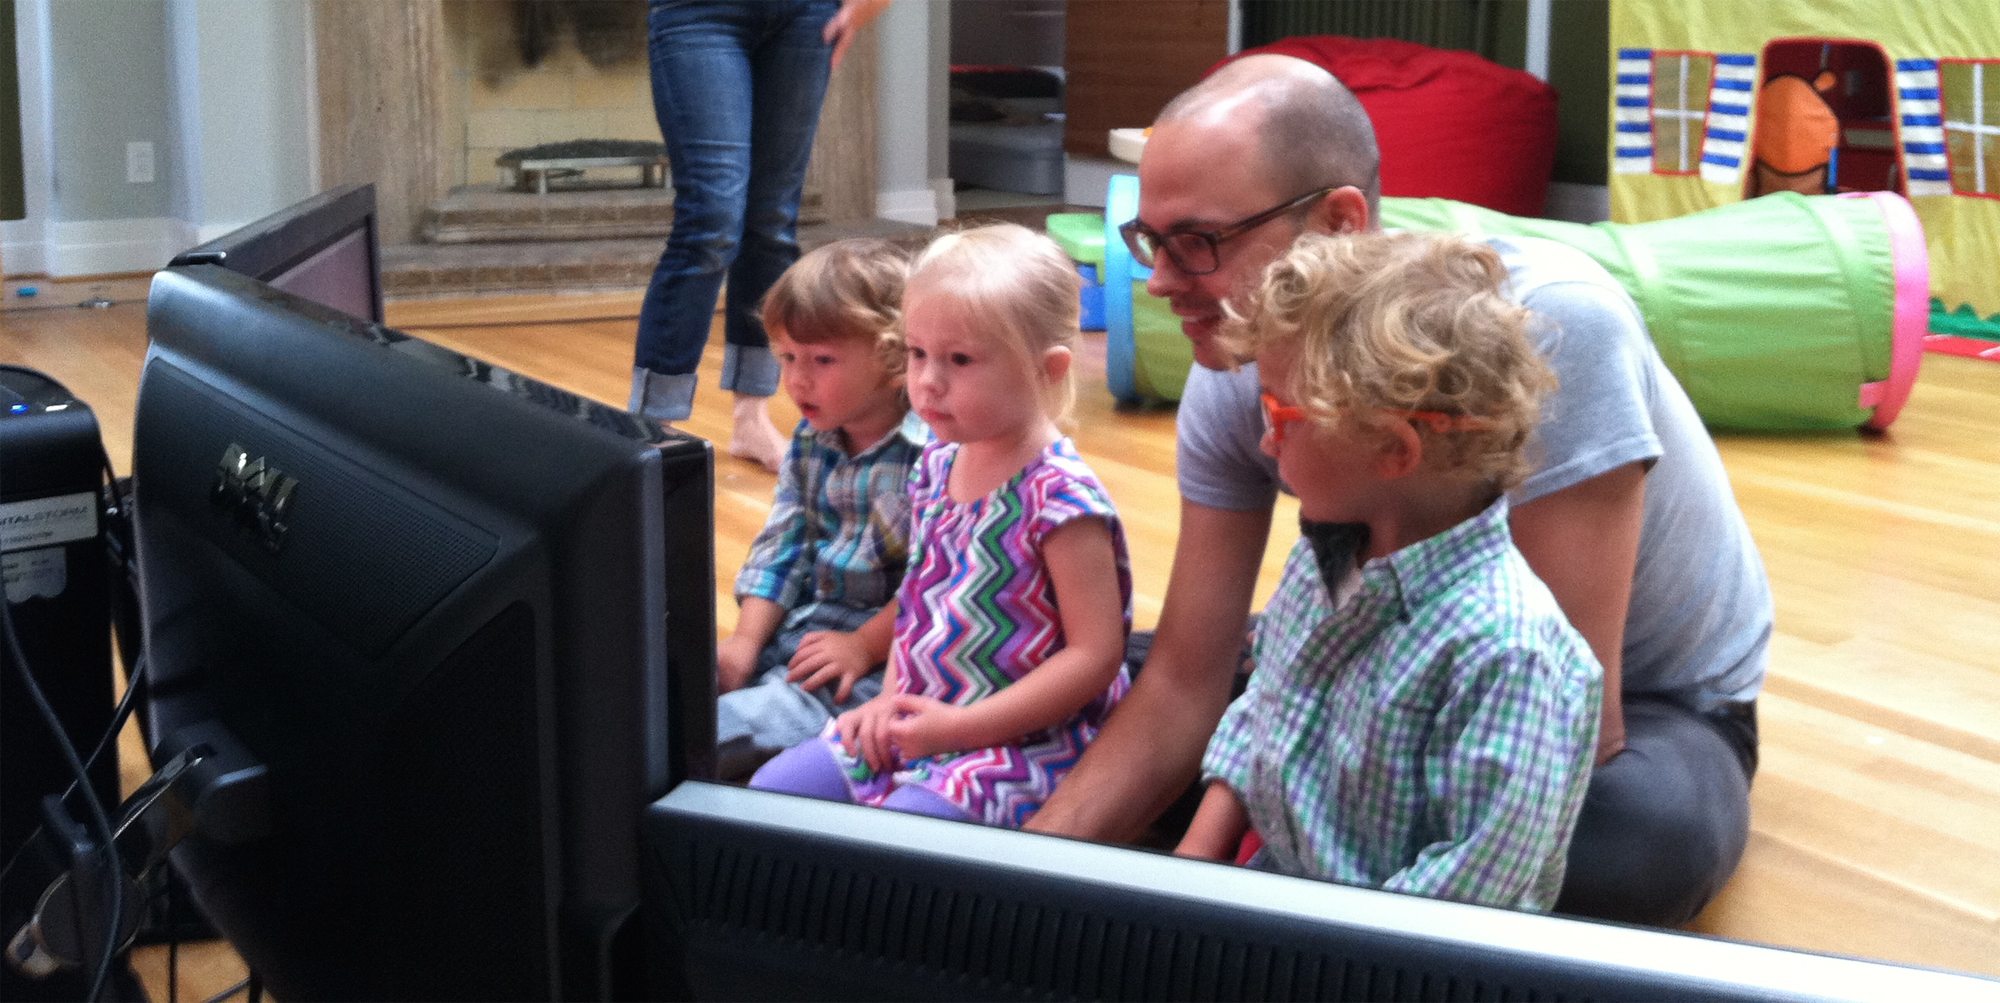
This morning I was hanging in orbit over the nightside of North America, looking down on the Earth through the three windows of my cupola as city lights appeared like a glowing tattoo over the slowly rotating orb. Then, my excitable one-year-old son mashed the big red button and our spacecraft suddenly leapt across the void, headed toward Mars. My three-year-old daughter quickly put us into orbit over the polar ice caps and I gaped as Phobos streaked past our starboard bow.
It bears explaining that last spring I built a spaceship simulator in my basement. Today I’m going to explain how I did it, and how you can do it, too.
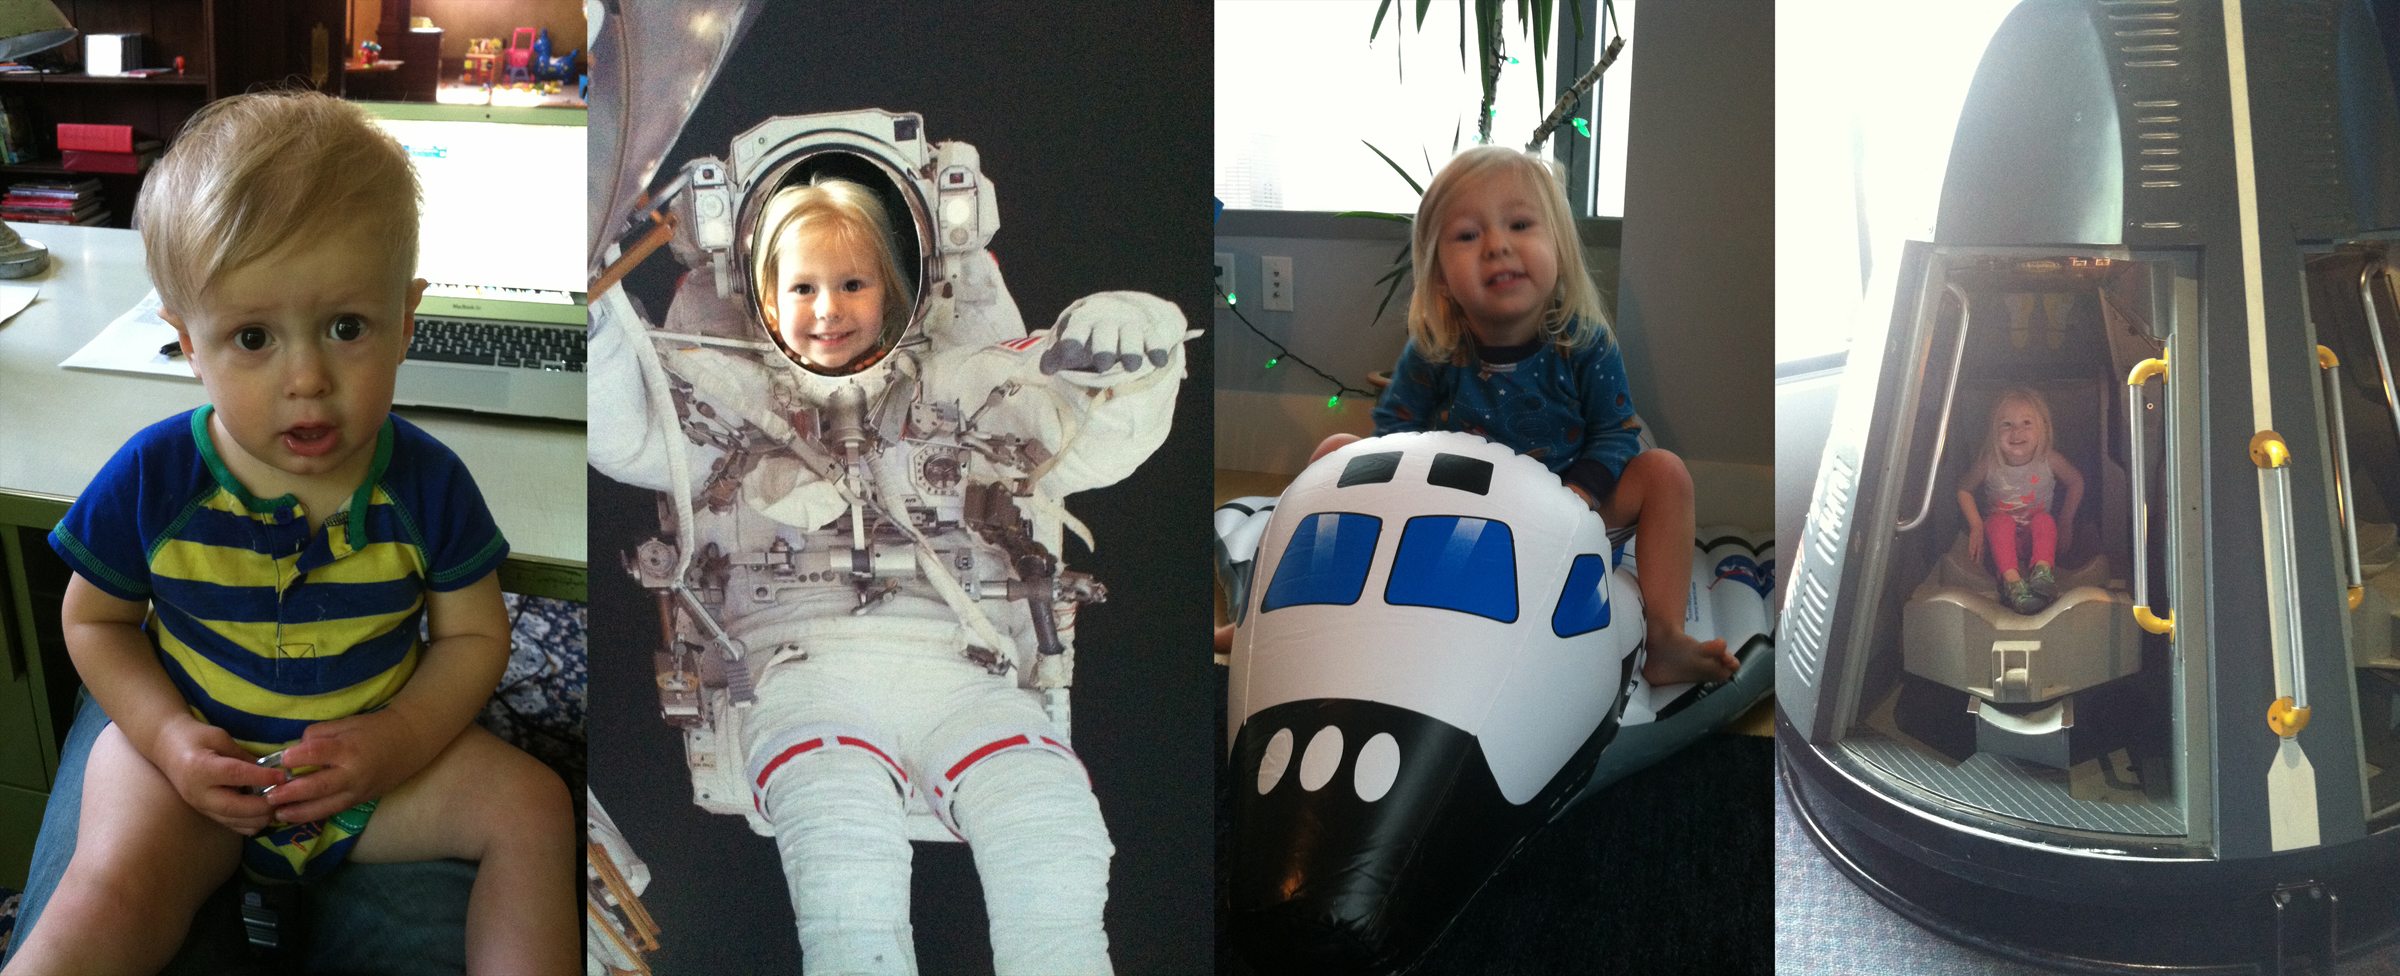
I happen to have two kids who are excited about planets and astronauts and outer space, and I’ve got a pile of dormant gaming hardware gathering dust (thanks to the aforementioned kids). Maybe you do, too. If so, read on to learn how to build your own badass spaceship simulator with a large fun-to-investment return.
(Note: Unlike a lot of dads I see posting projects on the Internet, I took the traditional approach and half-assed most of this. So be aware that this project can be accomplished with a beer in your other hand.)
Overview
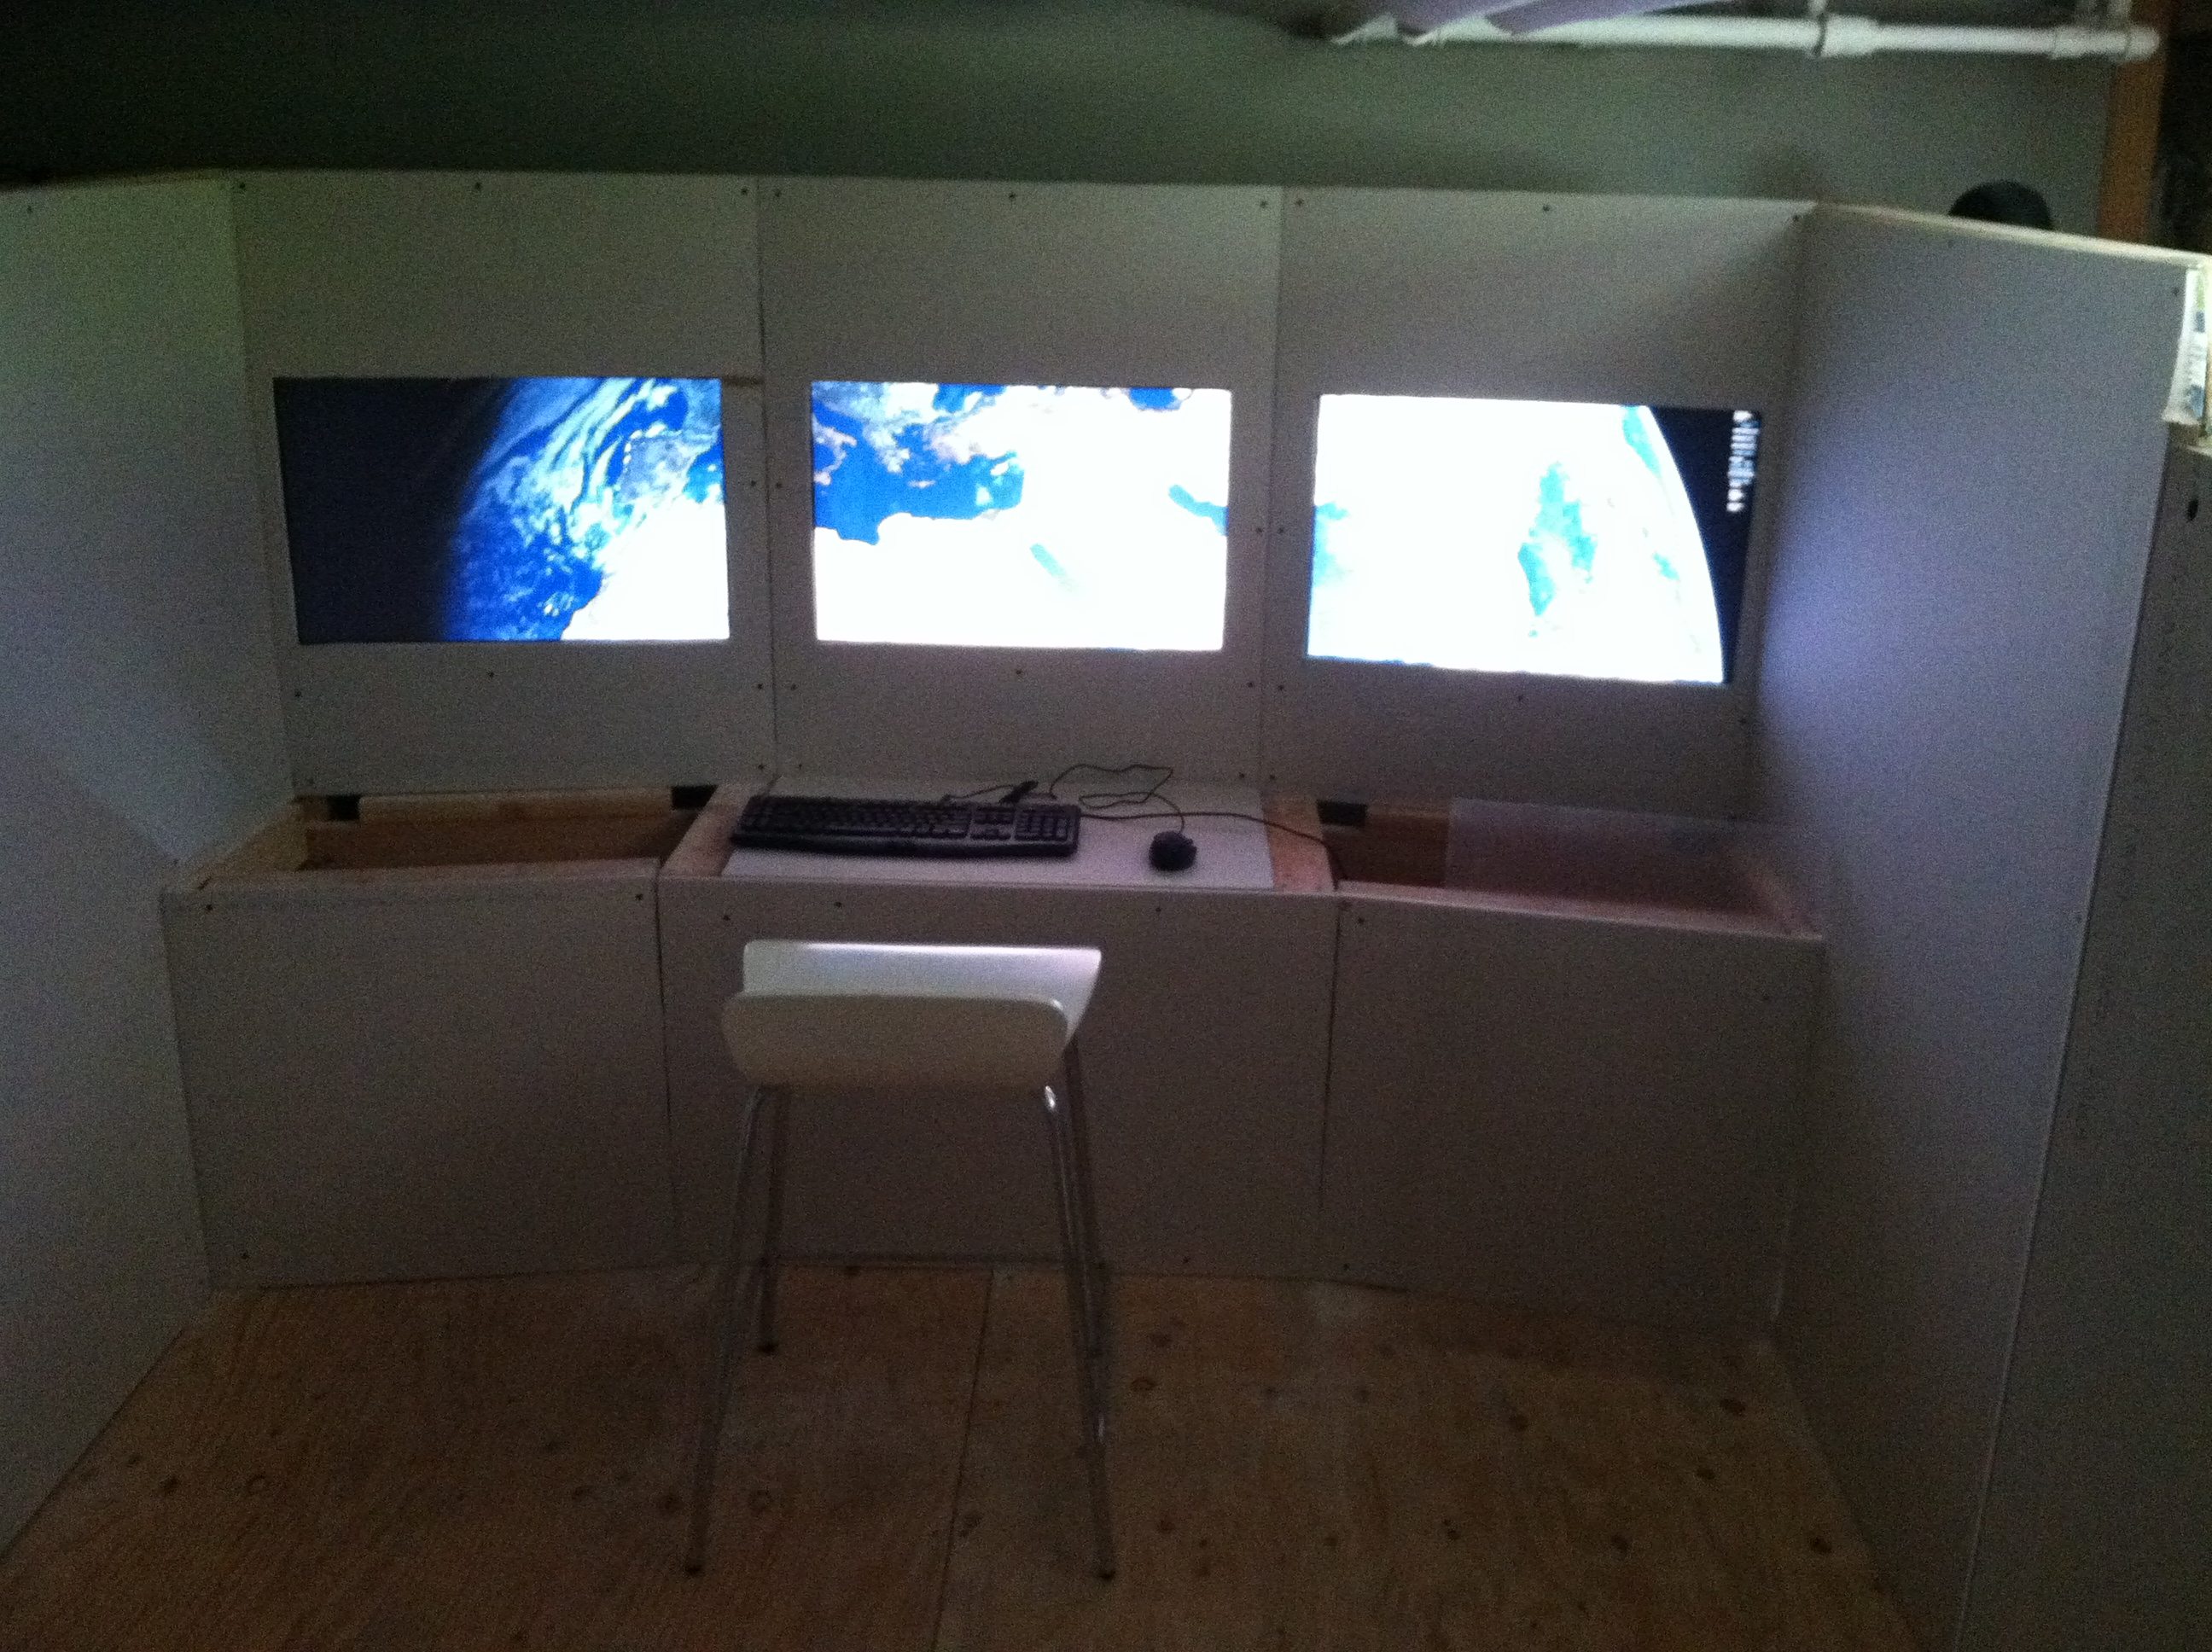
The spaceship simulator is comprised of a computer, three displays, and buttons that are mounted into a fun enclosure that resembles a spaceship on the inside. The kids can hit the buttons to navigate through a realistic (and real-time if you want) simulation of the solar system—all while looking out through the “windows.”
Computer Hardware
The first thing is to assemble your hardware and get the simulation running. I had an aging gaming PC laying around, which was lucky. But you will need to scrape together a PC capable of running two or three displays at once (one is just boring!). It doesn’t have to be the fastest machine around because the space simulation software scales well, but the video cards do have to play nice with each other.

Using NVIDIA video cards, I was able to use SLI “spanning” mode to combine three monitors into one display. Using SLI was important because you must take into account the “bezel” space, i.e., the framing around the monitors. This is vital, because it makes the monitors look like real windows as objects disappear behind the frame and reappear on the next monitor. Whichever video cards you pick up, make absolutely sure that they can do the equivalent.
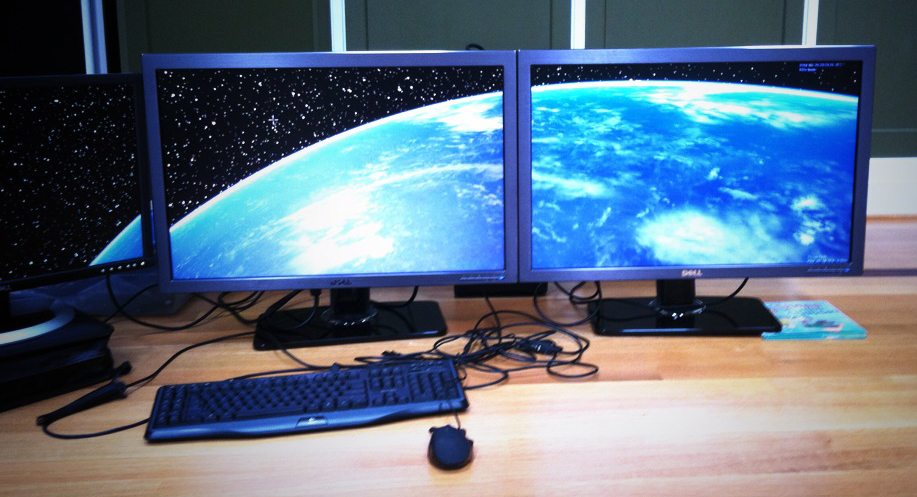
The illusion works best if the monitors are exactly the same, but based on fooling with the display modes you could conceivably make this work with different size monitors. It’s tempting to want to stick the monitors far apart from each other (one in the ceiling, right? Or put them on the walls like portholes) but I don’t know how to make the space simulation software properly render those viewpoints. Instead, the optimal layout is simply two or three monitors side by side on a flat plane. In my simulator, I used three monitors and gave the left and right monitors a slight 10 degree angle to give at least the illusion of a cupola.

Software
It was no easy feat to find a free educational computer program with lots of flexibility that allows kids to just explore the solar system without shooting anything or getting overly technical. There is a solution, however — a free program created to provide photo-realistic, real-time, three dimensional exploration of the solar system, galaxy, and universe.
Celestia! It rocks.

The Celestia website explains it best:
Celestia is an application for real-time 3D visualization of space, with a detailed model of the solar system, over 100,000 stars, more than 10,000 galaxies, and an extension mechanism for adding more objects.
Visit the Celestia Motherlode and you’ll find super high-res add-ons for all the planets, moons, and even other galaxies. Essentially, you can download the latest surface maps collected by NASA satellites and rovers, and then apply them to the objects in your solar system for RIDICULOUS high-resolution views of moons, planets, asteroids, whatever!

Celestia will run in full-screen mode over all your monitors to give a real spaceship look. You can even disable all text or add a built-in spaceship cockpit view. You’ll notice that in normal video games played in multi-screen mode, you often see major distortion on the left and right monitors. But thanks to Celestia, you can also set the field of vision (FOV) to eliminate this distortion. Nine degrees FOV works perfectly for me.
Finally, the best part about Celestia is that you can program your own scripts (i.e., macros). By adding real buttons for the kids to mash (because they can’t be trusted with keyboards), you can map each button to a hot-key that a Celestia script will be “listening” for. For example, I have a function for each planet that will fly the ship there and put it into orbit at the right distance, speed up time so that the planet is visibly rotating (every planet spins at a different speed, of course), and just generally just give the kid a good look.

Having a programming background certainly makes it easier to set up a Celestia script, but there are lots of resources online to help you figure out how to program this. And if you have to, just email me and I’ll share my script. There are other lessons about scripting that you’ll have to learn in the field. For example, kids will not take it easy on the buttons, so it’s a good idea to put a delay into the script to stop listening to commands that come too fast. Otherwise the kids pound the keys too fast and it confuses the program and, well, things get breaky.

Enclosure
You gotta feel like you’re inside a spaceship, right? On this, go crazy and use your imagination. But here are a few tips to make the carpentry aspect of this project go smoothly…
First, designing the enclosure was a perfect exercise for Google Sketchup. I considered other more complicated 3D programs, but Sketchup was the simplest to learn and provided plenty of accuracy for my needs. It’s a versatile program to learn, and I expect it to serve me well on future projects (I’m looking at you, tree house). Also, by making the enclosure left-right symmetric, you can just Sketchup one half and then copy and paste and mirror to get the other half.
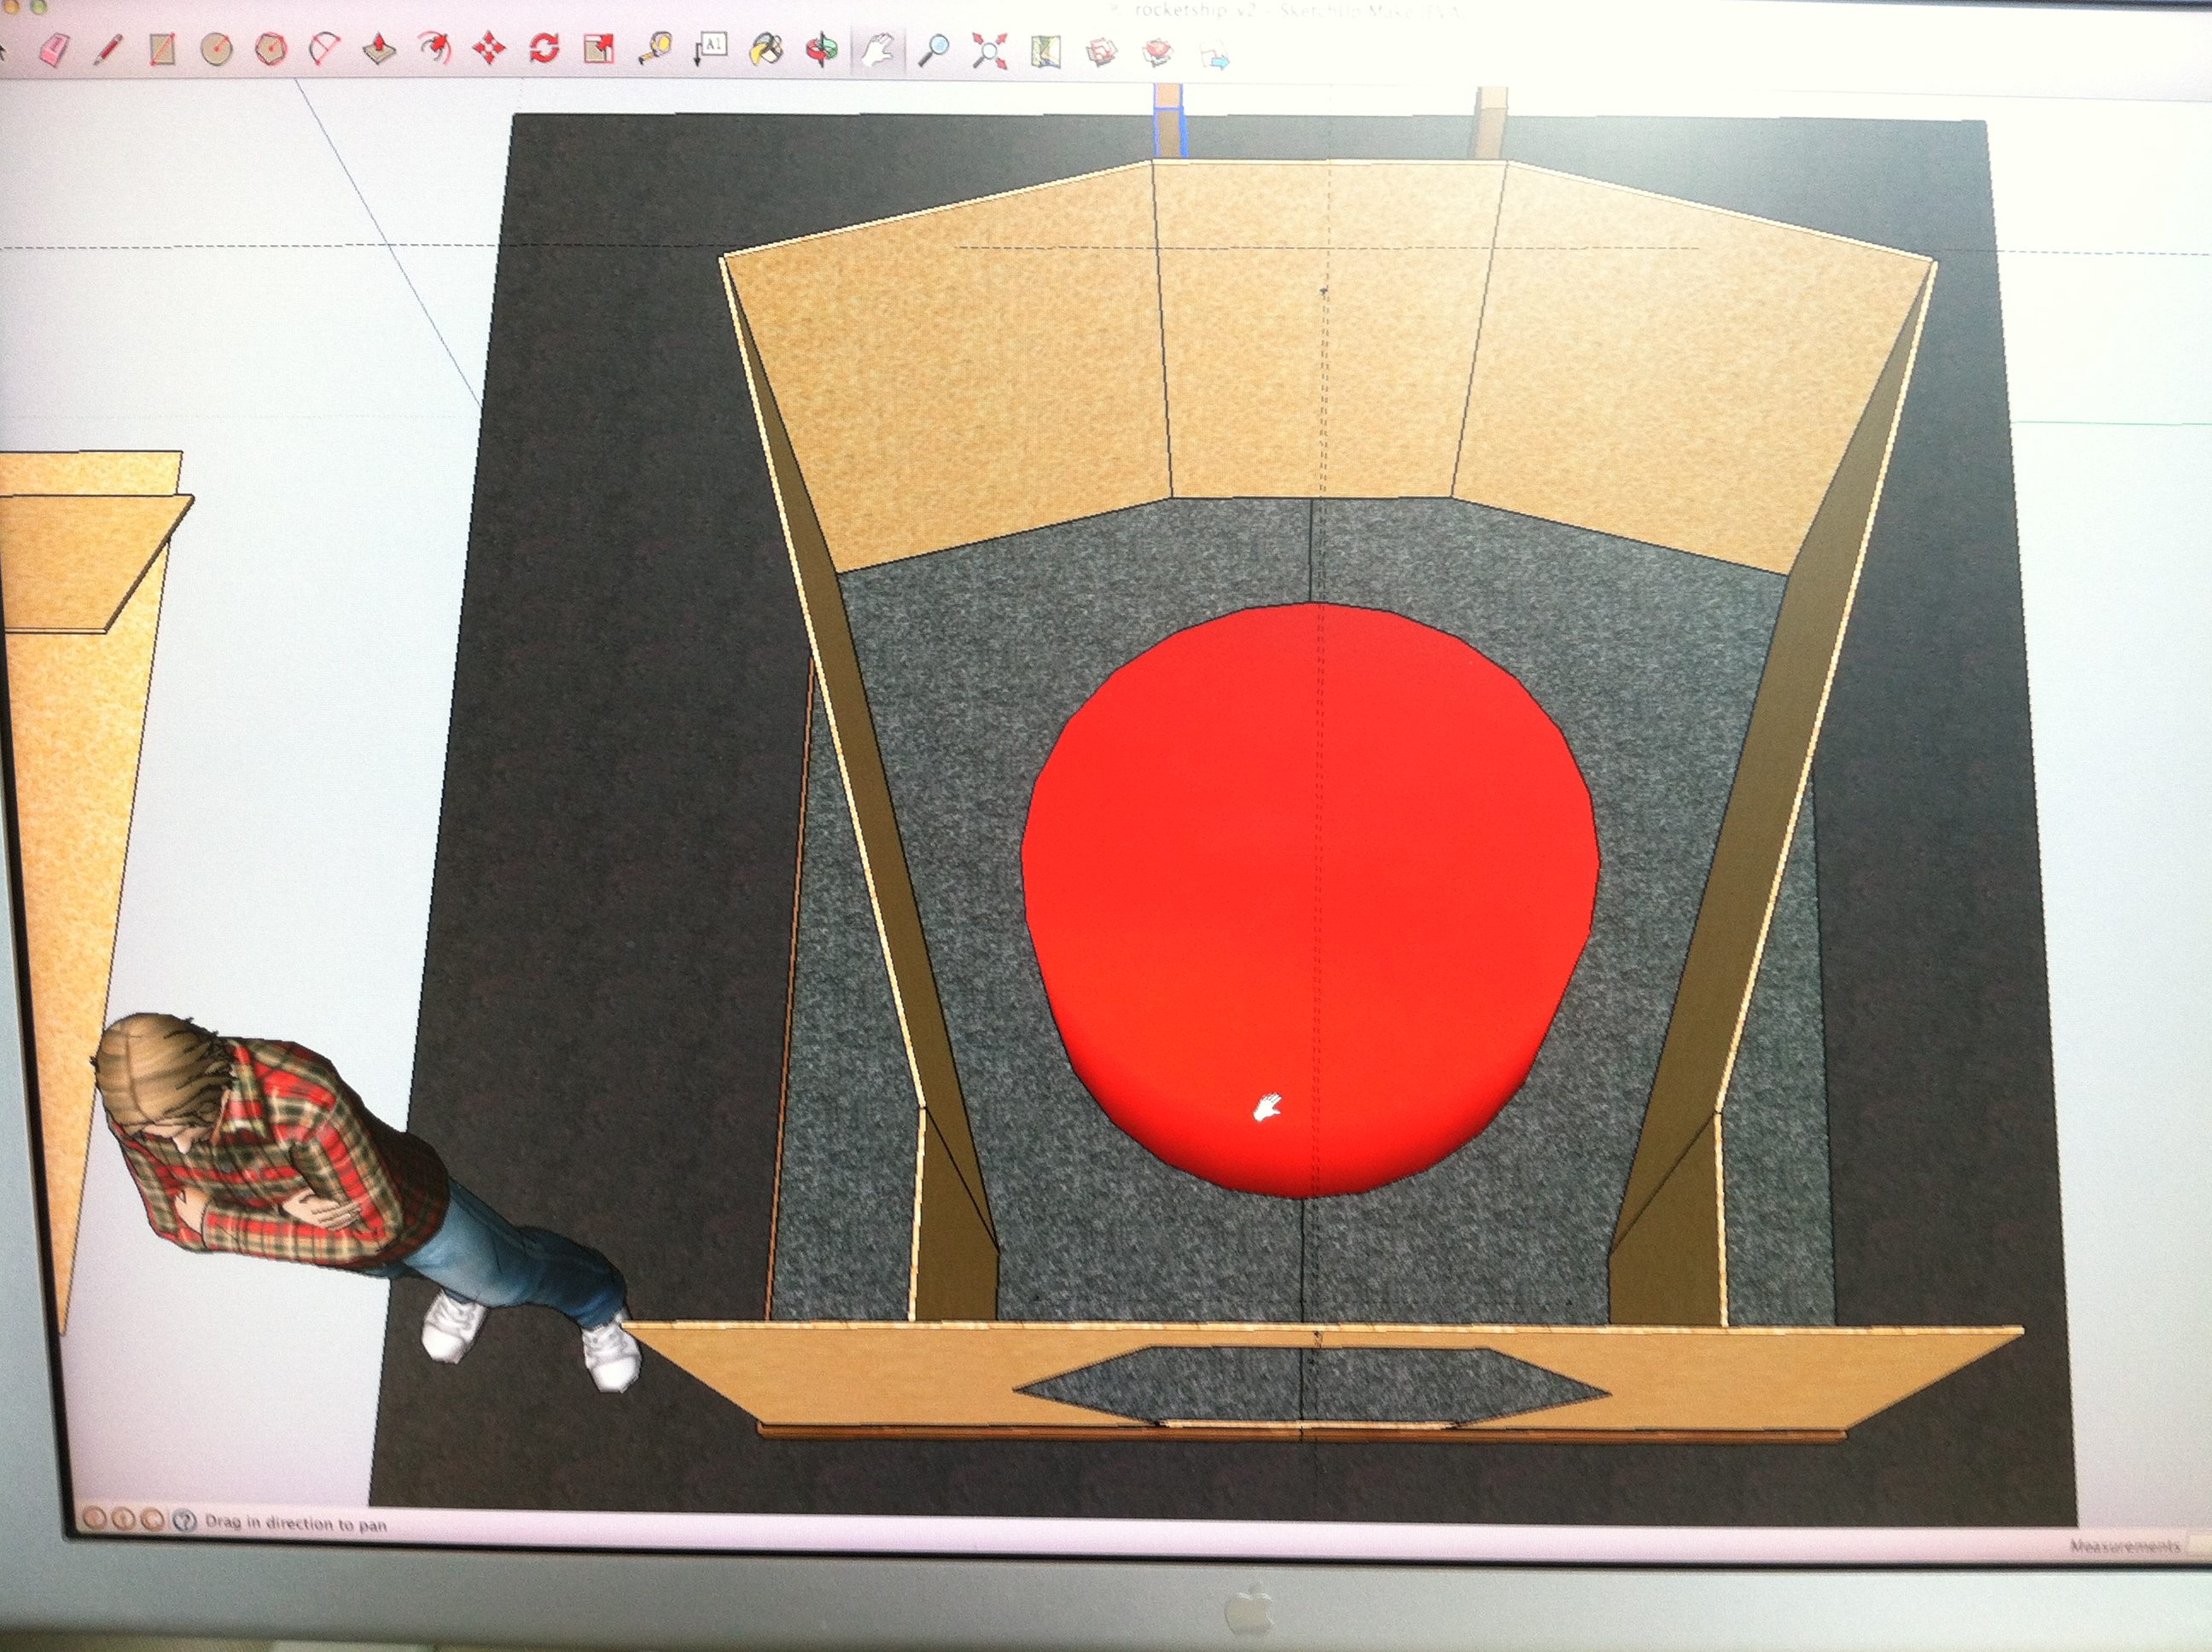
To simplify the overall design problem, create several standard “objects” up front in Sketchup, such as 4’x8′ sheets of plywood and 2x4s — anything you can buy at Home Depot. (And keep in mind that a 2×4 is not actually 2″ by 4″…) To minimize cutting and measuring, try to use these standard-size objects whenever possible in your design. Another tip: measure the size of your room first and make damn sure to leave yourself at least 3′ around the enclosure. This way you can get around the thing to work on the buttons, speakers, etc. I made the mistake of not leaving myself enough room and now it’s like a caving expedition every time I want to fiddle with a button.
Monitor placement is also key. Things look best if the monitors are at the same height, and almost in the same plane. I gave the two monitors on the right and left a 10 degree angle, to create a cockpit look without deforming the image too much. (The monitors think they are in the same plane, so planets are drawn flat and they look funny if you angle the monitors too much.)
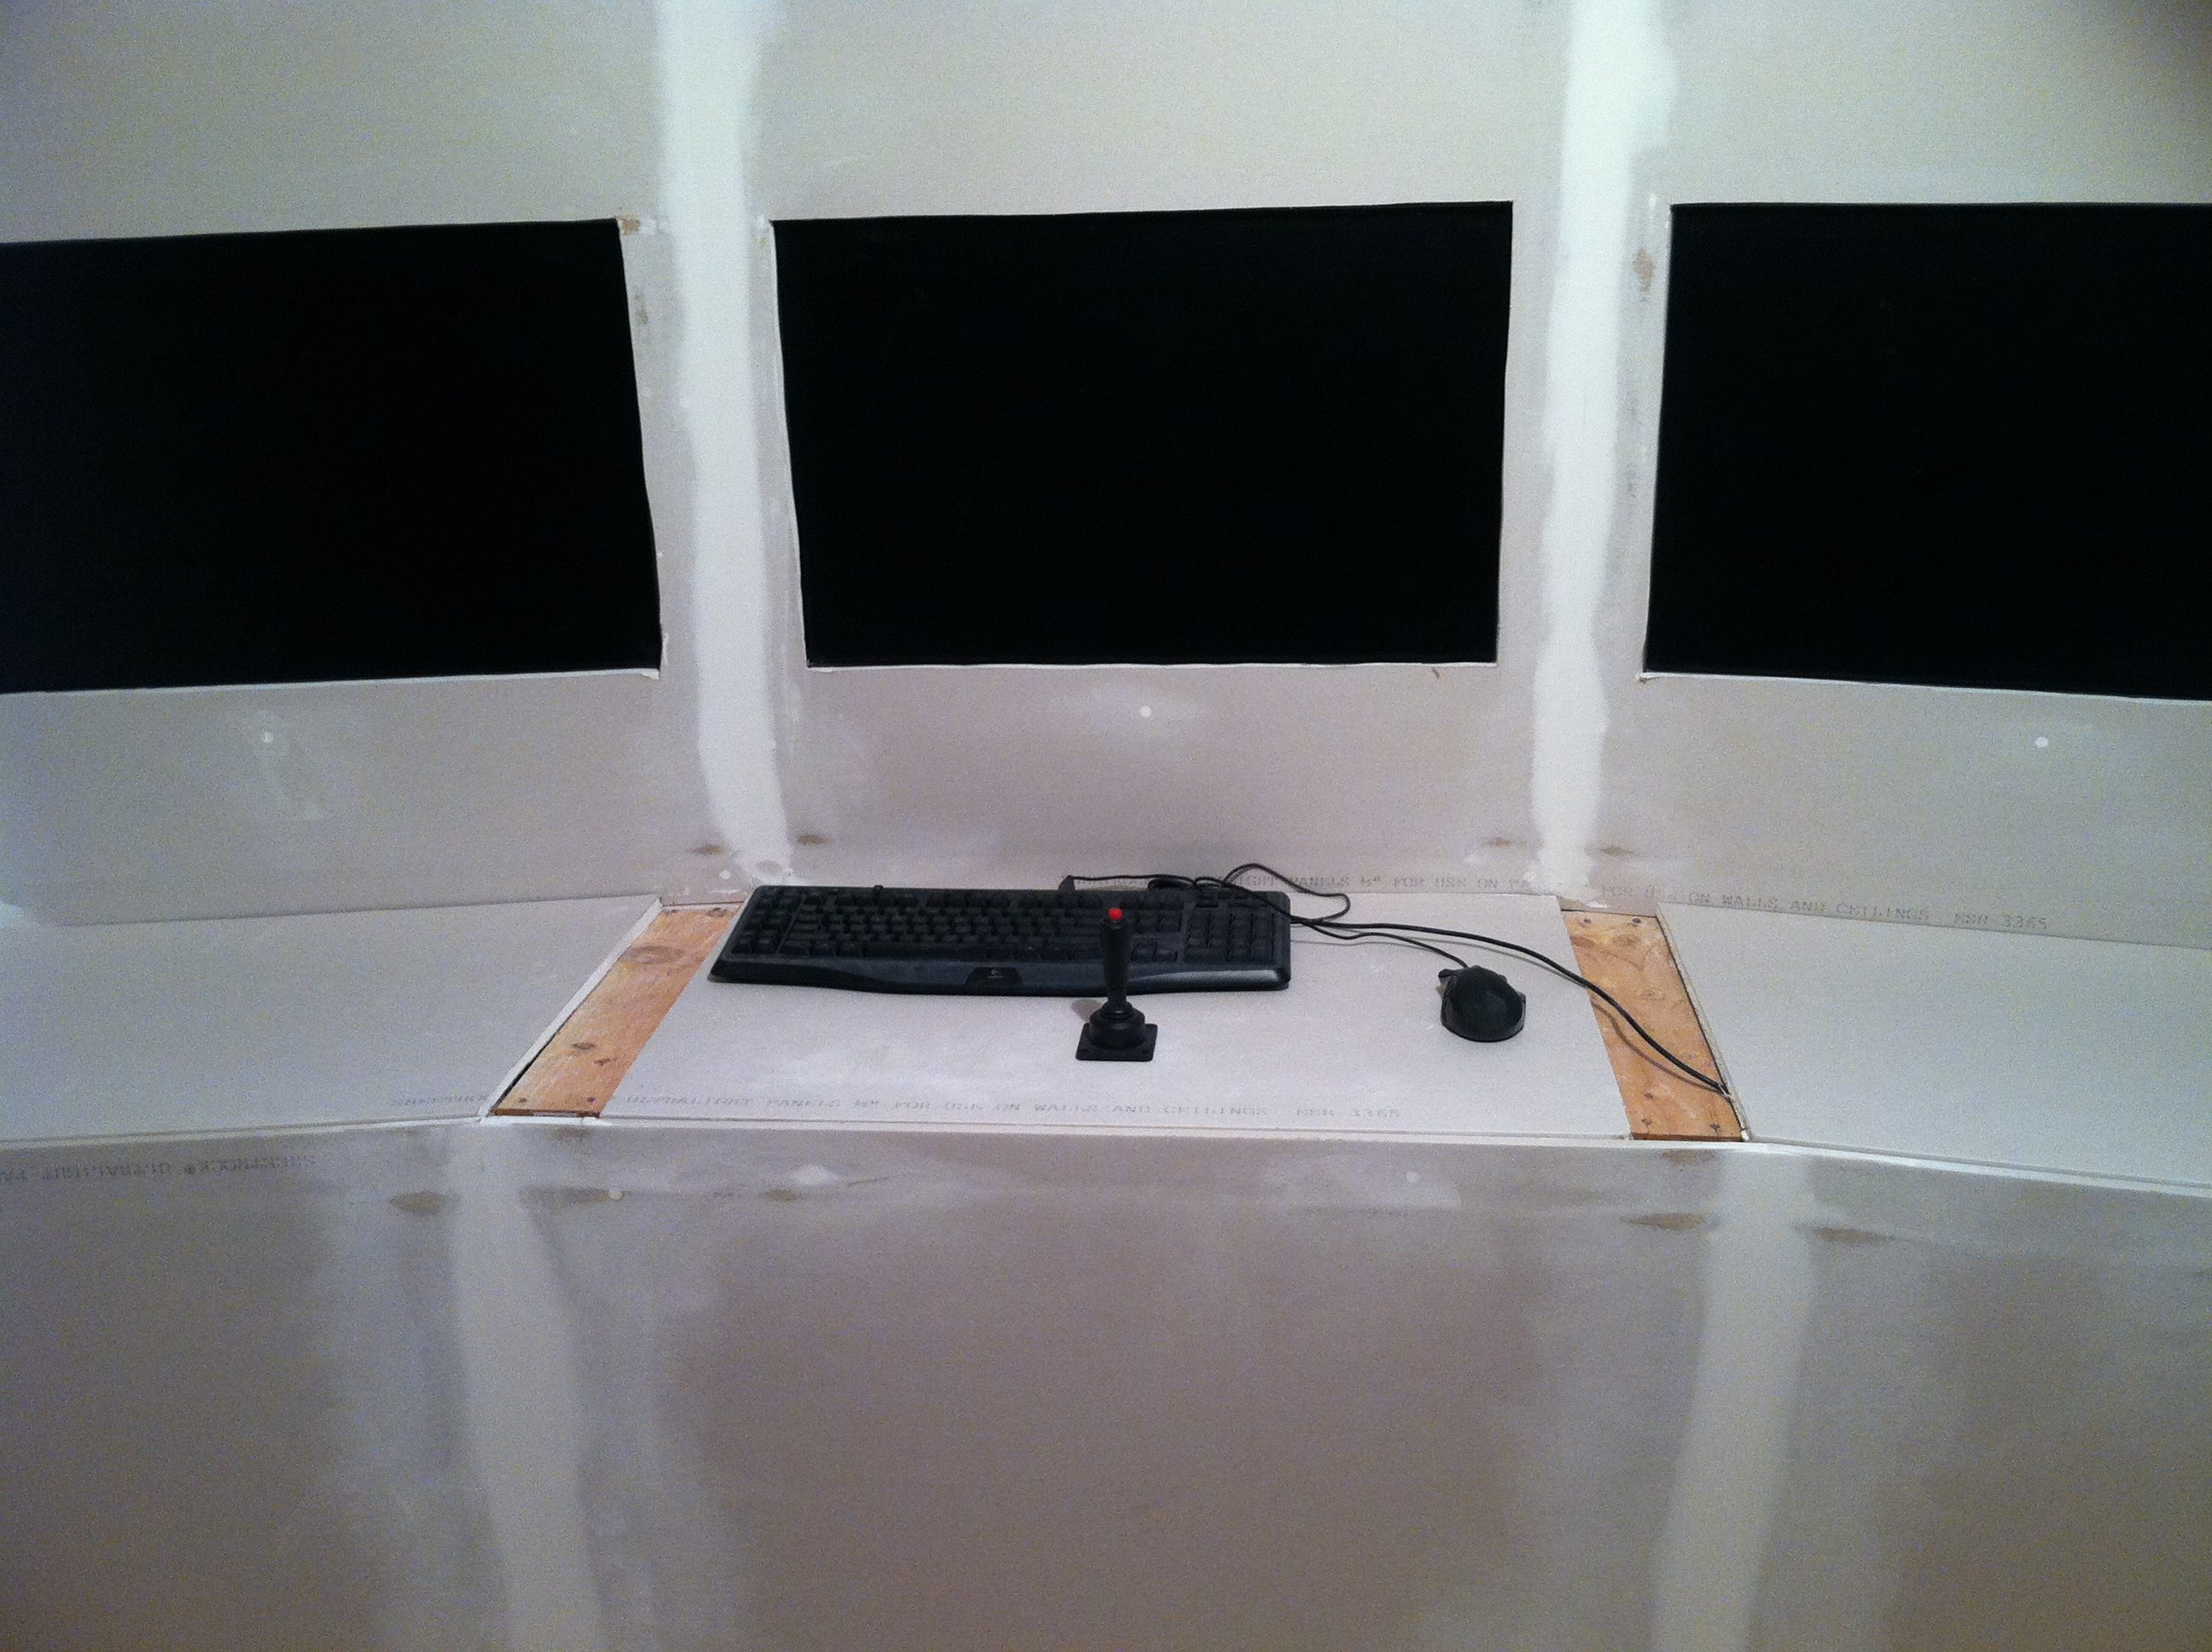
In front of the monitors, you’ll want to place a control panel where your kids can operate the machine. Again, be sure to leave yourself enough room to access this space later, because you’ll be wiring buttons and you don’t want to get trapped under there and die like the dad from Gremlins who was pretending to be Santa Claus. That would be traumatic.
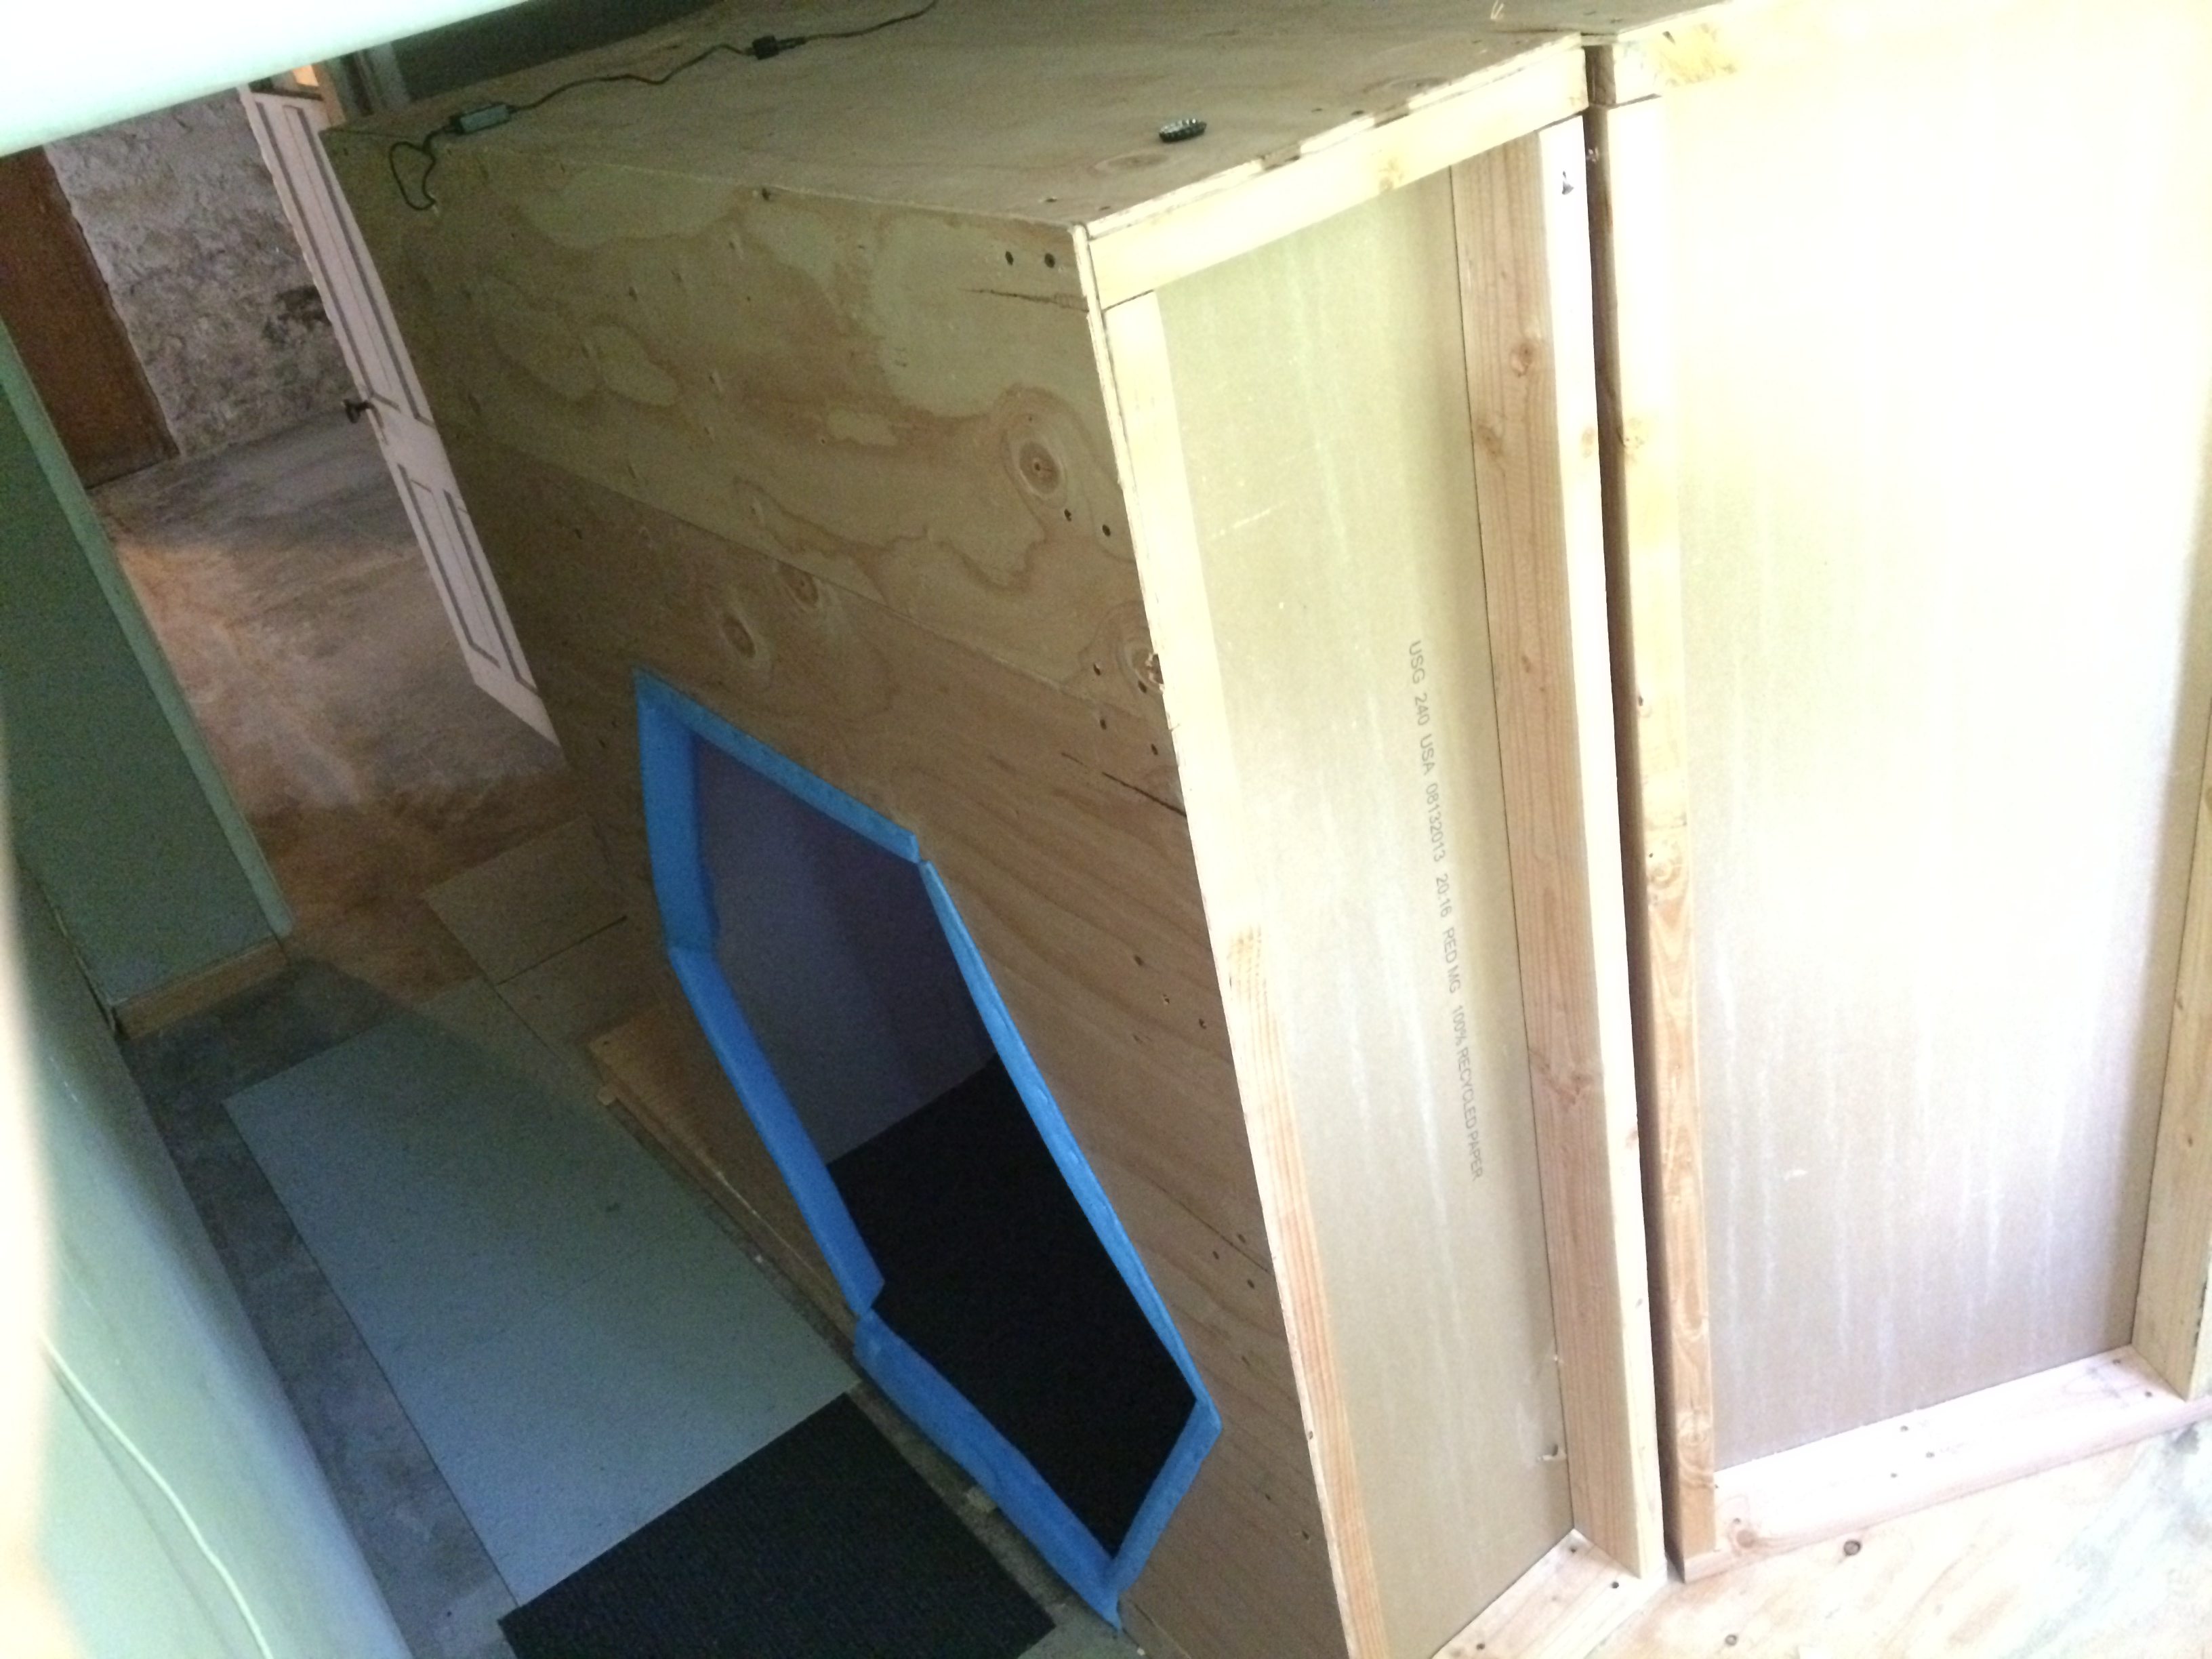
Once you design the enclosure it’s time to cut the material and hammer or drill it all together. To make measuring and cutting simpler, I color-coded all the same-size pieces of wood in Google Sketchup, counted them up and then cut them at the same time. For each pile, I wrote the “color” on each piece of lumber and then I hung up print-outs of the Google Sketchup file from different angles. This way, I was able to put the enclosure together like a model plane (and keep my screamingly loud saw active for a concentrated amount of time instead of spreading it out — kids nap, you know!).

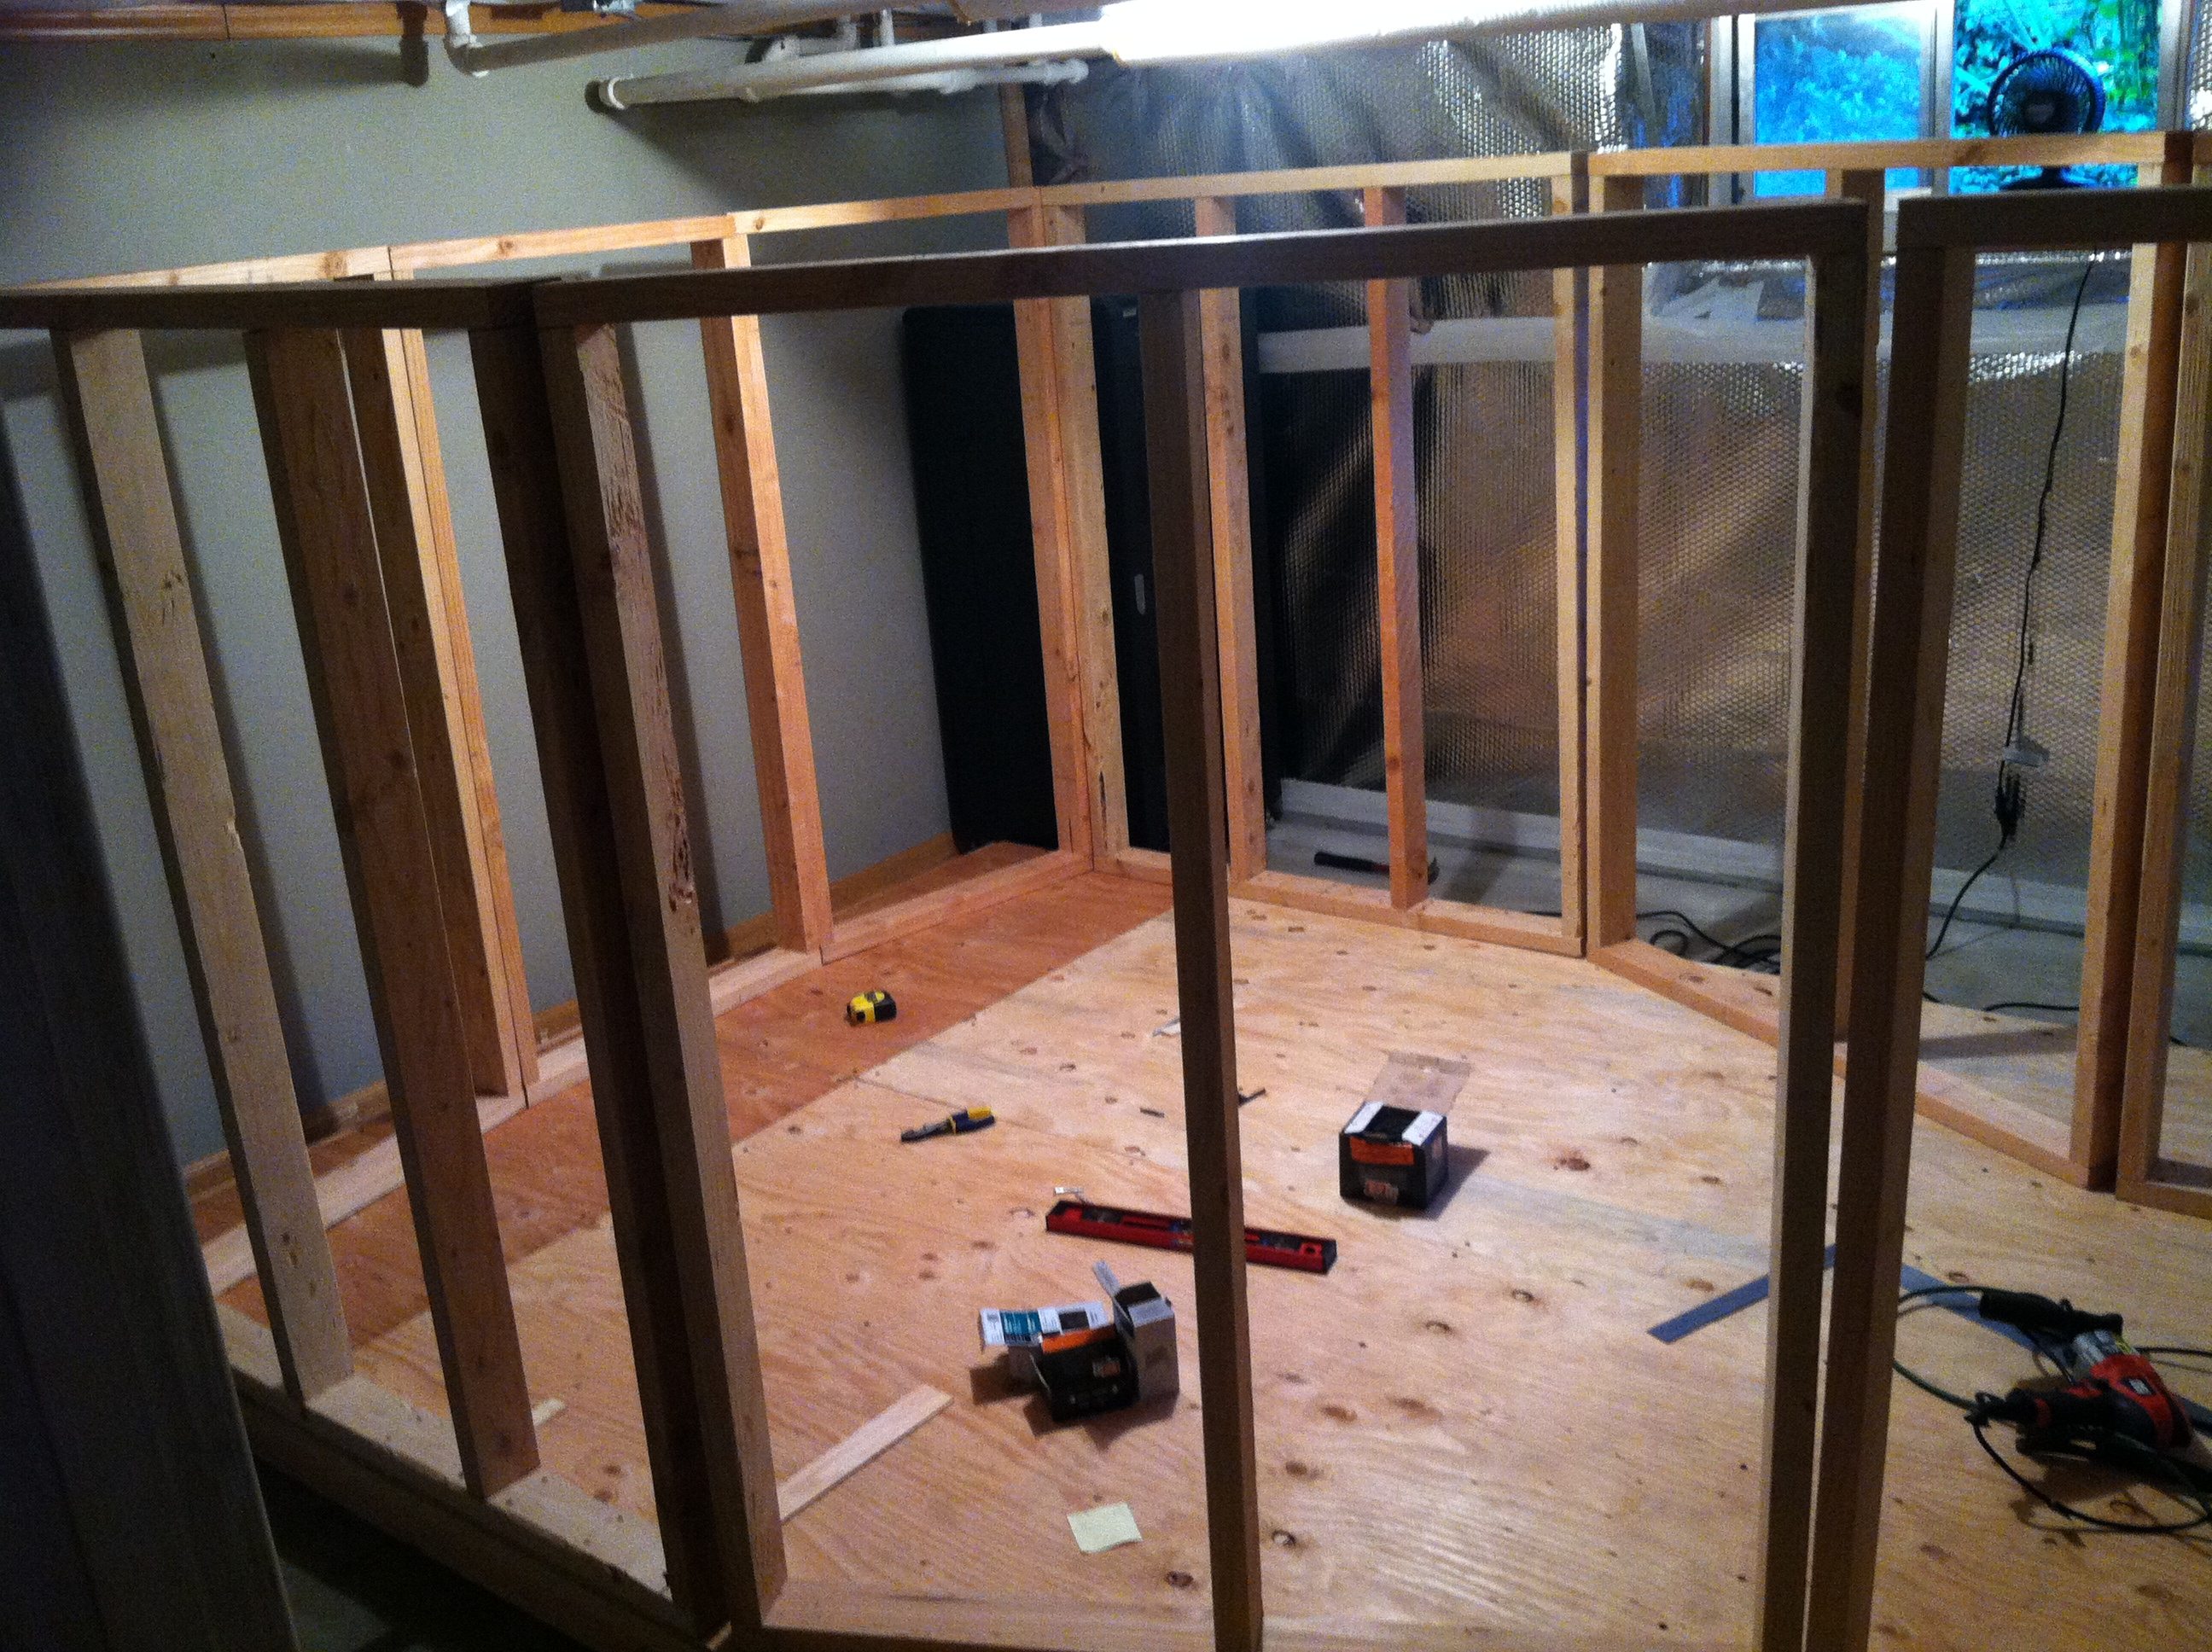
For actual construction, I built and leveled an 8’x8′ platform out of 2’x4’s and plywood. You might not have to do this if you’re not in a filthy basement with a cement floor. On this platform, I framed my walls. Then I mounted my monitors to make sure they fit right, before taking them back out. After that, I cut and attached drywall for the walls, control panel surfaces, and frame around the monitors. I mudded and sanded this. Then I painted the whole thing. Finally, I threw down some “Flor” tiles over the plywood floor to prevent splinters. I cut a hexagon entrance out of plywood, and put some scavenged foam padding around it. I mounted an LED light strip inside for lighting (and it comes with a remote control that I wall-mounted for more buttons). The whole thing took three months of on and off again work over the weekend. Honestly, it was only my kids’ growing excitement that urged me over the finish line. Finito!


I got a lot of inspiration from the home flight simulator hobbyists, who have tons of web sites, forums, and YouTube videos of their creations. If you want to go crazy, you can always buy an old airplane fuselage and haul that into your basement.

In terms of a place to sit, I bought an old video game chair from a thrift store and jammed it in there. I also decided to make the ceiling 4′ tall (for the kids) and so having a place to sit became crucial for my aching back. I also bought a cheap wireless keyboard after I realized I’d be using the keyboard more than I thought.
 Controls
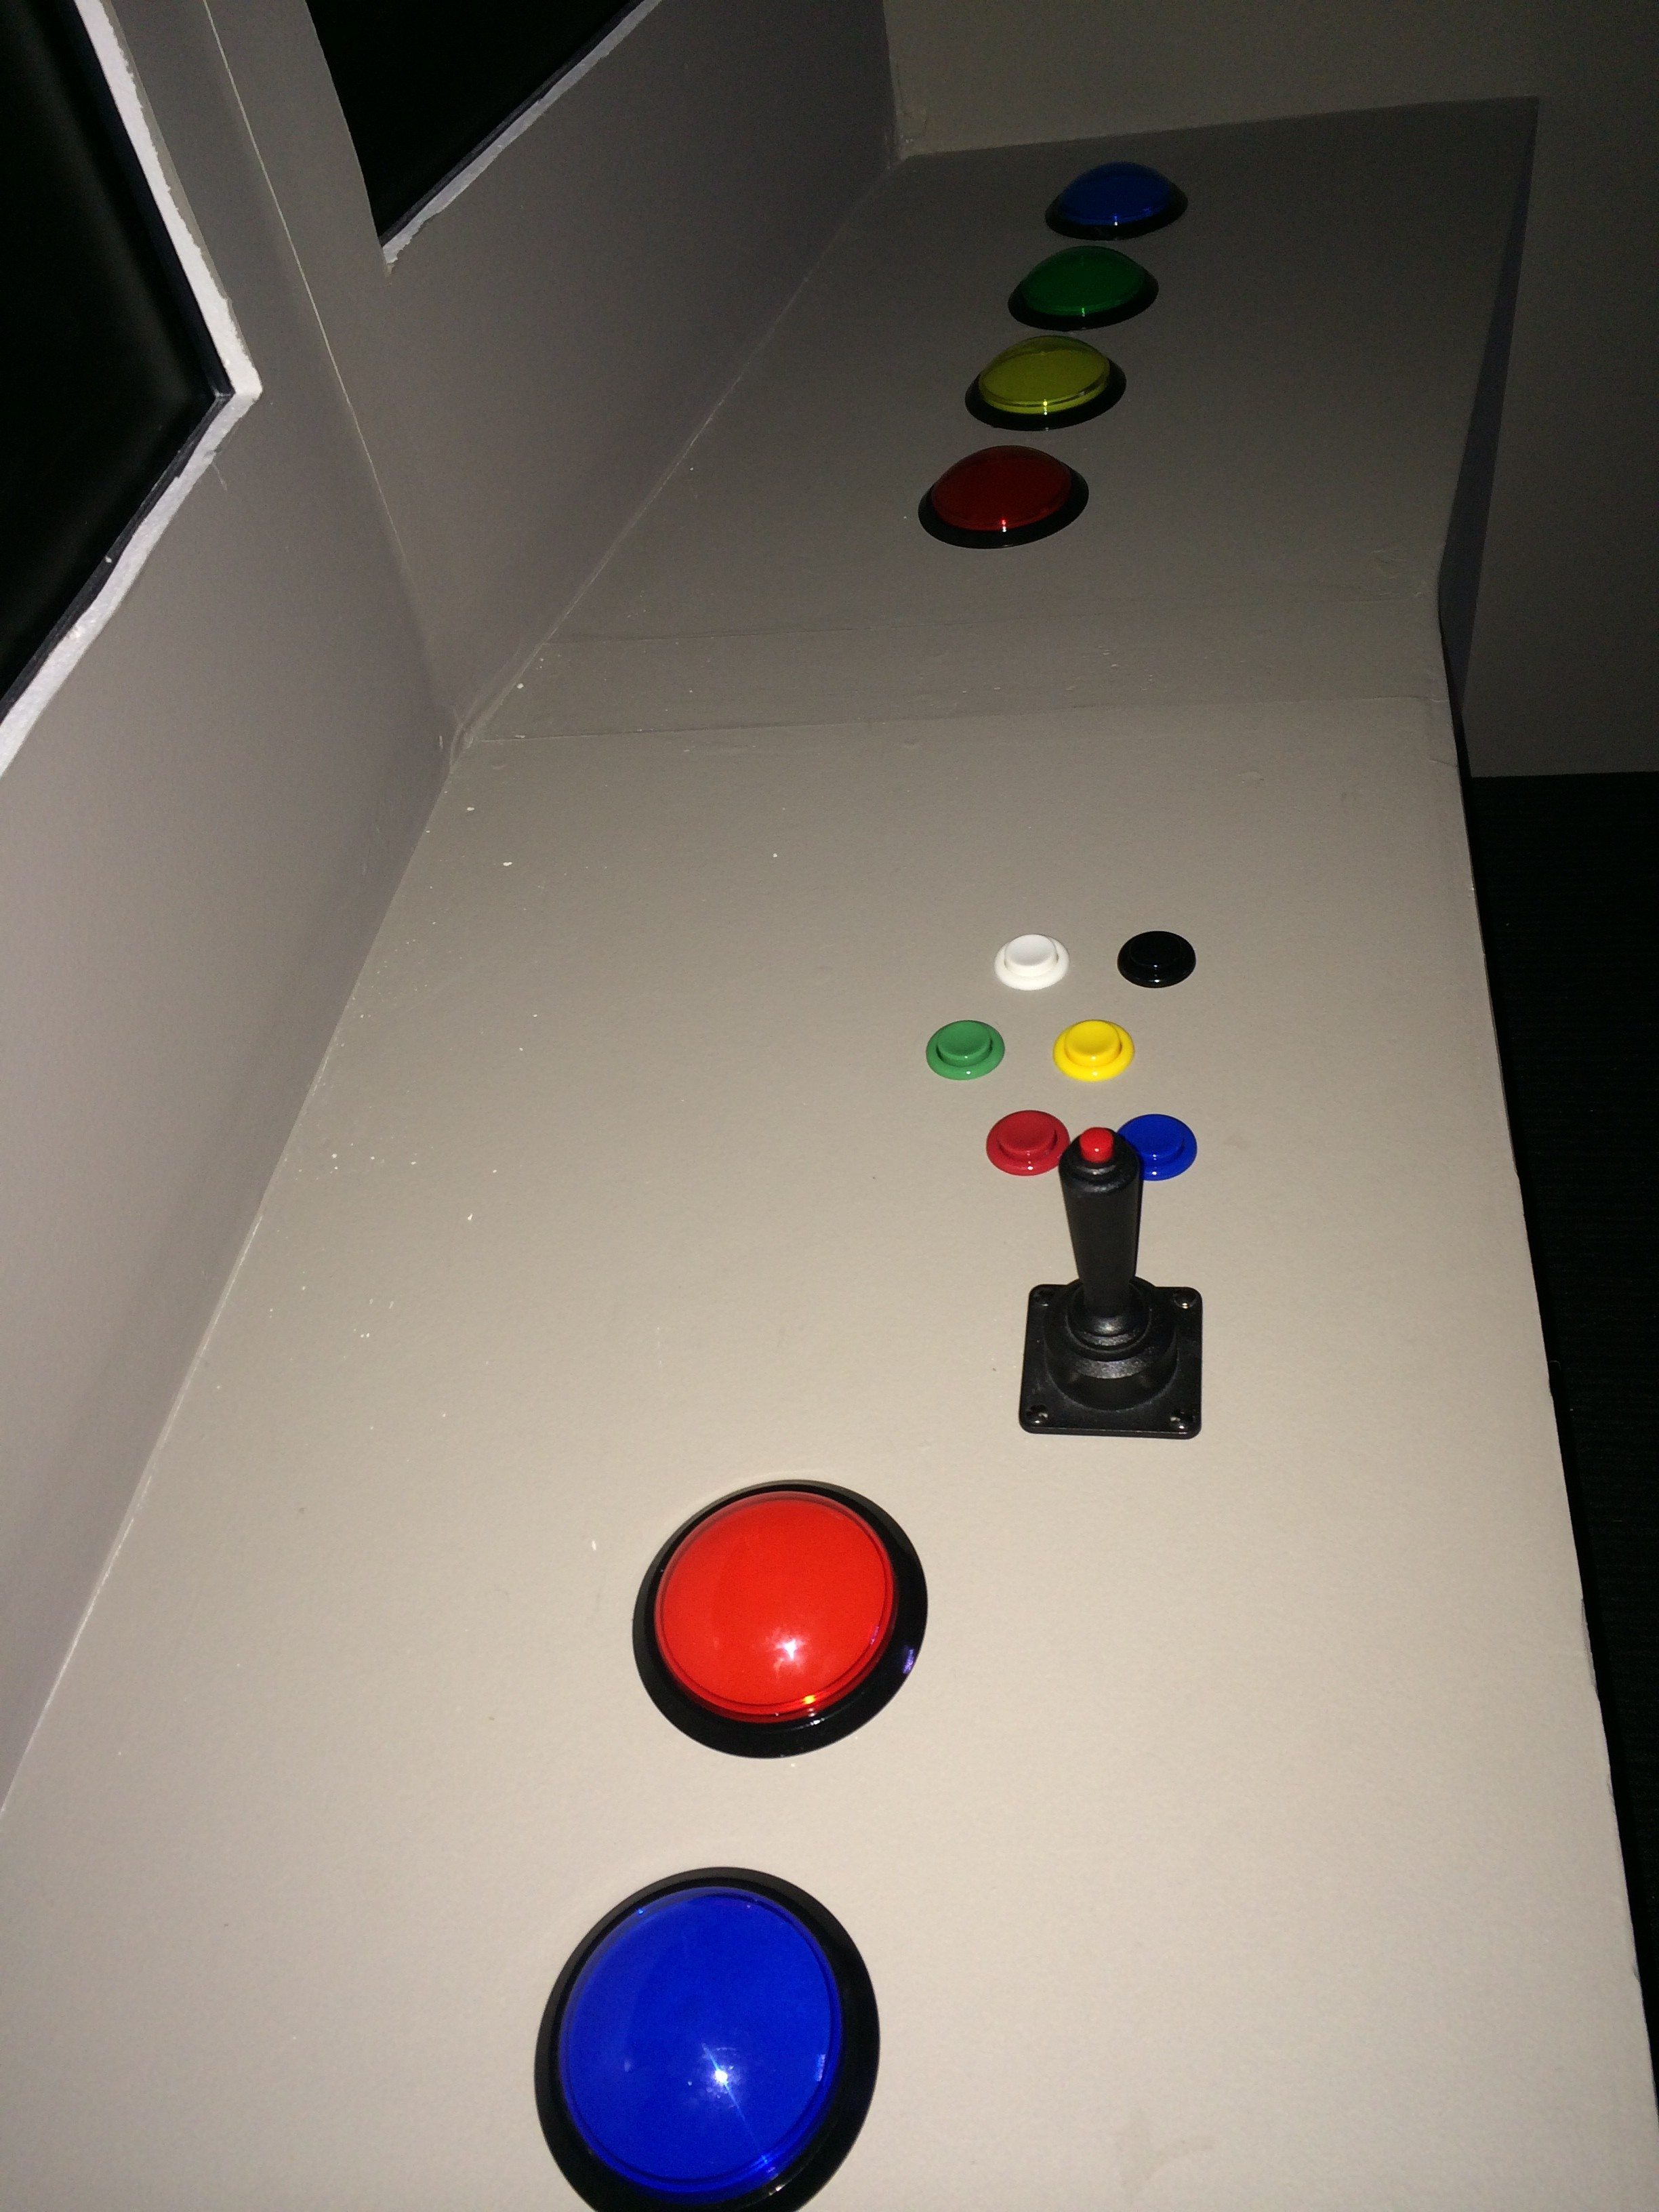
The buttons and joysticks are the most fun part of this for the kids, but they will take a beating. So, where better to get joysticks and buttons than from an arcade supply store!? I personally shopped at SparkFun for the buttons and UltiMarc for the controller that makes your computer think the buttons are part of the keyboard.
From SparkFun I purchased the following:
Arcade Joystick x1
Big Dome Push Button — Various Colors x9
Concave Button — Various Colors x6
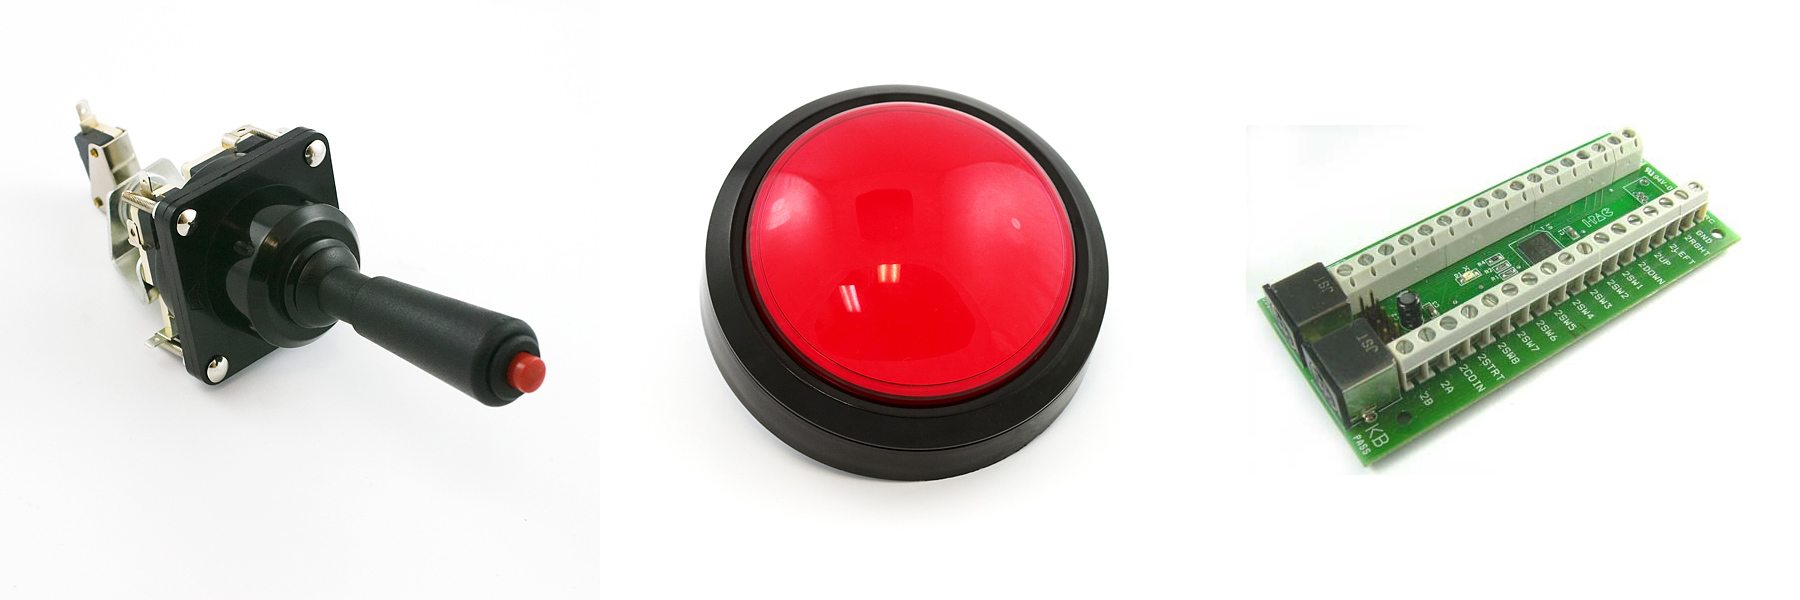
These buttons (even the joystick) are simple contact switches that are easy to wire. However, they don’t do any good without a controller that will map their input to a keyboard key. For that, I bought the Ultimarc IPAC-2 USB Interface.
This is a simple circuit board that connects to your computer via USB and to the buttons with simple screw-downs for the wires (one to the button and one to ground). When a button is pushed, the IPAC generates a keypress that the computer can’t distinguish from a keyboard. That’s lucky, because our space simulation software can be programmed to do utterly awesome stuff given keypresses.
In my case, I have a joystick to control the attitude of the ship. Six concave buttons in “Streetfighter 2” configuration to change speed, to land on planets, to jump to the next moon of a planet, etc. Then, I have nine “big dome” buttons that correspond to the eight planets and the sun. These big buttons are easy to mash and they send the ship careening around space. Yanking around on the joystick flies the ship around.
Everything Else
I use Pandora on an “Ambient” soundtrack to get that creepy-good outer space aura. And I put speakers outside and an old subwoofer on the roof of the enclosure to shake it. My brother also sent over a couple NASA astronaut flightsuit costumes that the kids love to get dressed up in. There is even a plastic helmet that my daughter wears with a visor that drops down (although my son wears old wrestling headgear from a garage sale, and he is just as happy). But at this point you have done your job as a parent — it’s your kid’s imagination from here on out.


Thanks for reading! Please email me pictures of your own projects (contactdhw@gmail.com) or ask me questions on Twitter @danielwilsonPDX. You can always find me on my website at www.danielhwilson.com, and if you’re inspired, please grab a copy of my latest novel Robogenesis (standalone sequel to the New York Times bestselling Robopocalypse), released this June!
All photos by Daniel H. Wilson, used with permission.


YEAH!!! Awesome project! I wish I had the room in my basement to do something like this, but it’s definitely inspired me to look at a few other options for enclosed spaces… I’m thinking of creating a Star Wars style ejection pod with two “windows” outside… my two boys would love it.
Super cool project. I also want to add I am a super huge fanboy of yours! I have read Robopocalypse going on 5 times now. Autodrive scares me.